
In today’s world of digital photography, there are many individuals out there, myself included, who don’t remember “the good old days” of film, let alone black and white film. Yet, black and white landscape photography is almost as popular as it ever was. The problem for those of us newbies is that, unlike photographers who grew up with a camera in their hands and have been photographing for decades, most of us don’t have the ability to “see” in black and white: To see which scenes and subjects will make a good black and white photograph.
See and create black and white nature photos with these tips —
While simply converting any old color image to black and white will occasionally give you a good black and white landscape photo, a little more know-how can help you create truly captivating “gray-scale” photos. So, for this article I’m going to talk about a few of the techniques I use that have helped me “see” nature and landscapes in black and white, taking a lot of the guesswork out of making good black and white nature photographs.
#1. The accidental Ansel

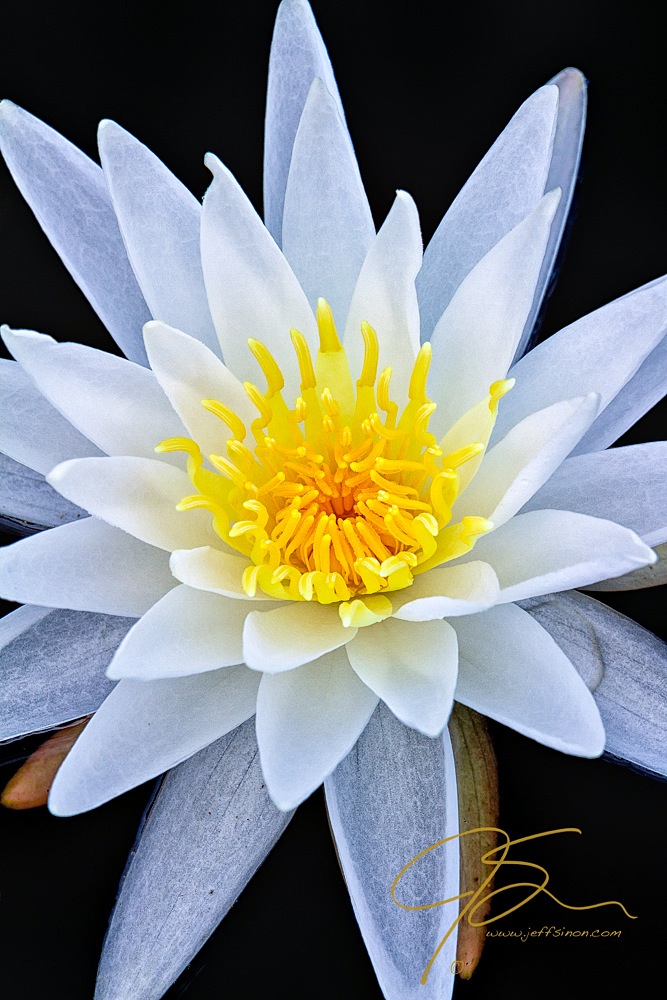
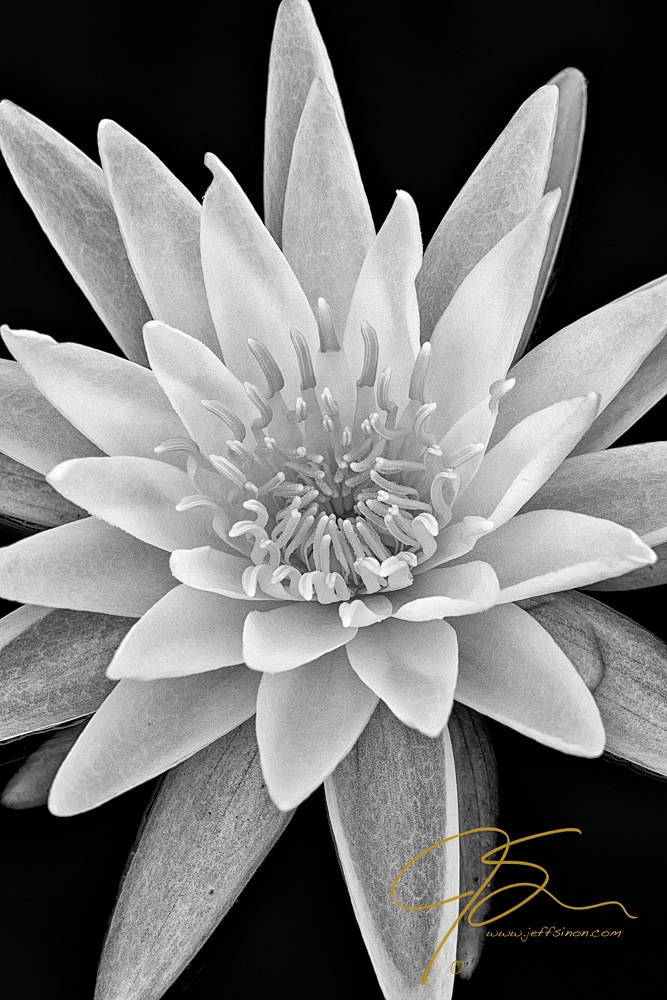
This is my first successful black and white photograph. It was created completely by accident.
As part of my post-processing workflow, I use Color Efex Pro to put the finishing touches on my photographs. In earlier versions of the software, images opened with the Black & White Conversion filter applied by default. As soon as I saw opened this image in Color Efex Pro, seeing it the default black and white, I knew this is how it was meant to be.
Another “accidental” way to create some nice monochrome nature landscape photos is to take some of your favorite color photos and give them a quick conversion to black and white with your image editing software. Subjects with a lot of texture and contrast often make great black and white photographs. In Lightroom 5, my primary photo editing and organizing software, a quick look to see if an image has B&W potential is one mouse click away in the Develop Module. And since Lightroom provides nondestructive editing, if you don’t like how it comes out, you can easily go back to the original color file.
Discover the essential know-how of photo editing in the newest Craftsy photography class 25 Innovative Photoshop Techniques for Photo & Video.
#2: See through the lens of the camera.
An easy way to teach yourself how to see what makes a good black and white landscape photograph is to set your camera to the “Monochrome” or “B & W”setting the next time you go out to take pictures. With the camera set to Monochrome, the preview on the cameras LCD will show you how the scene looks in black and white. Soon after the press of the shutter, you’ll know whether or not your photo has potential for a good black and white photograph. Spending a day shooting with your camera set to Monochrome will go a long way towards teaching you to see in black and white.
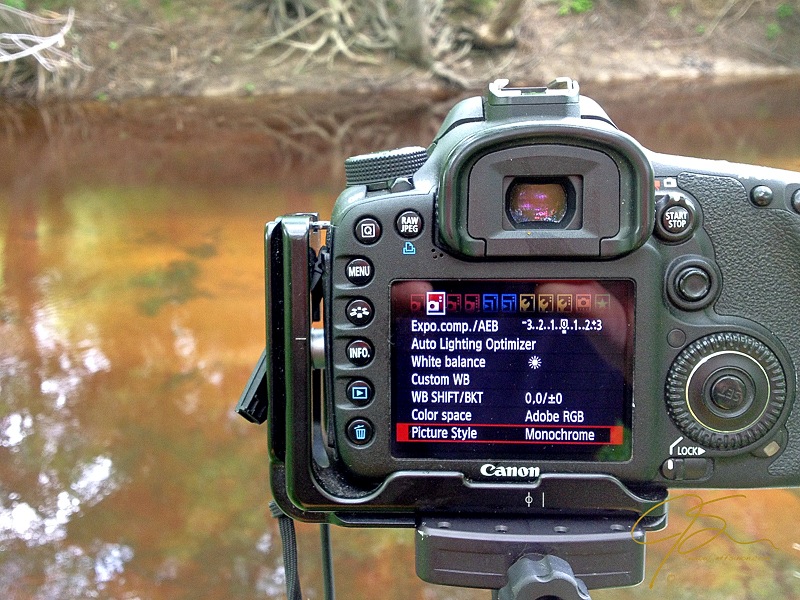
Picture Style set to Monochrome
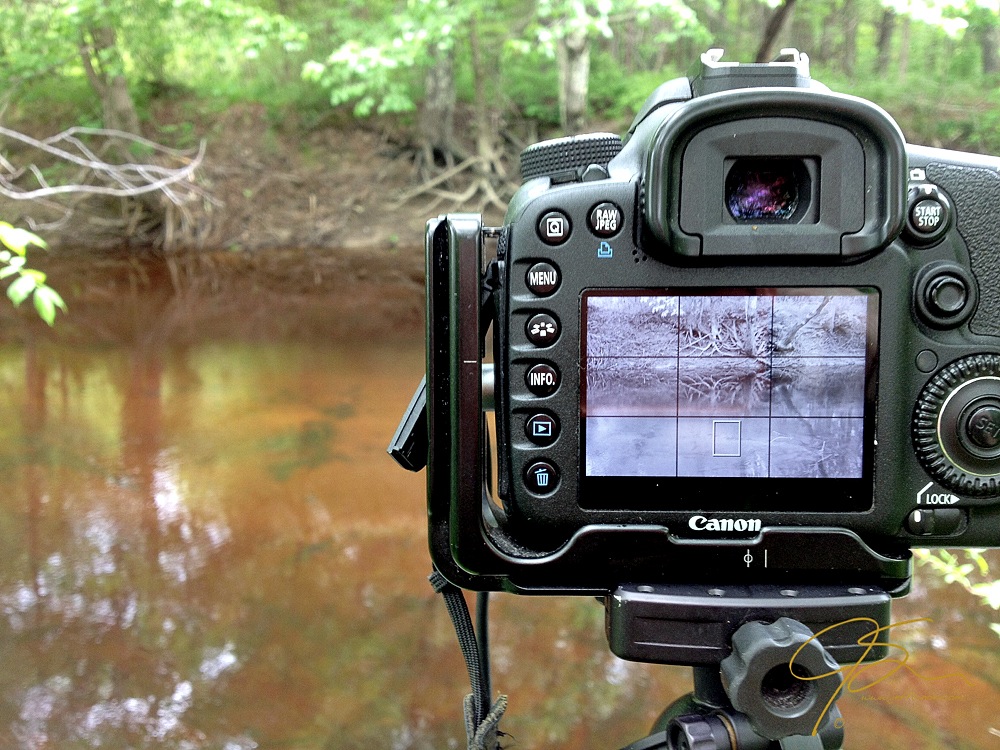
Monochrome preview on LCD
BUT, and this is a really big but, you need a camera capable of capturing images in the RAW format to get the most out of this technique. Essentially, when shooting in RAW the camera still captures the photo in full color, regardless of what (to use Canon’s terminology) the picture’s style setting is. The preview you see on the LCD is a black and white version of the original color RAW file, processed in-camera.
With RAW, even if it won’t work as black and white, you still have a color file to work with. If on the other hand your camera is set to, or is only able of capturing .jpg files, what you see is what to get. If the photo doesn’t work as a black and white, then there is no color file to fall back on. You can only delete and start over. Both can work in teaching you to better see what works as a black and white photograph, but only with RAW image capture do you still have the ability to process a color version if the photo won’t make a good black and white photograph.
#3. Eventually, you will see the light.
With enough practice you will soon learn to see in black and white. You’ll start to recognize scenes and subjects that are going to work well as a black and white photo.
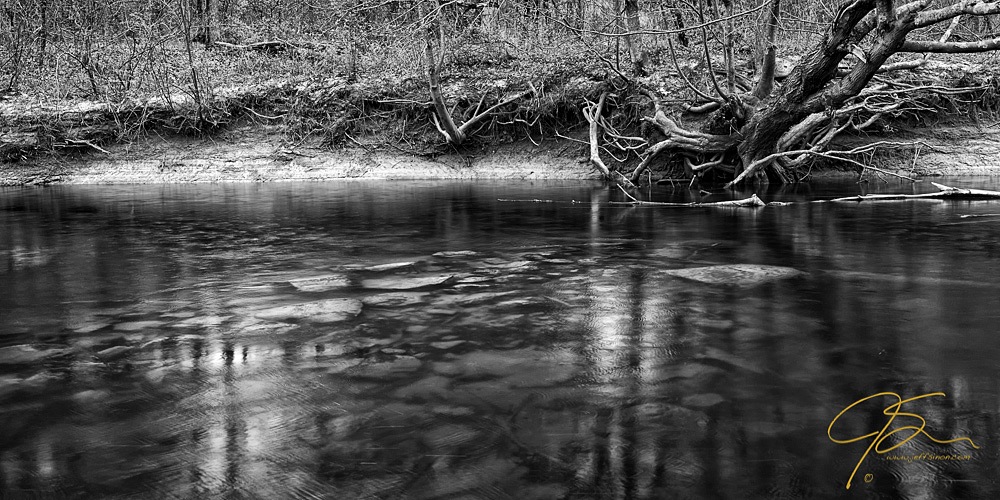
Having practiced these techniques over the years it all finally came together for the photo below. This is my first ever photo that I envisioned right from the start as a black and white. I drive by this section of undercut and eroded riverbank every day — for several months I’ve “saw” this photograph in my mind.
Always in black and white.
By practicing these techniques you too will start the see the world in black and white.
You can learn even more about capturing the beauty of nature and landscapes in Bluprint photography classes, such as Shooting Intimate Landscapes with Rob Sheppard.
Share tips, start a discussion or ask one of our experts or other students a question.
No Responses to “Shades of Gray: Black & White Landscape Photography Tips”