
So you’re out photographing a sunrise or sunset, and you think you’ve got exactly the shot you had hoped for. Yet when you get home and upload it to your computer, you find it’s totally unusable.
The culprit that ruined your photo? Lens flare!
In this week’s Fix-It Friday, I’ll show you an unbelievably easy trick for fixing lens flare in post-processing.
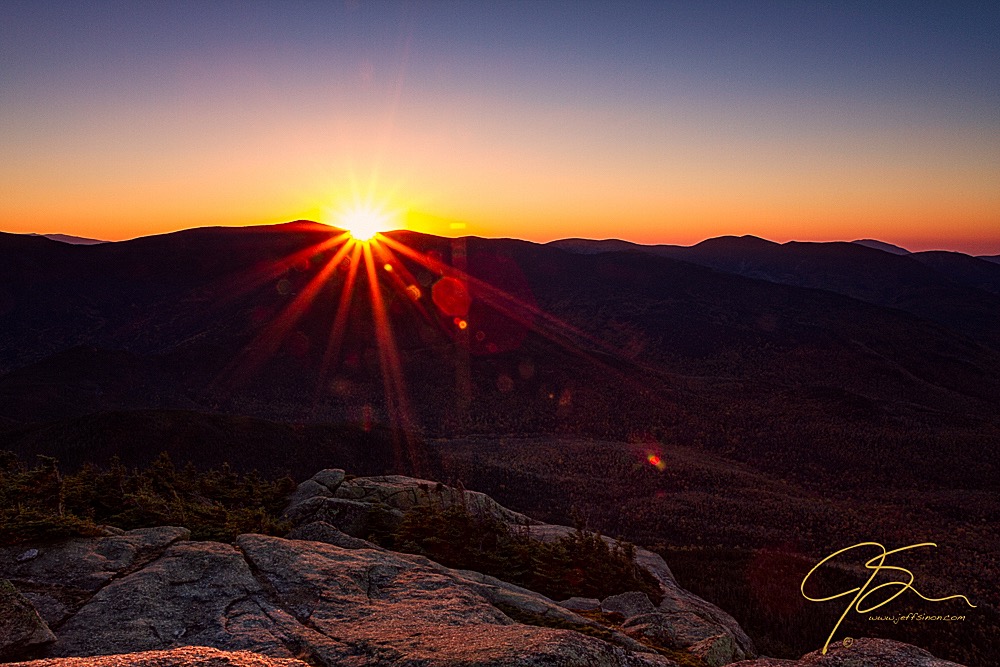
This is an extreme case of lens flare caused by shooting directly into the sun. The flare can be increased by having a filter in front of the lens.
What is a lens flare?
Lens flare is a result of light reflecting off the multiple reflective surfaces it passes through before reaching your camera’s sensor. Camera lenses are made with many glass elements, and each glass surface has the potential to cause reflections (that’s why the lens’s description often mentions various lens coatings). These coatings are designed to reduce flare, among other things.
What causes lens flare?
Shooting into light
First and foremost, shooting directly into a bright light source ups the chance of a flare appearing in your photo. This could be the sun, a street lamp or any other bright light in the frame of your shot. It’s not just a problem with inexpensive lenses — even the best lenses will have at least some lens flare when shooting directly into the sun or some other bright light source.
Filters
Another contributor to lens flare is the use of filters — cheap ones in particular. The more layers of glass the light has to pass through, the greater the chance of flare. Those “protective” filters often sold to unsuspecting new photographers are the worst offenders. If you have one on your lens, my advice is to take it off and gently deposit it in the trash.
However, as the above image shows, even an expensive filter can cause flare problems, especially if the filter is dusty or has a scratch. That’s the case in the image above: See the vertical ray of flare in the middle of the frame? That’s caused by the scratch in the filter.
Preventing lens flare
Two of the best ways to prevent or reduce lens flare are:
1. Don’t include any bright light sources when composing your photos.
2. Second, use a lens hood — that’s what they’re designed for. Lens hoods are particularly useful for flares caused by a bright light that’s just out of frame. This type of flare may not cause light streaks or colored balls of light like in the top photo, but it can cause a lack of contrast and cause the image to look flat and washed out.
Troubleshoot Your Shots: Quick Fixes to Photography Issues

Get troubleshooting tips for taking better, more eye-catching photos.
My secret fix
Most landscape photographers want to include the sun in their sunrise or sunset photos, as well as the brilliant rays of light radiating from the sun. Here’s a trick that lets you include the sun in your photos and keep those wonderful rays of light (the “good” lens flare), while eliminating the bad lens flare during post-processing.
Taking the photos
For this technique, you’ll need to take two identical shots without moving your camera. Compose the photo as you would like and take your first shot.

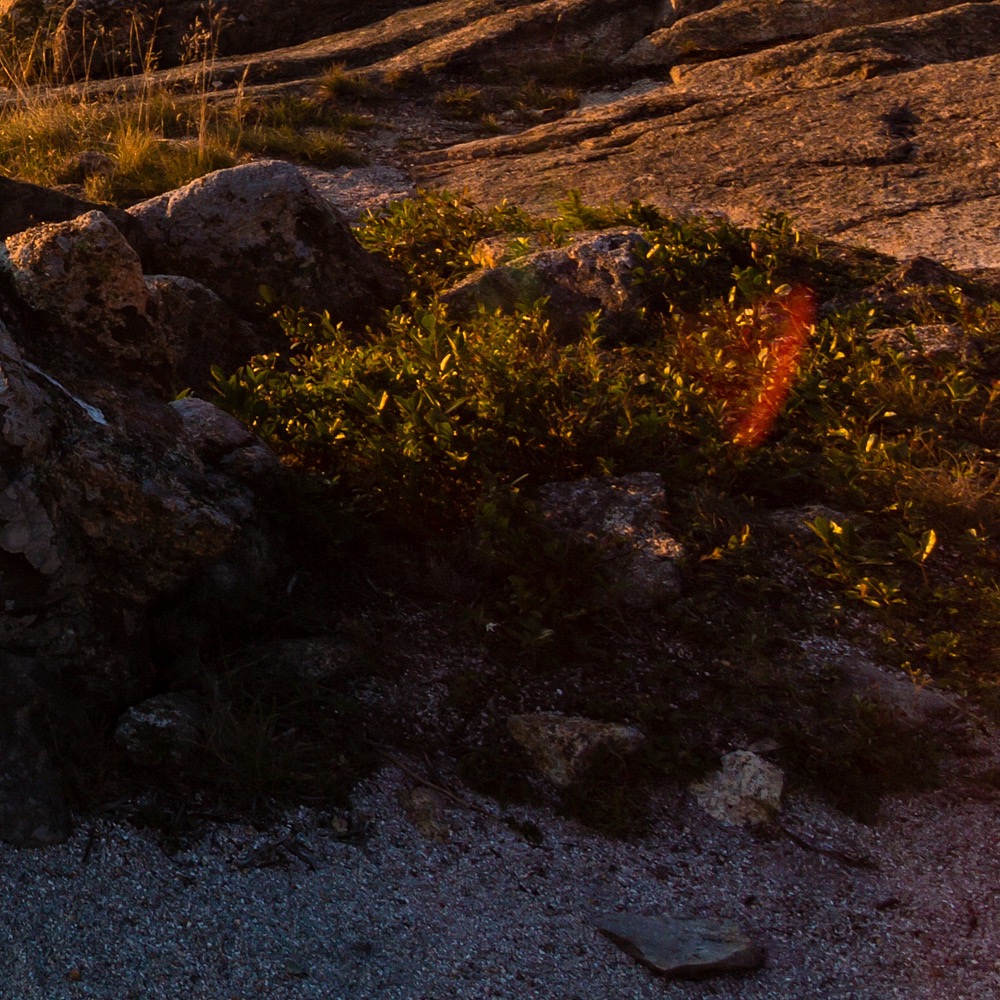
See the red flare and loss of contrast in the lower right of the photo? (It’s right above my watermark.)
Now — without moving your camera — it’s time to take your second photo. This time, place your thumb over the sun. Don’t worry that your thumb is in the photo. You’ll fix that in post-processing. The objective here is to rid the rest of the image of the lens flare created by the sun.
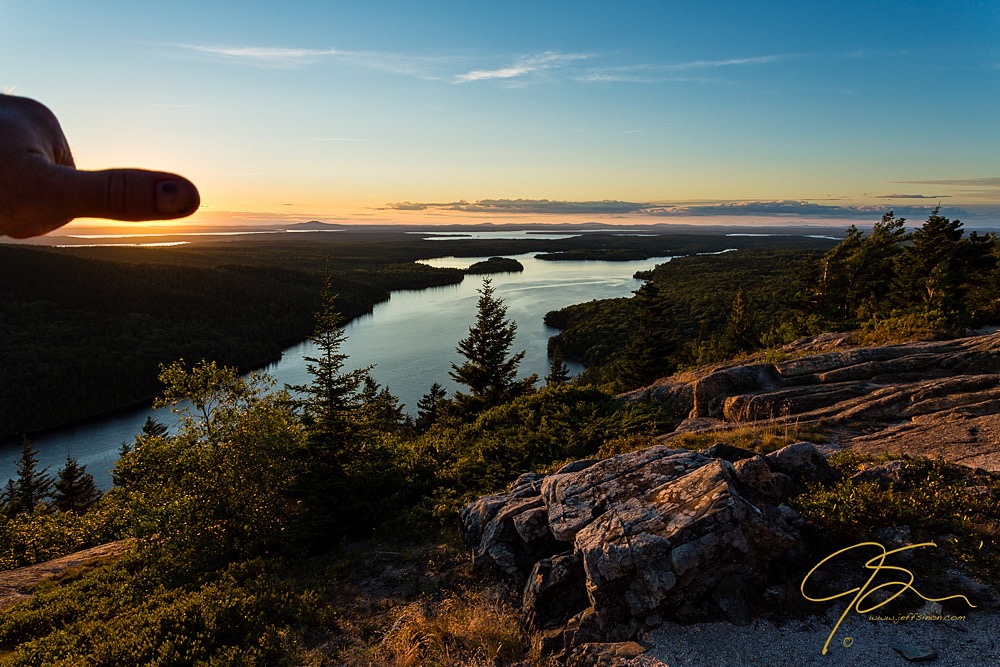
Notice how there is no lens flare in the second photo?
Post-processing
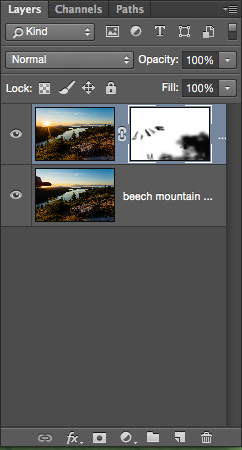
Then, open both of the photos in one Photoshop document as separate layers. If you start in Lightroom, select both images then right click > Edit In > Open As Layers In Photoshop.
Once in Photoshop, place the photo without your thumb as the top layer. Then, select the top layer and create a layer mask: Click on the Layer Mask icon at the bottom of the Layers Panel. (It’s the one that looks like a white rectangle with a dark circle in the center.)
Then, select the brush tool (keyboard shortcut B), making sure your foreground color is set to black and your background color is set to white. Next, make sure you’re working on the top layer and have the layer mask selected.
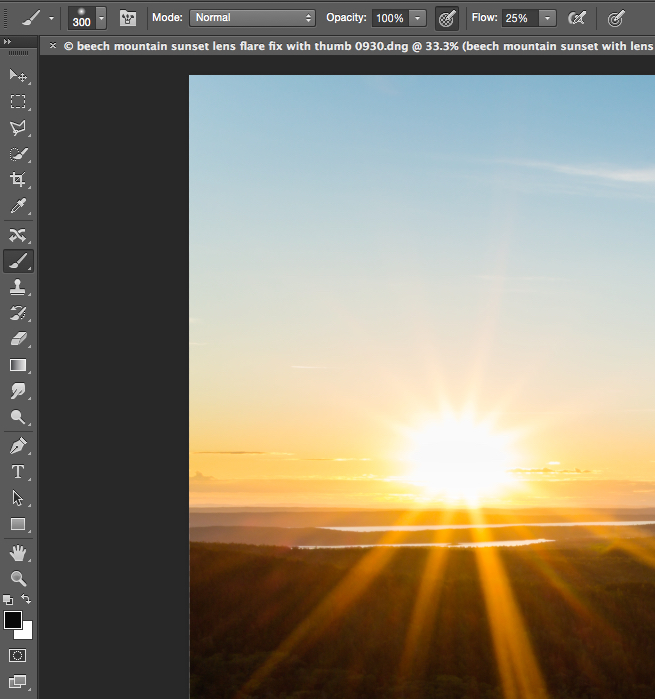
I usually set the opacity to 100 percent and the flow to around 20–25 percent. This way, I can gently brush away the flare and have it look as seamless as possible. You can also alter the size of your brush by using the right and left bracket keys.
When you’re all set to go, start to paint away the lens flare. Keep painting, altering the opacity and brush size as necessary until the problem lens flare is gone.
Once you’re done, select Layer > Flatten Image and then save your file. You can then continue editing your now lens flare–free photograph.

Troubleshoot Your Shots: Quick Fixes to Photography Issues
Get troubleshooting tips for taking better, more eye-catching photos.
Share tips, start a discussion or ask one of our experts or other students a question.
No Responses to “One Expert Shares His Brilliant Trick for Eliminating Lens Flare”