
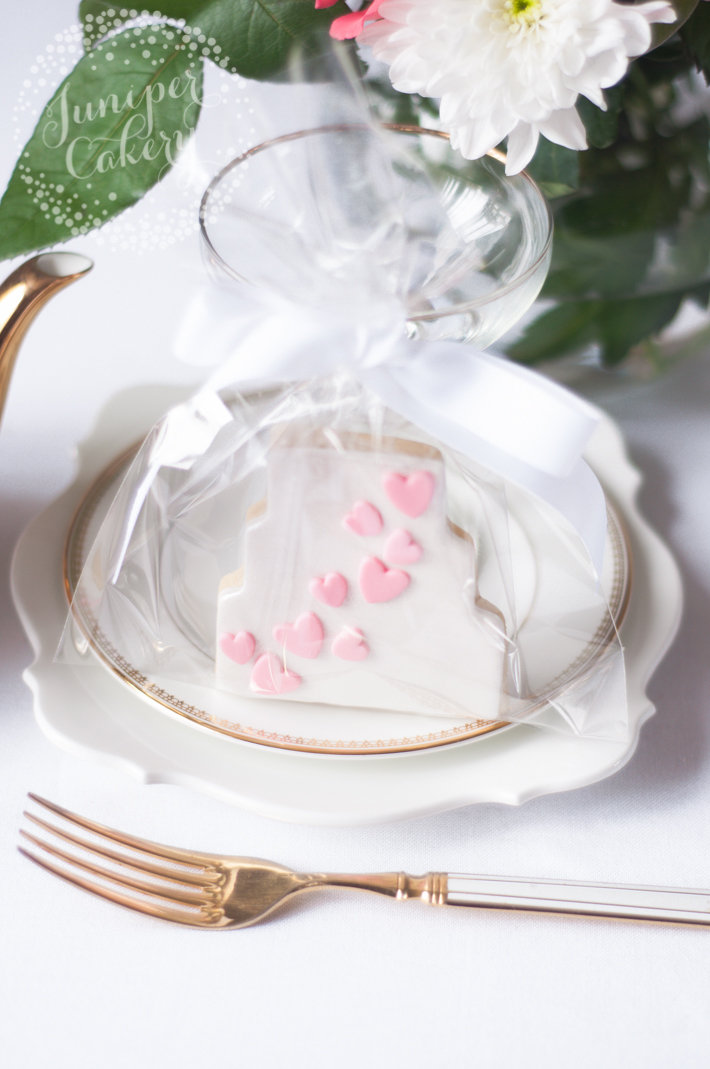
Creating hundreds of pretty wedding sugar cookies for a client really ups the stress levels, but it needn’t be too panic-inducing! Keep your techniques simple but your designs sweet with our easy-peasy tutorial for wedding sugar cookies!
Wedding sugar cookies tutorial
What you need:
- Your go-to sugar cookie recipe
- Chosen cookie cutter (we opted for a fun wedding cake shape)
- White edible pearlescent luster dust (yes, it exists)
- Food-safe paintbrushes
- Vodka
- White fondant
- Pink fondant
- Small heart plunger cutters
- Good quality pastry brush
- Apricot preserve or marmalade (minus the shredded orange)
- Cornstarch
- Edible glue
Step 1:
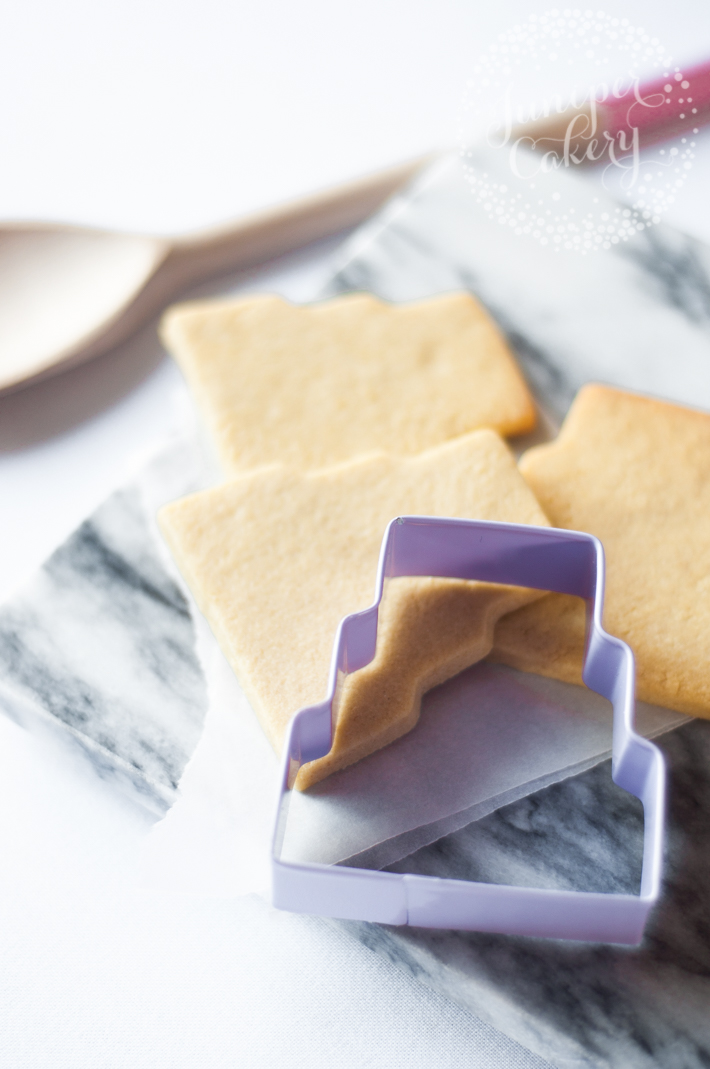
Mix, cut and bake your wedding sugar cookies according to your chosen recipe. We chose to use a really sweet wedding cake–shaped cutter, but the best thing about this tutorial is that you can use any shape — opt for anchors for a sea-faring themed reception or hearts for a romantic party!
Top tip alert!Never over mix your sugar cookie dough. It’s temping to leave it mixing in a stand-up mixer while you carry out some other jobs, but over mixing will lead to cookies that spread, leaving misshapen treats!
Step 2:
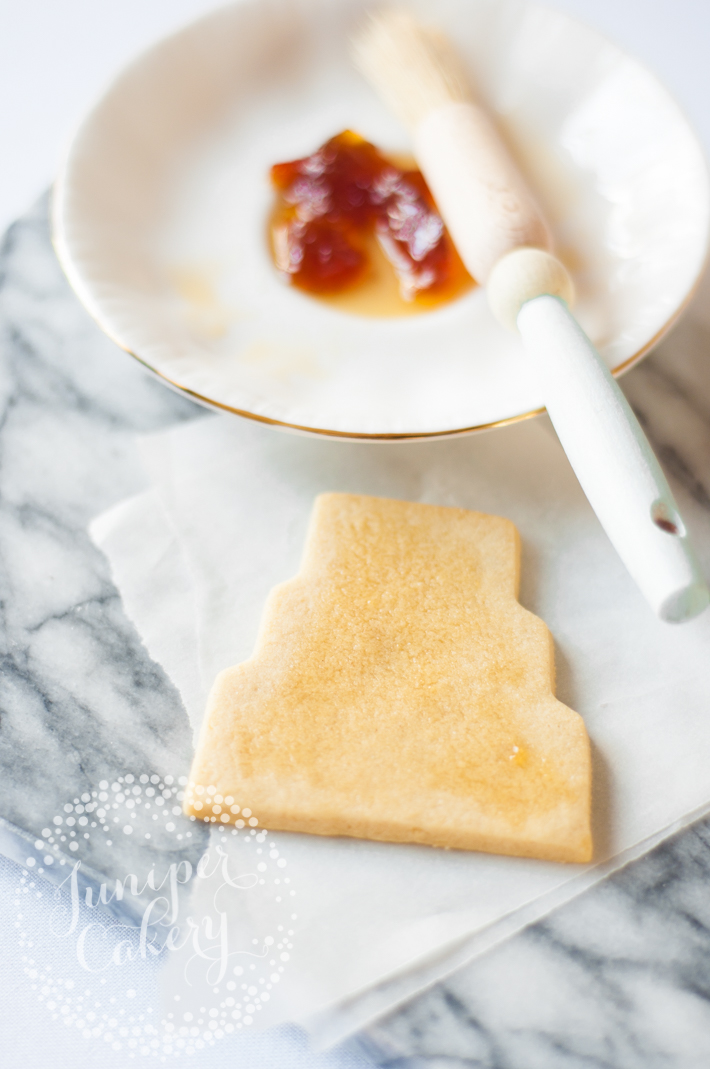
Once your cookies are cool, bush them lightly with your apricot preserve or marmalade and a pastry brush. Make sure you use a good quality brush or else you’ll be left with bristles falling out and into your jam!
Step 3:
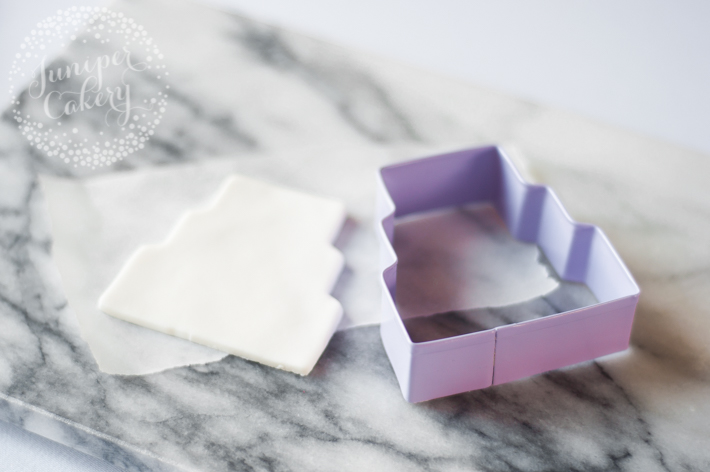
Roll out some white fondant on a clean, cornstarch-dusted surface and cut out shapes with your cutter.
Step 4:
Gently take your fondant shape and lay it on top of your jam-brushed cookie. Use a cake smoother and press lightly to avoid fingerprints or dents.
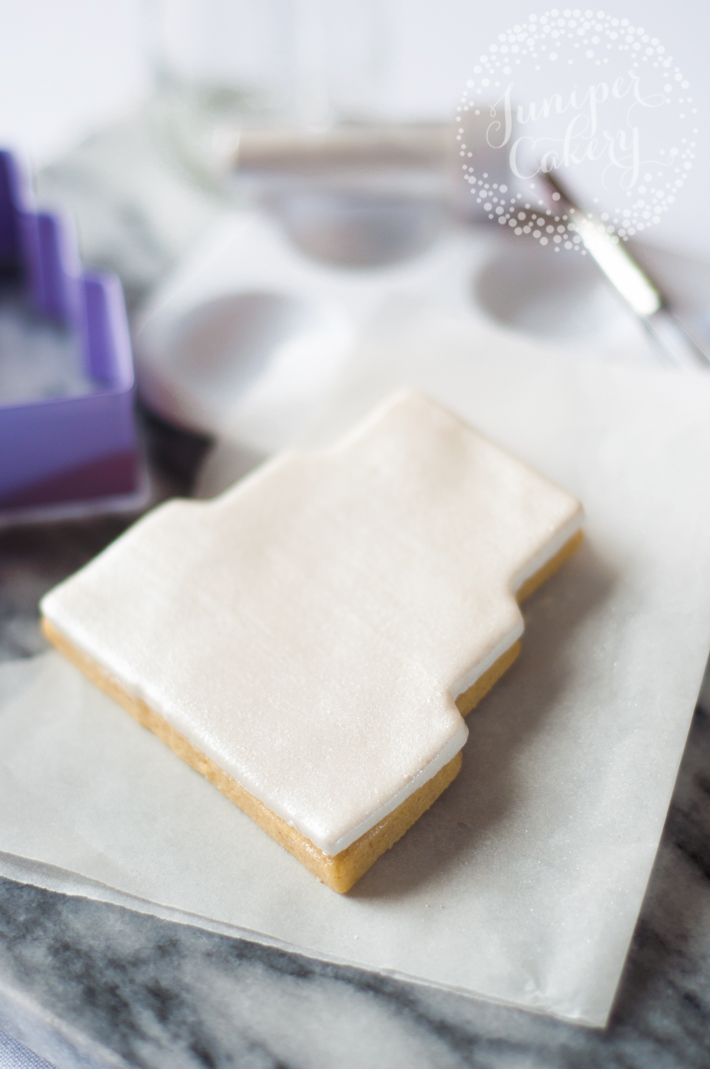
Step 5:
To add a shimmering look to your cookies, mix a little vodka (or, if you prefer, Everclear or lemon extract) with white pearlescent luster dust (we like to use “snowflake” by Sugarflair) to form a liquid mixture that’s a little thinner and more watery than paint.
Step 6:
Using a medium-sized and food-safe paintbrush, paint your luster mix horizontally across your cookie. Don’t be tempted to paint in every other direction or you’ll be left with a messy looking paint job! Apply around 2–3 coats, but make sure that you wait for each coat to dry fully before applying the next luster layer.
Step 7:
Once you’ve finished painting your cookie, lightly dust the surface with dry white pearlescent luster dust. Make sure you use a dry and preferably fluffy brush for this step!
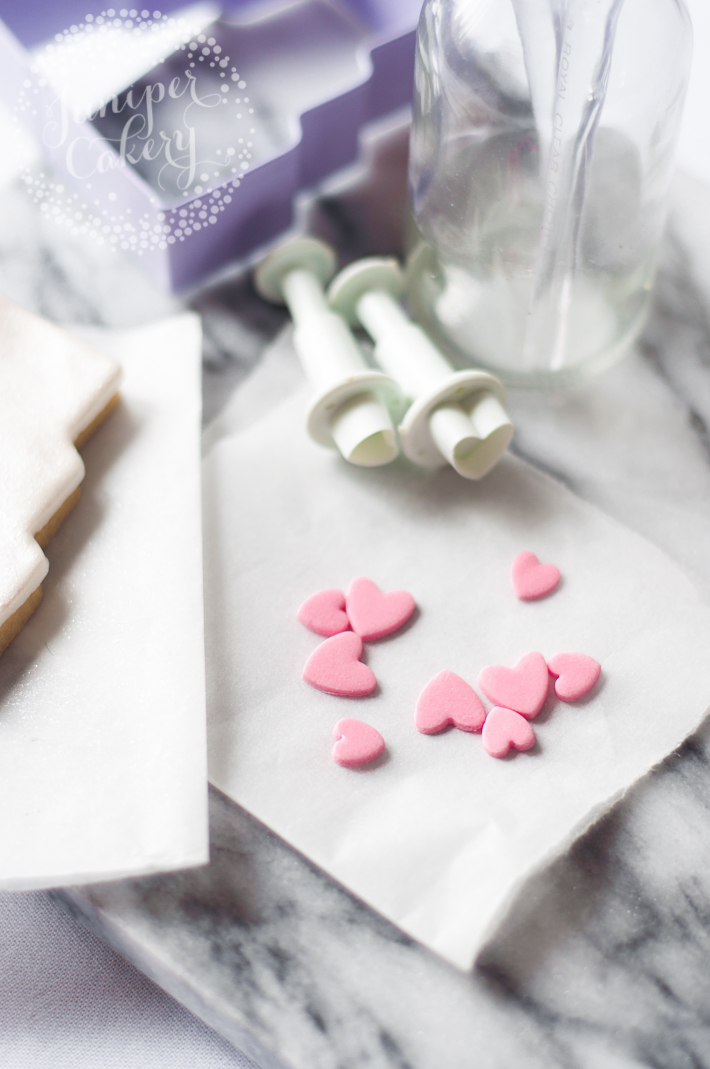
Step 8:
Roll out some pink fondant and cut out a series of hearts using small plunger cutters.
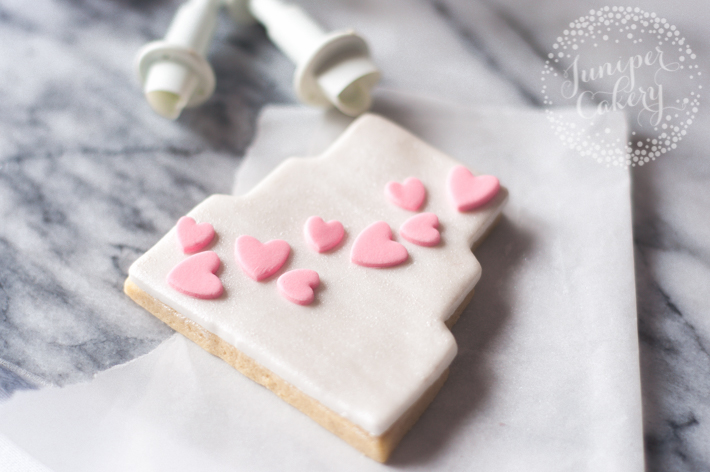
Step 9:
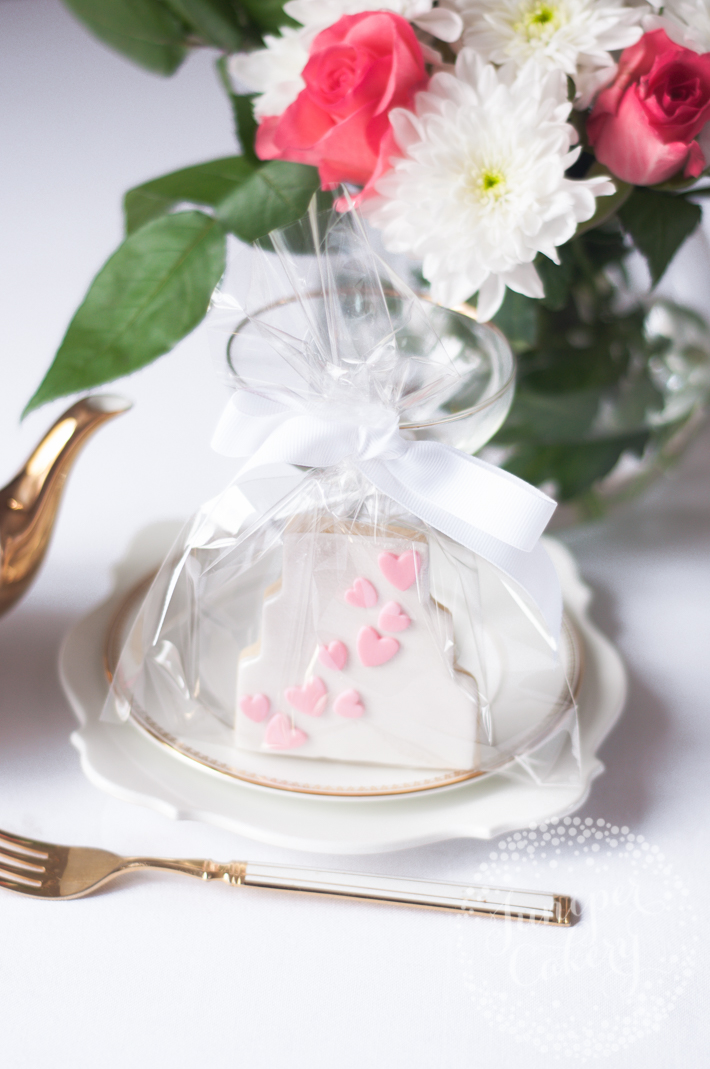
Using some edible glue, apply your fondant hearts onto your cookies. For our wedding cake–shaped cookie, we arranged different sized hearts cascading from the top downwards.
Everyone gets stuck for ideas and sometimes the most simple of designs or tutorials can lead to a “lightbulb” moment. Some fabulous ideas for adding a little more detail to this step-by-step guide include stenciling pretty patterns on top of the lustered fondant effect, piping tiny royal icing hearts, creating gold leaf monograms or adding luxurious edible sugar pearls!
So when I try to find cookie decorating guide and essential royal icing techniques by using the links above or searching I am redirected to the main crafts page Very frustrating