
Have you noticed how popular leather is this season? Of course, leather is always a popular choice for fall and winter outerwear, but, this year, I’ve seen it incorporated into all types of everyday clothing, from skirts and pants to dresses and shirts. I love seeing it on sleeves, peplums and on the trendy moto jacket. Most of what is used, surprisingly, is not real but boy it sure looks real. Leather and faux leather feels great and believe it or not, sewing with either of them is a cinch.
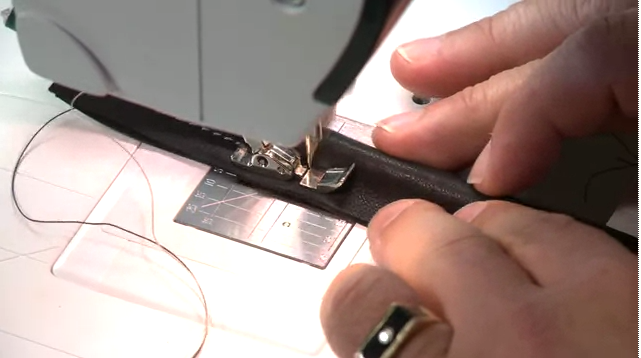
Photo via Don Morin
Learn How to Sew Leather in This Online Class!

Sew boutique-quality leather totes on your home machine with instant access to 9 HD video lessons you can watch anytime, anywhere, forever.
Whether looking for real or faux leather, the options out there are extensive. The real stuff, if you stick with the lightweight versions (no more than the 3 oz. variety), won’t strain your home sewing machine and won’t require serious leather sewing tools. When it comes to using the faux versions, again, stick with the lightweight varieties. They perform very much like regular fabric and are surprisingly easy to work with. In either case, your sewing methods and techniques are a bit different. Not difficult, but different.
Here are a few things to keep in mind when sewing with leather:
1. First and foremost, remember there are no do-overs when sewing with leather.
Every stitch leaves a permanent hole, so do all your fitting beforehand.
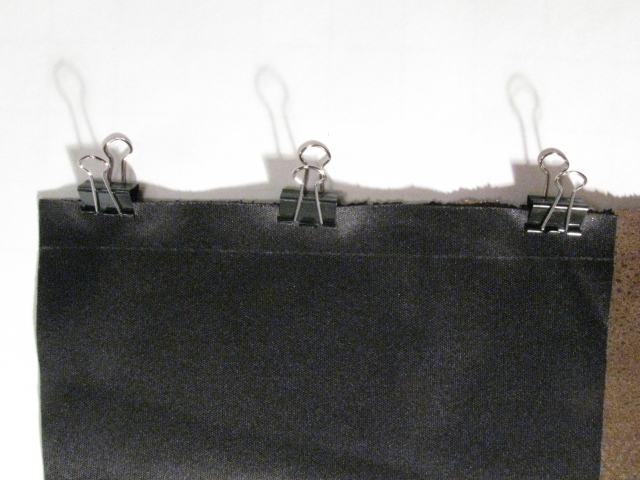
2. Pins will leave permanent holes in real or faux leathers, so they are pretty much out of the question unless you stick to using them only within seam allowances.
Instead, consider regular paper clips, binder clips, invisible tape, hair clips, or you can invest in special clips sold at fabric stores designed for quilting but work equally well for leather.
3. Cut out pattern pieces one layer at a time.
I prefer to trace my pattern pieces on the wrong side and use a rotary cutter for most of the cutting.
4. If you are using patterns, be sure to transfer all markings on the wrong side of the fabric.
Stay away from traditional transfer paper and marking wheels, and consider marking pens or tailor’s chalk.
5. Because the raw edges of leather will not fray, no added seam finishes are necessary.
Raw seam edges can remain unfinished or can be exposed for a great organic look.
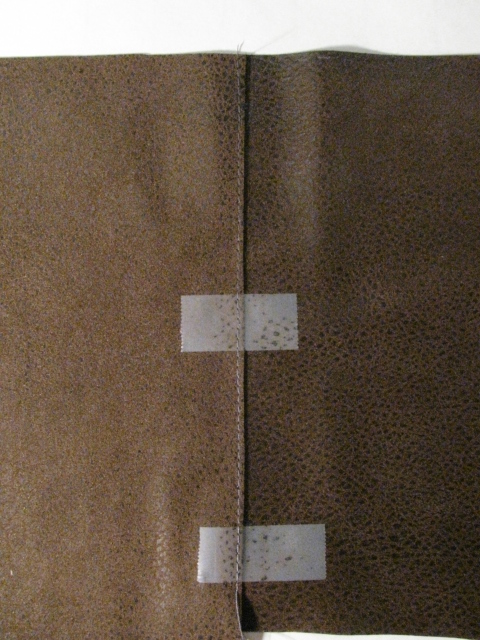
6. There are many seam options that can be considered.
Lapped seams, faux flat fell seams, single or double topstitched or just plain seams can all be used with real or faux leather. It all depends on the type of look you are going for in your project. If using plain seams, glue the seam allowances down with leather adhesive and use a wallpaper roller to seal them shut.

7. Use a fresh, new needle in your sewing machine whether using real or faux leather.
Select one that is designed specifically for leather.
8. Place a small piece of Scotch tape over the bottom of a universal foot so it glides easily over the leather.
Leather has a tendency to stick to the throat plate and/or presser foot when sewing, so use either a roller foot or a Teflon foot, or you can simply place a small piece of Scotch tape over the bottom of a universal foot so it glides easily over the leather. And, use a longer stitch length for a strong and secure seam.
9. And, lastly, test first!
Test all your stitches on a scrap of leather. Better to be safe than sorry.
Share tips, start a discussion or ask one of our experts or other students a question.
No Responses to “9 Tips for Sewing Leather”