
The holiday season is busy for everyone, but with just a little time and a few paper craft supplies, you can create unique hand-stamped Christmas cards sure to be appreciated by your family and friends. They don’t have to be complicated or time-consuming, they can be simple and easily replicated. I’ve created three stamped cards for your inspiration. All are somewhat whimsical but reflect styles from fun and cute to more traditional. Any image can be used in place of those I’ve chosen to reflect your own personal style and message.
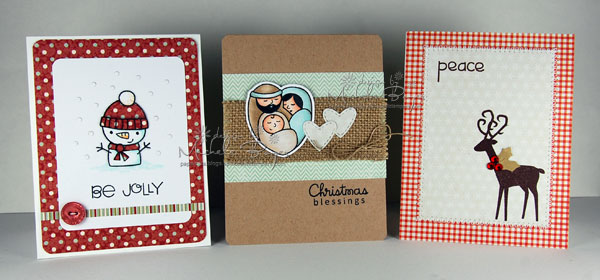
Be Jolly card
Supplies you’ll need:
- Snowman stamp and sentiment (I used Cool Dudes and Christmas Sampler by Paper Smooches)
- Black ink
- Coloring medium of your choice
- White card stock (3 1/4″ x 4 1/4″ and top-folding 4 1/4″ x 5 1/2″ card base)
- Patterned paper (4″ x 5 1/4″ plus small scrap)
- Circle punch or die that cuts small circles/die-cutting machine
- Button and white string
- Corner rounder
- Adhesive
Step 1:
Stamp image and sentiment onto white card stock and color using medium of your choice.
Step 2:
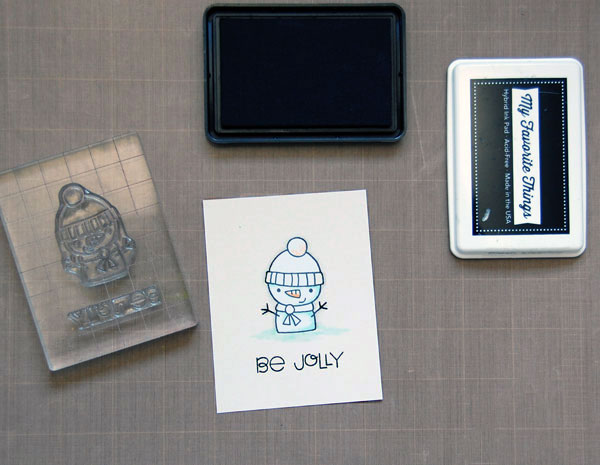
Stamp hat and scarf portion of image onto scrap of patterned paper. If desired, add shadow to the cut pieces using markers or pencils.
Tip: Smaller patterns will result in a more realistic appearance for paper-piecing. Often, large scaled patterns can be confusing or too bold.
Steps 3 and 4:
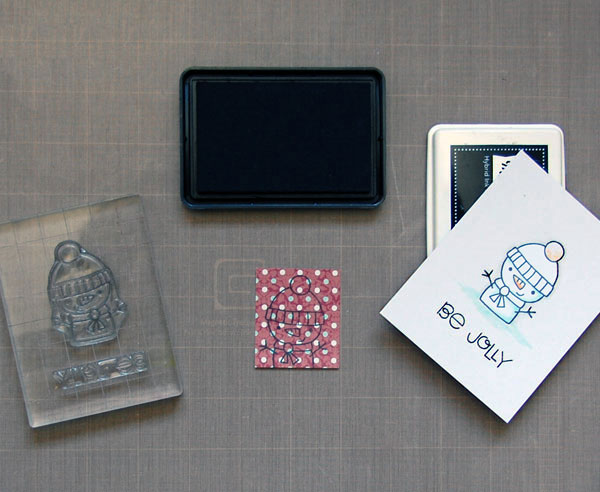
Cut out patterned pieces, trimming as close to the outside edges of the stamped lines as possible. Adhere pieces over colored image. Punch or die-cut multiple small circles and adhere to create falling snow around the snowman. A Quick Stik may be helpful to aid in picking up and placing small punched or die-cut pieces. One end has a slightly tacky tip that works great for this purpose.
Step 5:
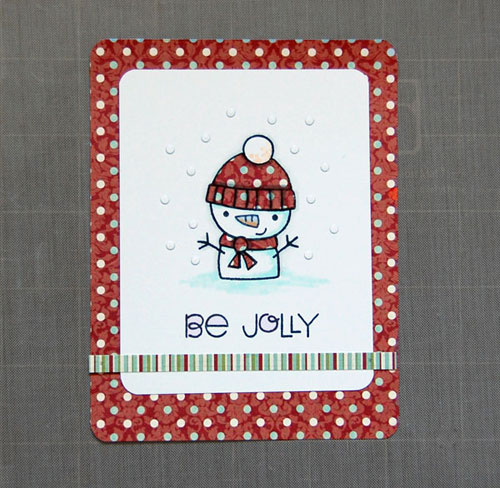
Round corners of white and patterned blocks and add thin strip of striped patterned paper beneath the sentiment.
Step 6:
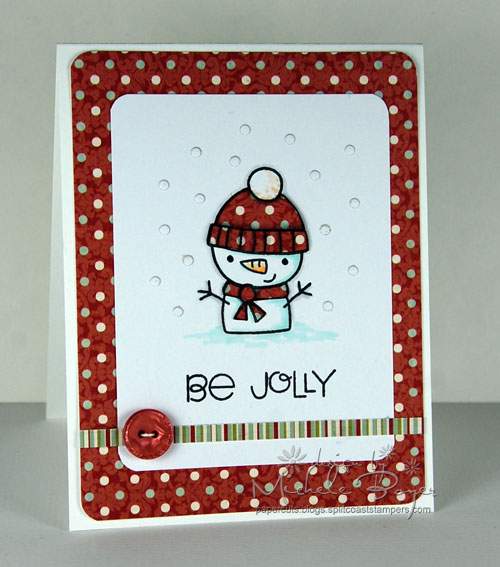
To finish card, stitch button to thin horizontal strip of patterned paper and adhere assembled panel to base card.
Christmas Blessings card
Supplies you’ll need:
- Stamp set (I used A Blessed Christmas by Paper Smooches)
- Coordinating image die (I used Blessed Icons by Paper Smooches) or scissors to cut around your stamped image
- Heart die or punch
- Black ink
- Kraft (top-folding 4 1/4″ x 5 1/2″ card base) and white card stock
- Patterned paper (4 1/4″ x 2 3/4″ chevron plus white snowflake scrap)
- Coloring medium of your choice
- 1 1/2″ wide burlap trim
- Hemp cord
- Double-sided tape and liquid glue
Step 1:
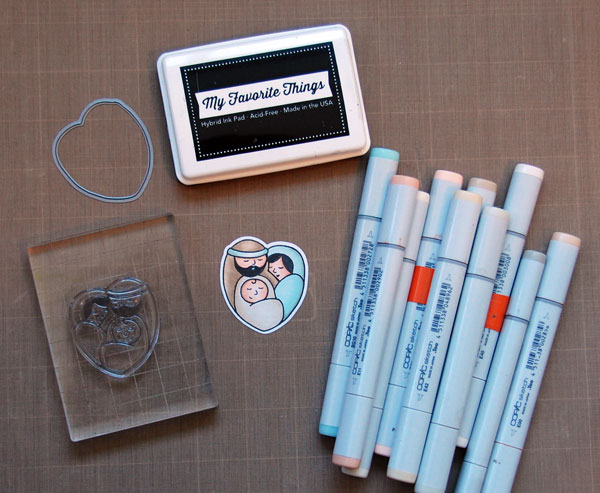
Stamp image, die-cut or cut around with scissors and color with your choice of coloring medium.
Step 2:
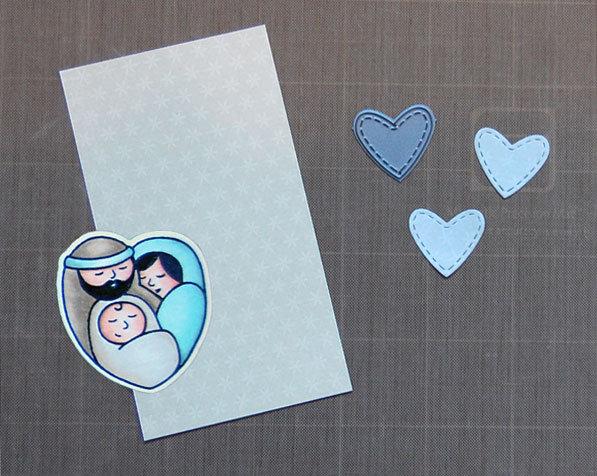
Die-cut or punch two hearts from patterned paper.
Step 3:

Adhere chevron paper across card front. Apply double-sided tape to burlap trim.
Step 4:
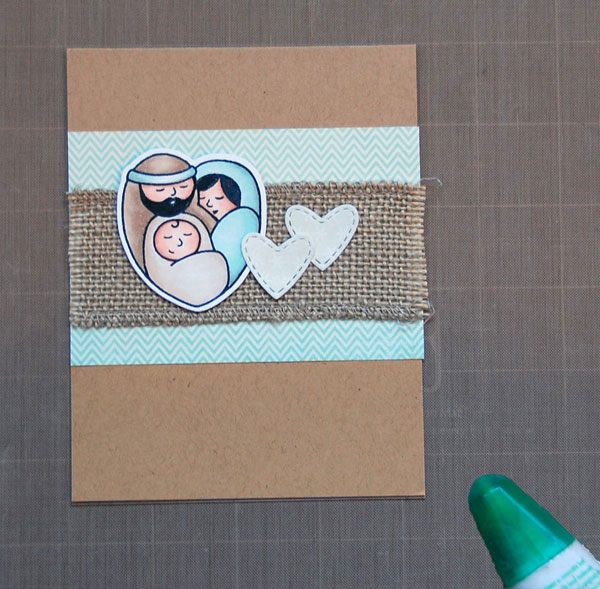
Remove backing from double-sided tape and adhere burlap over patterned paper. Using liquid glue, adhere colored image and hearts, slightly overlapping.
Step 5:
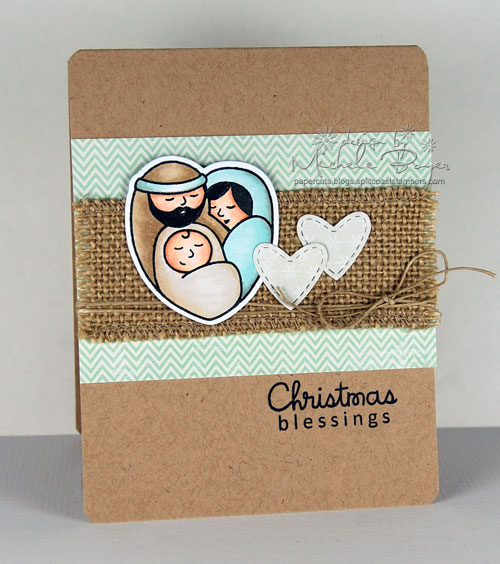
Tie hemp cord around burlap, tucking beneath stamped image and hearts. Stamp sentiment. As a last-minute decision, I rounded the corners to create a softer overall appearance.
Peace card
Supplies you’ll need:
- Stamp set (I used A Holy Holiday by Paper Smooches)
- Brown and green inks
- Cream card stock (top-folding 4 1/4″ x 5 1/2″ card base)
- Patterned paper (4 1/4″ x 5 1/2″ gingham, 3 1/4″ x 4 1/2″ snowflake pattern)
- Sewing machine/white thread
- Three red adhesive rhinestones
- Adhesive
Step 1:
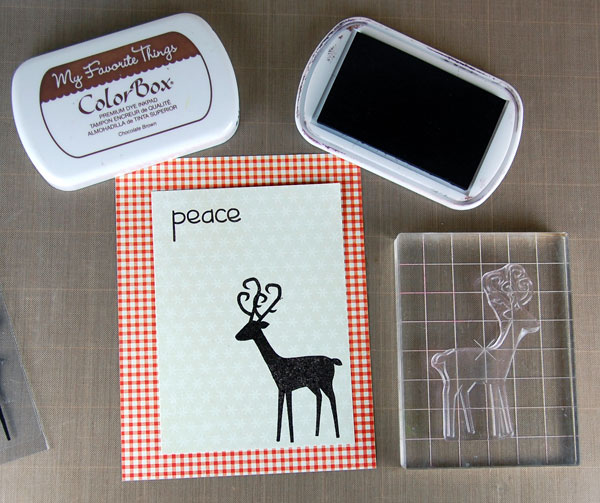
Using brown ink, stamp deer into bottom right of snowflake pattern. Stamp sentiment into upper left.
Step 2:
Apply a bit of adhesive to center back of deer panel; adhere to gingham. Zigzag stitch around edges. Pull threads to back and secure with tape.
Tip: I like Gutermann upholstery thread as it is thicker than regular sewing thread, resulting in a more dominant appearance (but both work nicely).
Step 3:
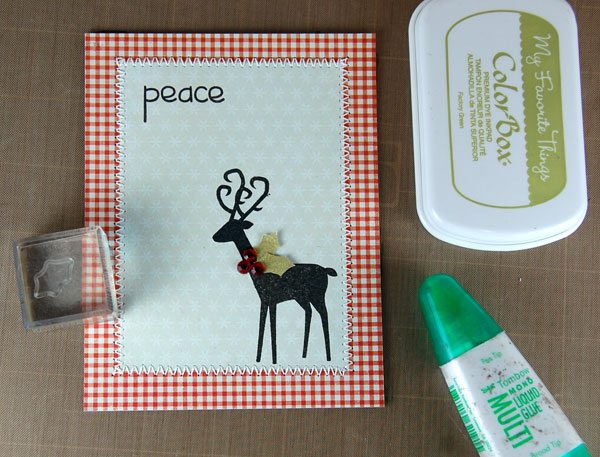
Stamp holly leaves, cut out and adhere to deer. Apply adhesive only to the inner tips so the ends are free to bend a bit forward. Adhere three rhinestones as berries.
Step 4:
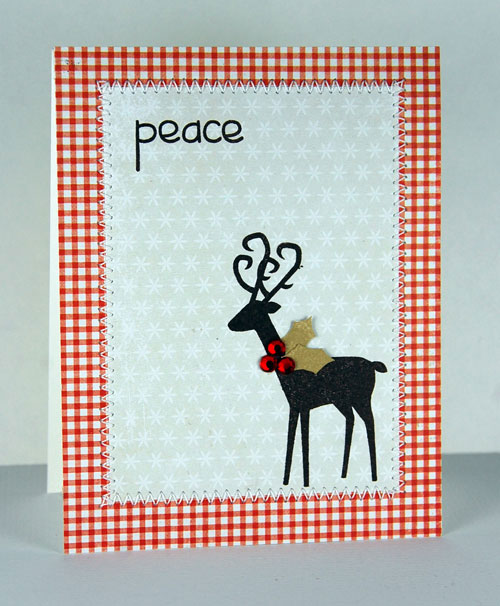
Adhere assembled panel to cream card base.
And there you have it!
Three stamped Christmas cards to make for your loved ones this holiday season!
Share tips, start a discussion or ask one of our experts or other students a question.
No Responses to “Simply Stamped! 3 (Free!) Holiday Greeting Card Tutorials”