
Spot color or selective color is a photo editing technique where a photo is converted to black and white, but has a select area left in color.
I remember first seeing this technique in film when Schindler’s List came out in 1993. The spot color effect was used in that case for strong symbolism. It’s also often used in portraiture to draw focus to a certain elements of a photo, such as a brightly colored umbrella on a gloomy day or lips or a rose for example. The well-known graffiti artist Banksy illustrates like this — many of his designs are black and white with a pop of color on an object for greater emphasis.
Read for an easy method for creating your own spot color photography.
There are several techniques for selective coloring. I prefer to use an easy composite and masking technique in Photoshop to apply spot color to my photos:
1. Duplicate layers
Open your image in Photoshop. In the layers panel, right click on the layer or click the drop-down menu and select Duplicate Layer. This will create two identical layers, one on top of the other.
Online Photography Class

Transform your images and videos with the creative power of Photoshop!Enroll Now »
2. Make the top layer black and white

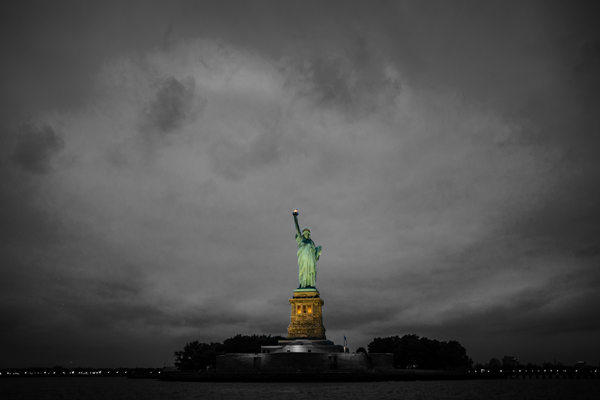
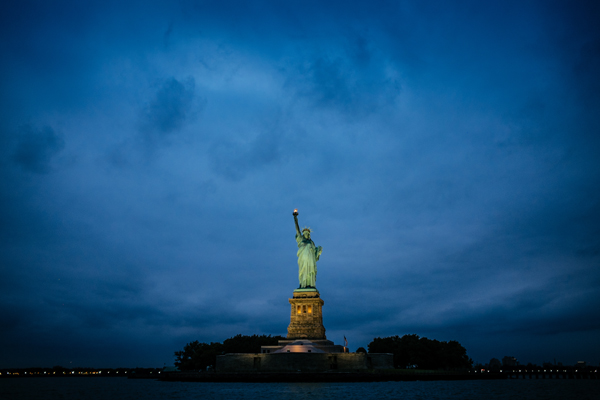
Under the Image menu, choose Adjustments -> Black and White. This menu item will give you a default black & white setting, plus different filters you can use to change the look of your black and white image when you make the conversion from color. In my example image of the Statue of Liberty, I used a modified green filter to bring out more contrast between the green statue and the blue sky.
There are other ways of converting the top layer to black and white, but I find the Black and White adjustment to have the most control. You could also desaturate the layer using Image -> Adjustments -> Hue and Saturation and dragging the saturation slider all the way down.

3. Select the top layer and create a mask
You can create a rough mask of the part you want to remain in color very quickly with a layer mask. Use the lasso tool or polygonal lasso tool to make a quick selection of the color area. Then go to Select -> Inverse (or Command + I) to select the area opposite the color area. Then, in your layer panel, click the “add layer mask” button. This will create a mask that roughly hides the black and white portion of your image.
There are multiple ways to create a mask. If you find another way to be easier for your workflow or your images, feel free to use that. See my previous post on image masking.
4. Refine the edges with the brush tool
In the layers panel, make sure you have the mask selected for the top black and white layer. Choose the brush tool and make sure you have it set to a small size and a somewhat soft shape. Also make sure your foreground and background colors are set to the default black and white. Use either the black or white color (depending on your mask) to brush out the color parts of the image that you don’t want to be there. Change the size and hardness of your brush as necessary.
Keep in mind, this effect can be SUPER cheesy if done too often, or in a way that has no artistic vision. Avoid having photos that look dated by being selective in your spot coloring and putting some thought behind the way you present your spot color work.
Have you tried using this spot color effect? Do you think it is tasteful or cheesy?
Online Photography Class
Transform your images and videos with the creative power of Photoshop!Enroll Now »
Share tips, start a discussion or ask one of our experts or other students a question.
No Responses to “4-Step Method for Creating Spot Color Photography”