
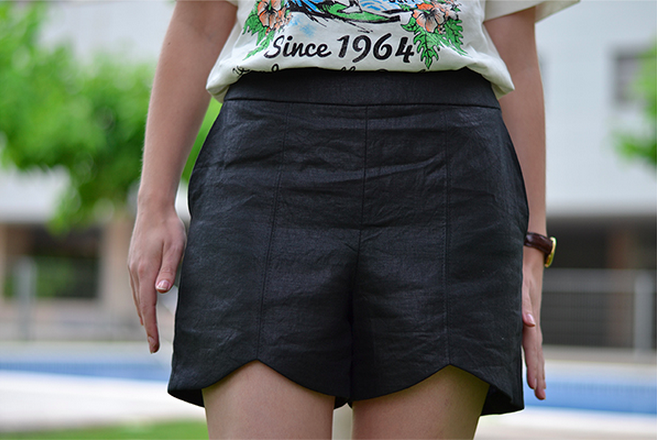
Make summertime scalloped shorts with this step-by-step sewing shorts tutorial. Now say that five times fast!
Summer is here, and it’s the perfect time to make a nice pair of shorts! There are so many lovely patterns out there. However, one particular pattern really caught my eye the second it was released: from Pattern Runway. I think the pattern makes for a very sassy, easy to dress up or down pair of shorts. Plus, they have just the right amount of detail that’s attainable for a beginner yet still interesting for a more advanced seamstress.
The PDF print-at-home pattern is very easy to assemble and the instructions are quite easy to follow. For a beginner, I would recommend making the shorts without the welt pockets (I made false pockets because I won’t use them). Also, no matter your level of expertise, I recommend making a muslin before you start sewing, as the pattern does tend to fit a little big.
Searching to find the perfect fit? Check out these great classes on fitting techniques for pants: Custom Fitting: Waist and Hips with Kathleen Cheetham and Pant Fitting Techniques with Sandra Betzina.
Follow this tutorial to make yourself a cute pair of scalloped shorts!
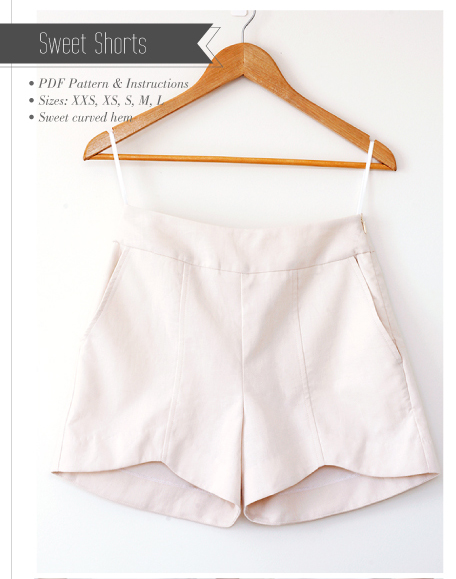
Photo via Pattern Runway
Pattern notes
Make sure you print your pattern in full 100% scale. The great thing is that the pattern is printed over a 1 x 1″ grid, which is very easy to tape together.
The pattern uses 3/8″ seam allowances (included). Make a muslin of the main pieces (the back, two front pieces, and waistband), as most of the reviews I read said the pattern ran rather big.
I can confirm that, according to the measurements, I made an XS size that matched my own measurements. But, I had to use 5/8″ seam allowances instead of the 3/8″ included in the pattern, as it was too big. Next time I’ll go directly for the smaller size.
For my material, I used a waxed linen fabric. I love the shine: It has a leathery look and feels very smart. However, it does tend to wrinkle like crazy! A nice medium-weight cotton, cotton sateen, wool crepe — really anything that doesn’t crease — would also be appropriate.
Let’s get started: how to make scalloped shorts

1. Sew the darts on the back pieces. Press toward the center.
2. On the wright side, mark the opening for the welt pocket.
3. On the wrong side, fuse interfacing over the welt pocket opening.
4. Report the marks on the right side of the welt pocket.
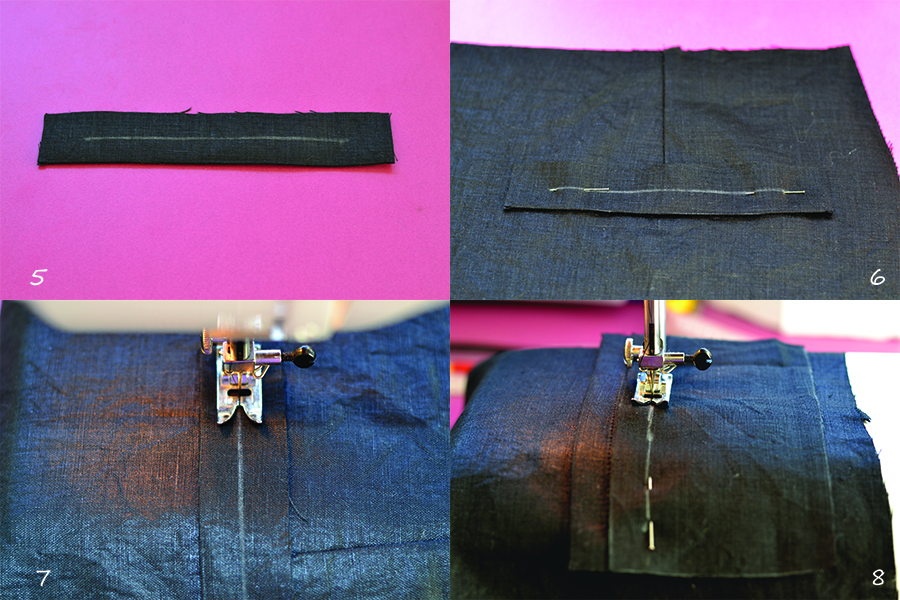
5. Fold the welt in two, wrong sides together.
6. Place the welt on the right side of the back piece, matching the lines. The raw edges of the welt should be facing up.
7. Stitch following the line.
8. Place the welt facing right sides together over the welt, match the edge with the stitch line. Stitch 5/8″ from the edge.
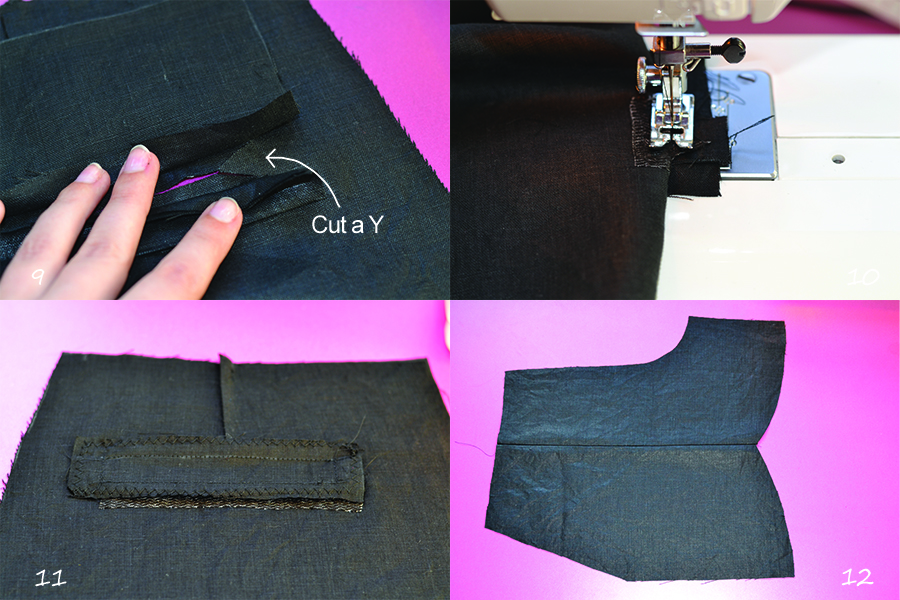
9. Cut the welt opening into the corners to make a “Y” shape.
10. Pass the welt and the facing through the opening and press open. Stitch the small triangle to the welt and facing seam allowances.
11. Optional: I didn’t follow the instructions and made a false welt pocket instead because I didn’t want to add bulk as my fabric is linen. I just stitched the seam allowances together to close the pocket and zigzag the raw edges.
12. Stitch the two front pieces right sides together and press the seam allowances open.
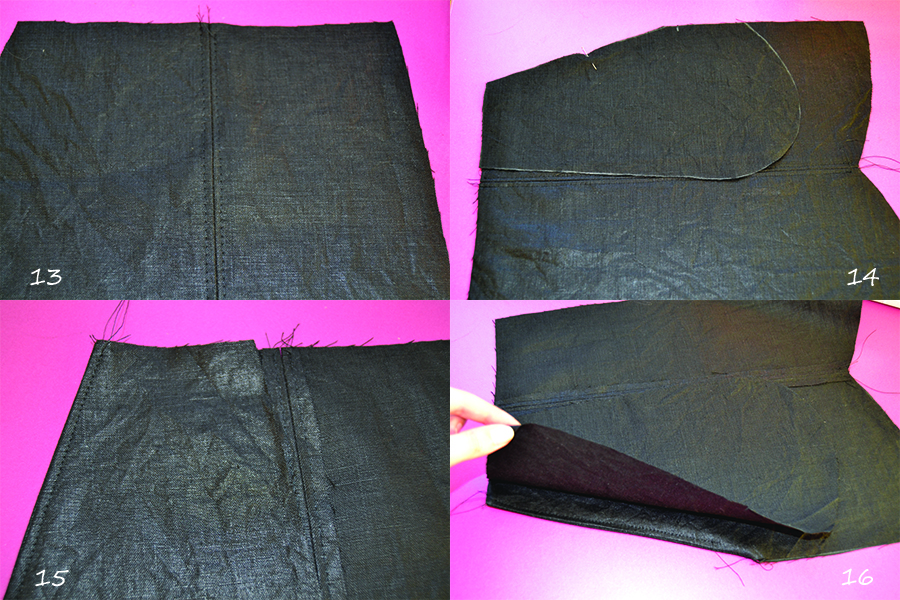
13. Topstitch along the seams.
14. I didn’t use any pocket facings as my fabric is light enough. With right sides together, stitch the pocket bag to the front.
15. Understitch the pocket.
16. Place the pocket over the pocket bag, right sides together and stitch the rounded edges together. Finish the seam allowances.
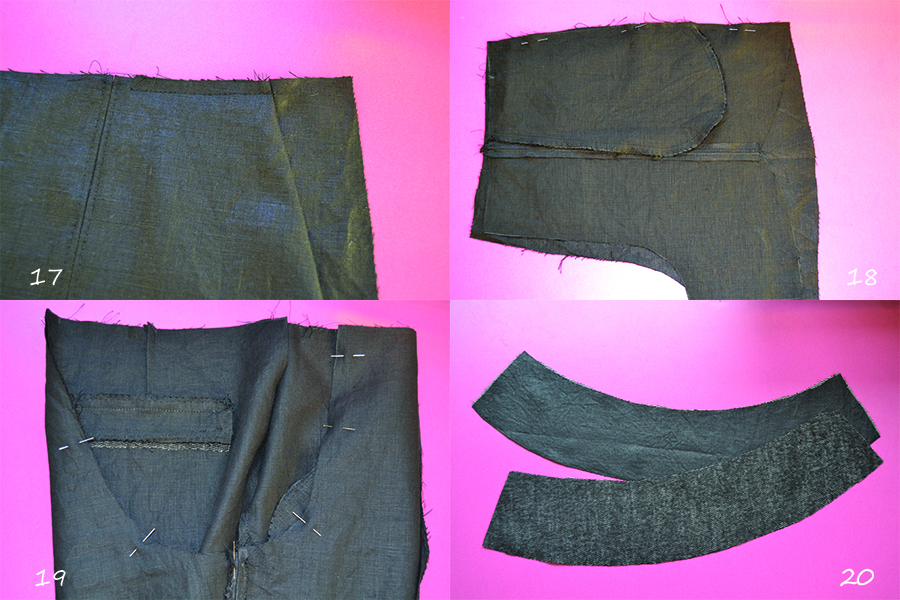
17. Baste the pocket openings at the top and side.
18. Stitch the side seam of the right side together (leave left side open for the zipper). Stitch the inseams together. Finish and press the seam allowances.
19. With right sides together, place one leg inside the other one and pin the front and back pieces together. Stitch the crotch seam.
20. Fuse interfacing to the waistband pieces and stitch the right side together.
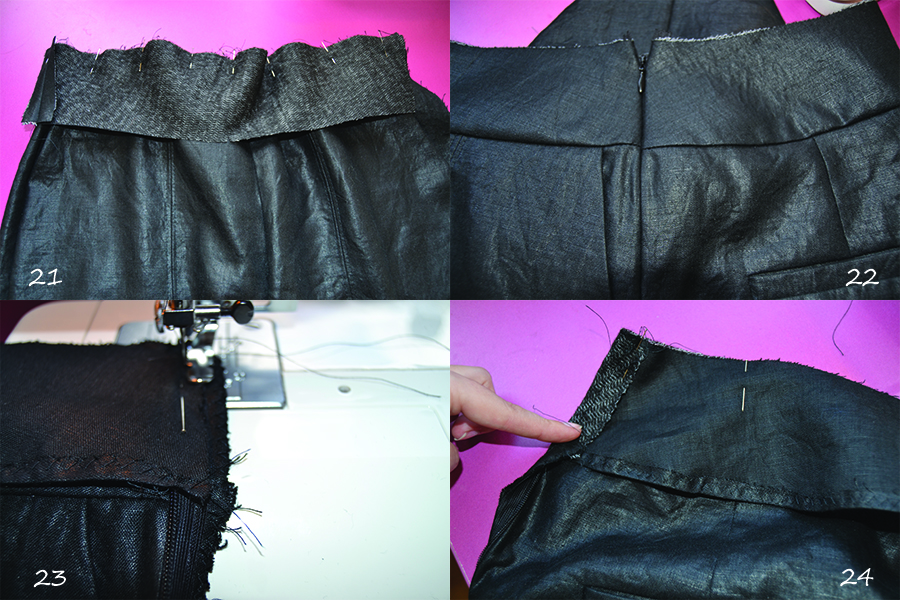
21. Stitch the waistband to the shorts, matching the notches. Clip the seam allowances and press toward the waistband.
22. Insert the invisible zipper on the left side. Stitch the left side together below the zipper end.
23. With right sides together, stitch the waistband facing to the waistband along the zipper, very close to the teeth.
24. Fold the seam allowance toward the waistband facing, pin it in place and stitch the edges of the waistband and facing together. Trim the corners and turn inside out.
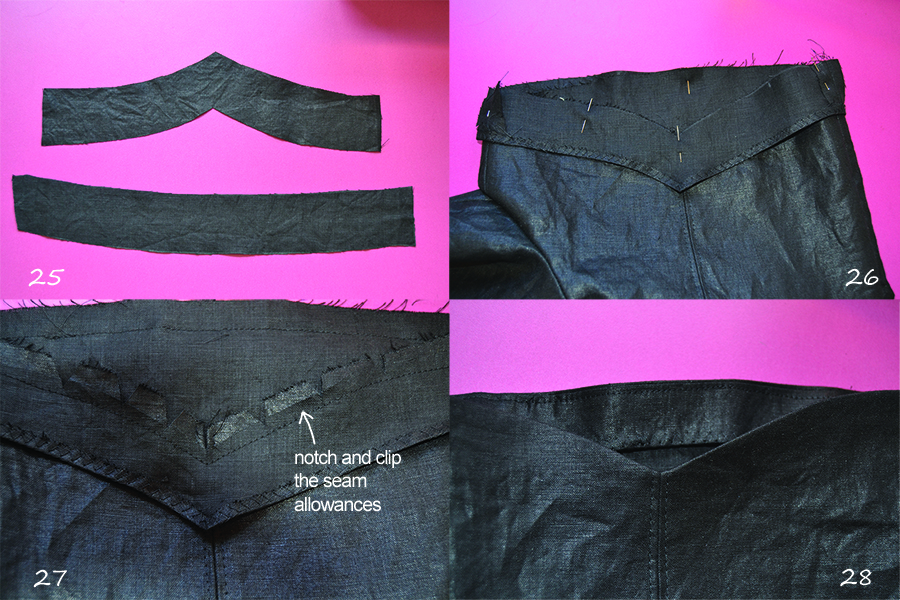
25. With right sides together, stitch the scalloped hem facing together at the side seams.
26. Matching the notches, pin the facing to the hem right sides together. Stitch following the curved hem.
27. Notch and clip the seam allowances. Clip into the “V” shape as close as possible to the stitching line.
28. Understitch the facing. Press to the inside and secure the facing to the side and front seam allowances.
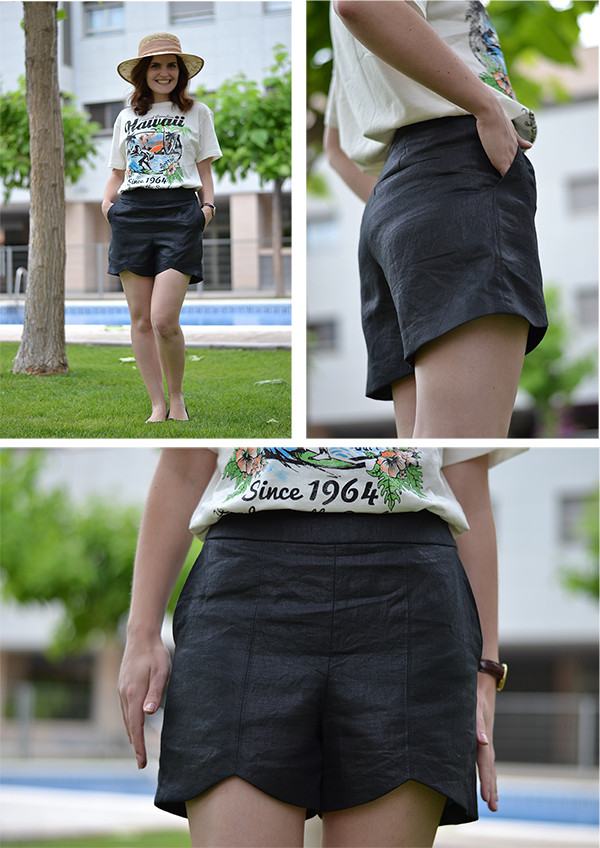
All photos via Pauline Alice
Give it a good press, and you’re ready to go!
I’ve been wearing these shorts for the past week, and I’m already planning on sewing a new, wrinkle-free version with some different fabric. I love how classy and comfortable they are — perfect for a summer day in the city or even a trip to the beach.
Still no pattern??
where can I get this pattern?