
Little tips can help your sewing be more accurate, faster and more organized. And often the tools to help you along the way are common household items that you might have never suspected would prove helpful in your sewing.
Read on for some of my favorite sewing hacks.
1. Clothespins and binder clips can step in for pins.
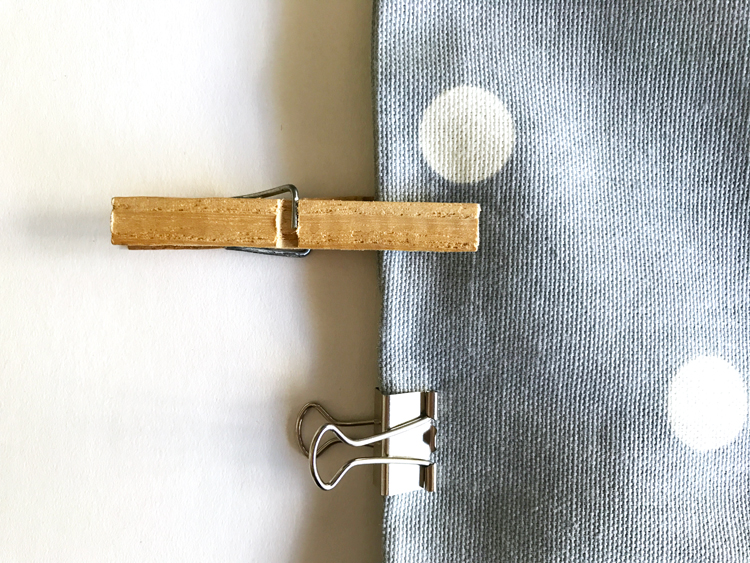
Sometimes thicker fabrics can be far too thick to be held together by straight pins. Or perhaps you’re sewing with something that you don’t want to puncture with a hole, like leather, vinyl or oil cloth. These situations are ideal for clips instead of pins.
Fancy clips are sold at sewing stores, but instead of buying another item for your studio, use a common household item to do the same job – like a binder clip or a clothespin! They work exactly the same and most people probably already have some lingering around the house.
2. Add a seam allowance with a double pencil tracing tool
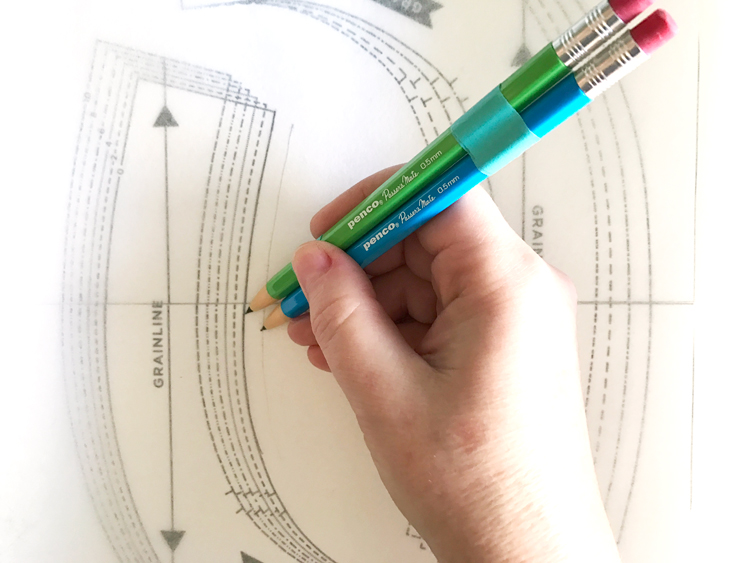
Some patterns, especially those designed in Europe and Japan, do not come with seam allowances included so that you can add in the seam allowance of your choice when you trace the pattern in your size. Rulers certainly help you draw the seam allowance, but on curves especially, accurate marking can take a lot of time.
A really quick and easy way to solve this is by taping two pencils together, so when you trace along the line, a second line is drawn to the side. Keep in mind that you will want to measure what this distance is, and then use that as your seam allowance during the sewing process.
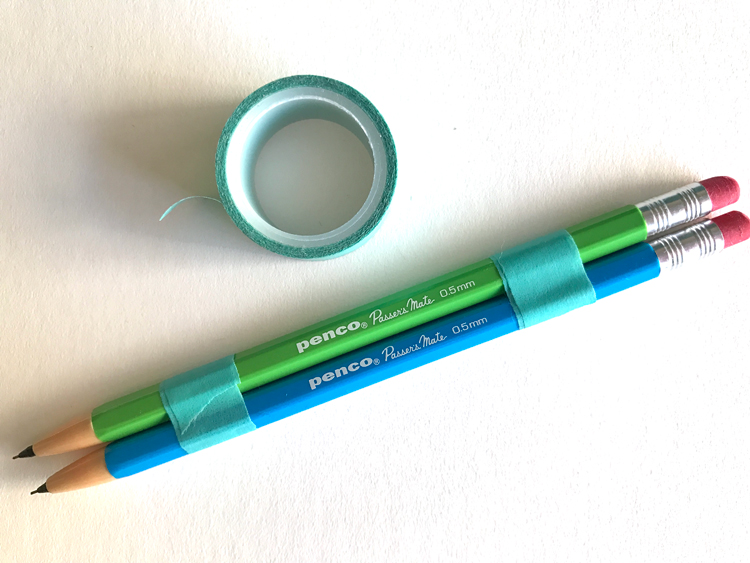
Tracing is far more accurate with a fine point pencil, so I recommend using a mechanical pencil, like the two pictured here, for a quick and accurate fine point line.
3. Mark your seam allowance on your machine.
If you need to use a seam allowance that’s not marked on your machine, or perhaps you just need help seeing the line on the foot place, here are three ways to make a new line that’s easy to put in place and easy to see.
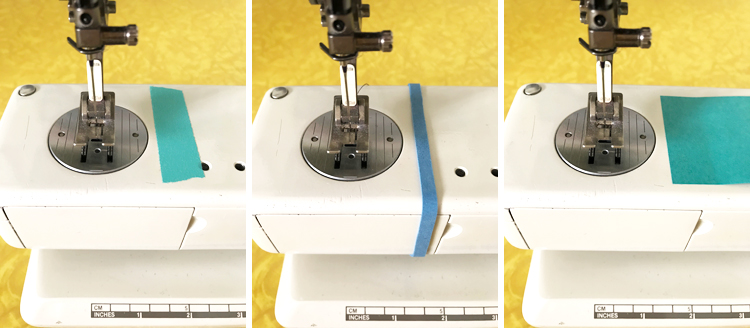
- First, as shown on the far left, you can use washi tape or painter’s tape to mark your line. These tapes are easy to remove and don’t leave sticky residue behind. Though decorative washi tapes are fun, pick a solid color for an easy-to-see edge.
- Second, in the middle, you can use a large rubber band to mark your new seam allowance. Make sure it’s large enough to fit around your machine without great strain. You don’t want it to snap while you’re sewing!
- And lastly, on the far right, you can simply place down a sticky note to mark on your machine.
4. Store buttons in a pill tray.
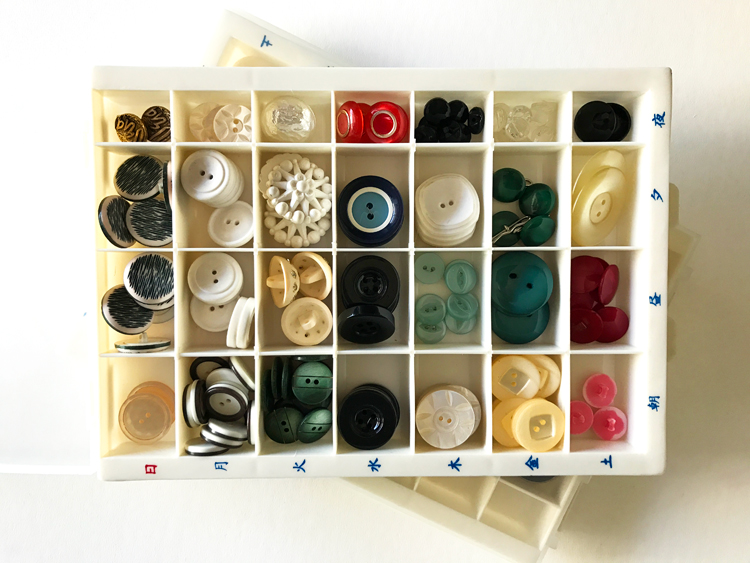
Years ago while cruising a Japanese dollar store, I stumbled upon these trays that are meant for pill organizing. Mine don’t look like what you can find the U.S., but this strategy works for the ones that you can pick up at a grocery or pharmacy near. Hardware stores also sell similar plastic storage trays with little slots that can be moved around to create larger or smaller compartments, which is really helpful if you have larger buttons in your collection.
5. Use your nearly-empty bobbins for basting.
At the start of any new project, I fill up a new bobbin with thread to match the fabric. When I’m done, there’s often some thread left on the bobbin. If it’s a color thread I use often, I simply set the spool and bobbin aside to be paired up again for the next use.
However, if this happens to you with a color you don’t plan to use, instead of unspooling the thread and tossing it, use it for unseen sewing.
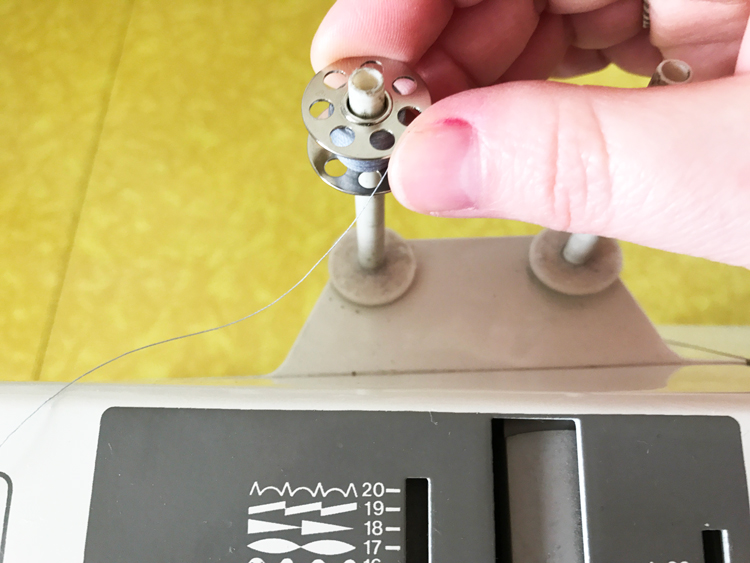
Place the bobbin on your thread spool pin in place of your spool. For example, if you need to baste two pieces together, or sew baste stitches for hand gathering or setting a sleeve into a garment, this is a great time to swap out your main thread for a bobbin with thread that would otherwise get tossed. Baste stitches are almost always pulled out, making it a perfect opportunity to use up those random bobbins half full of colors you don’t use regularly.
6. Check your seam allowance with the width of a tape measure.
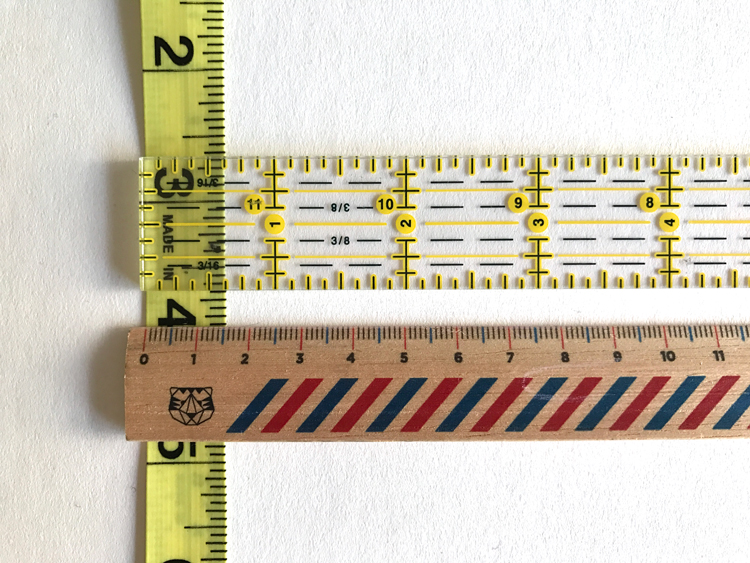
The most common sewing seam allowance is 5/8″ (because it translates perfectly to 1½ cm for those who use the metric system). When you need to check your stitching or mark a spot with a 5/8″, you could use a seam gauge — but if that tool isn’t on hand, use this little-known secret: Nearly all newly manufactured tape measures happen to be 5/8″ or 1½ cm wide! Not only is your tape measure handy for measuring long distances, it’s also a great shortcut to confirming your 5/8″ seam allowance marking as well!
7. Leave notes with your fabric stash.
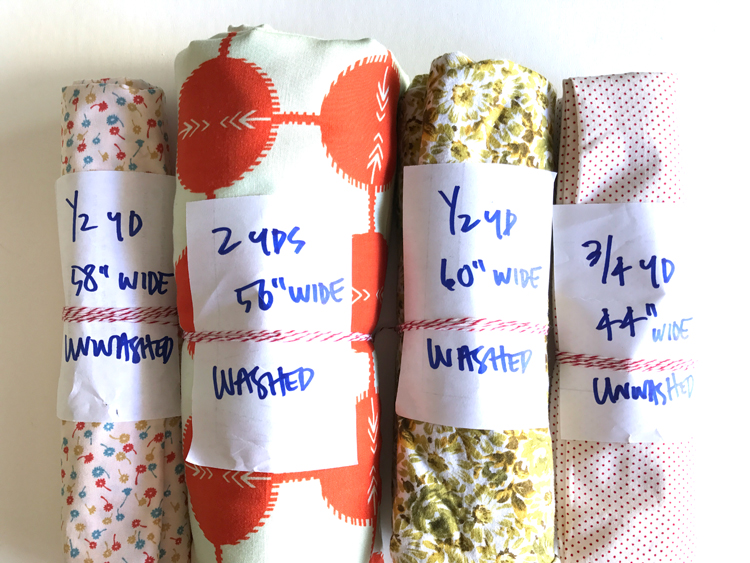
Given that I sew for a living, people ask me all the time how I organize my fabric. To me my method is pretty straightforward, but I always get a reaction of surprise at one detail: I always mark if my fabric has been washed or not.
I roll my fabric stash as pictured here, with the yardage, width and “washed” or “unwashed” written on a scrap of paper, then bind it together with some baker’s twine. You can use any folding and wrapping method you like.
I love that I can see at a quick glance if the fabric is right for a project by knowing these three simple pieces of information. A tip though: Remember to re-measure you fabric after washing it, as the width and length will both likely have shrunk.
8. Store bobbins in toe separators.
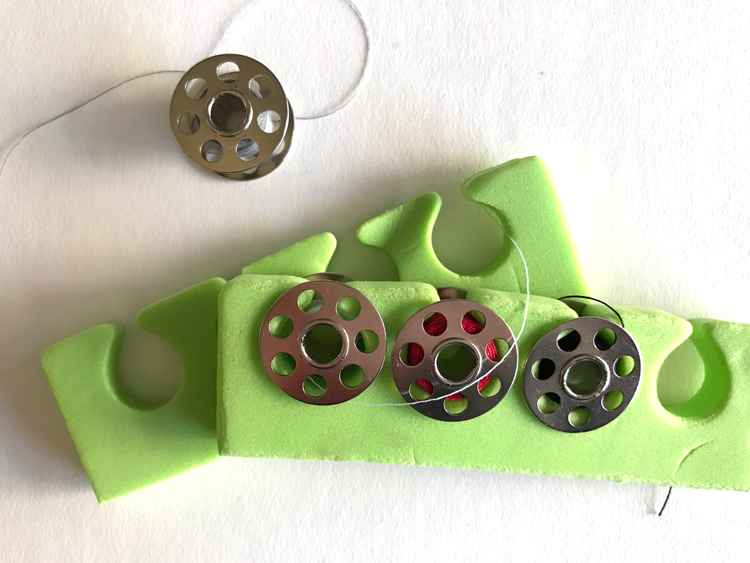
I know I cannot be the only one who hates how their bobbins roll and scatter all over the place! A tip someone shared with me ages ago is the magical secret that bobbins fit perfectly into those little foam toe separators for polishing your toe nails!
It’s a wonderful way to keep your bobbins in place in a drawer, so the threads don’t get all tangled and messy. And, if you want to take it one step further, you can write the thread colors on the foam with a permanent market, making it easy to mate the bobbin with its spool. Since the ink is permanent, this is best done with thread colors you use often.
9. A pin makes sure you never cut through your buttonhole.
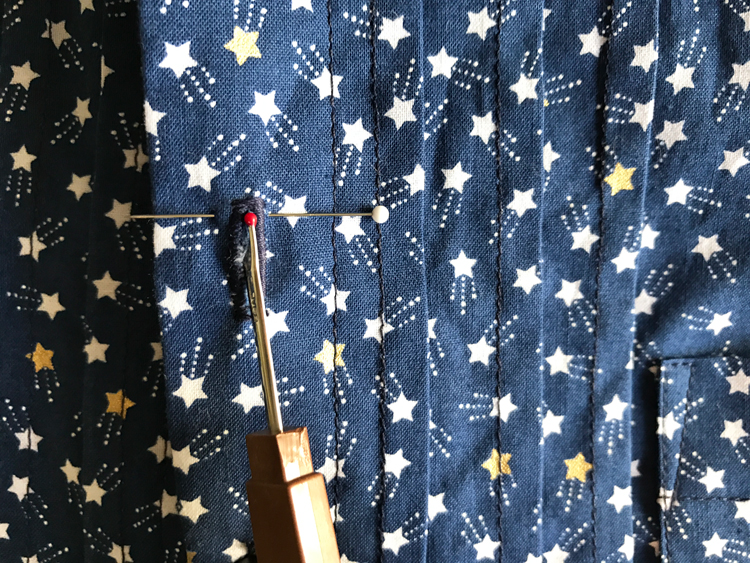
The most common way to cut open a buttonhole is using your seam ripper. But there’s always a fear of cutting beyond your sewn buttonhole, especially on thicker fabrics where you have to push quite hard into the fabric.
A great way to keep yourself from tearing through the threads is by placing a pin across the buttonhole near the end, so your seam ripper will simply run into the pin, instead of tearing through the stitch. Easy and oh so helpful!
10. Peel your chalk for a super sharp edge.
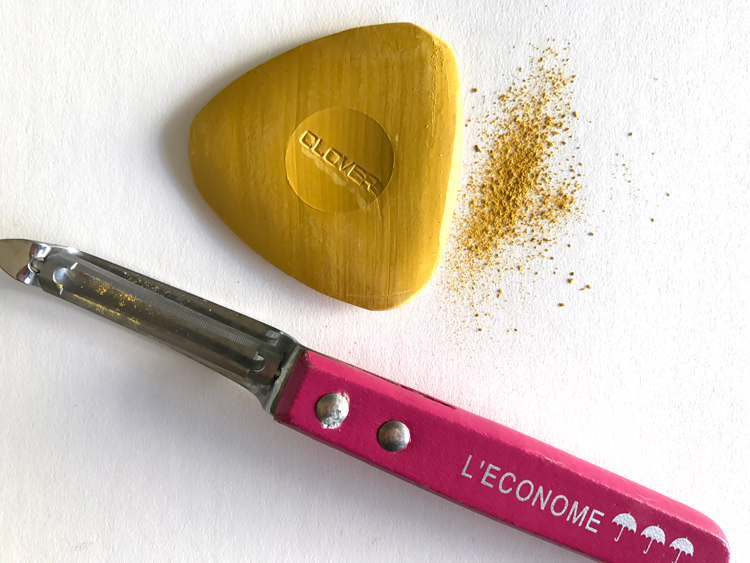
Chalk triangle wedges are great for making quick markings on fabric. Ideally that mark is a precise and clear line. But of course, the sharp edge can dull over time as you use it. I’ve often been told that sandpaper can file down the edge, but honestly I almost never have sandpaper on hand. Another sharpening tool I always have around is my kitchen peeler, which does a wonderful job of creating a crisp, sharp edge on the chalk. Give it a try next time your chalk gets dull!
11. Organize used needles on a cork board.
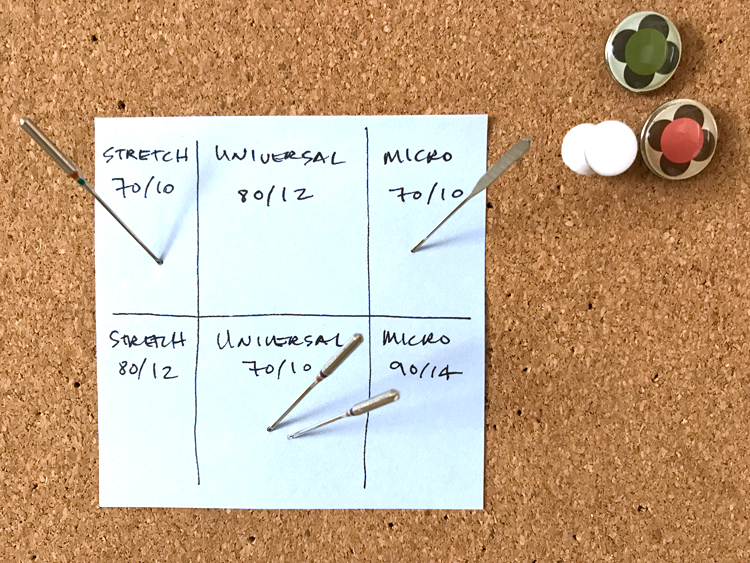
Sewing machine needles need to be changed after about 8 to 10 hours of sewing — typically about two projects. If you’re moving on to a project that requires a different kind of needle before hitting that threshold, I don’t advise putting the used needle back into the case — you may forget which one was partly used.
I created a little chart on a sticky note, which I pinned that to a cork board in my studio. That way, when I remove the needle that still has some life in it, I can stick it into the cork board in the square for that needle type and size. Then next time I need to use that kind of needle, I can simply use it and then toss it afterward.
Such helpful tips ,so handy and easy but l never would have thought of them myself. Thankyou
While I am sewing and cutting I made a portable garbage can out of a large tomato sauce can. I spray painted it and it goes where I go anytime while doing crafts and sewing etc., etc., :) :)