
I’m going to tell you a secret. piping is not my favorite thing to do! I’ve always preferred cake design techniques that involve sculpting, molding, or hand-painting. Brides and grooms, on the other hand, love piping! It’s a classic look that has stood the test of time.
Trends come and go, but a beautifully piped cake wedding cake will always be in style.
This simple “S” and “C” scroll piping method is quick, easy, and yields impressive results!
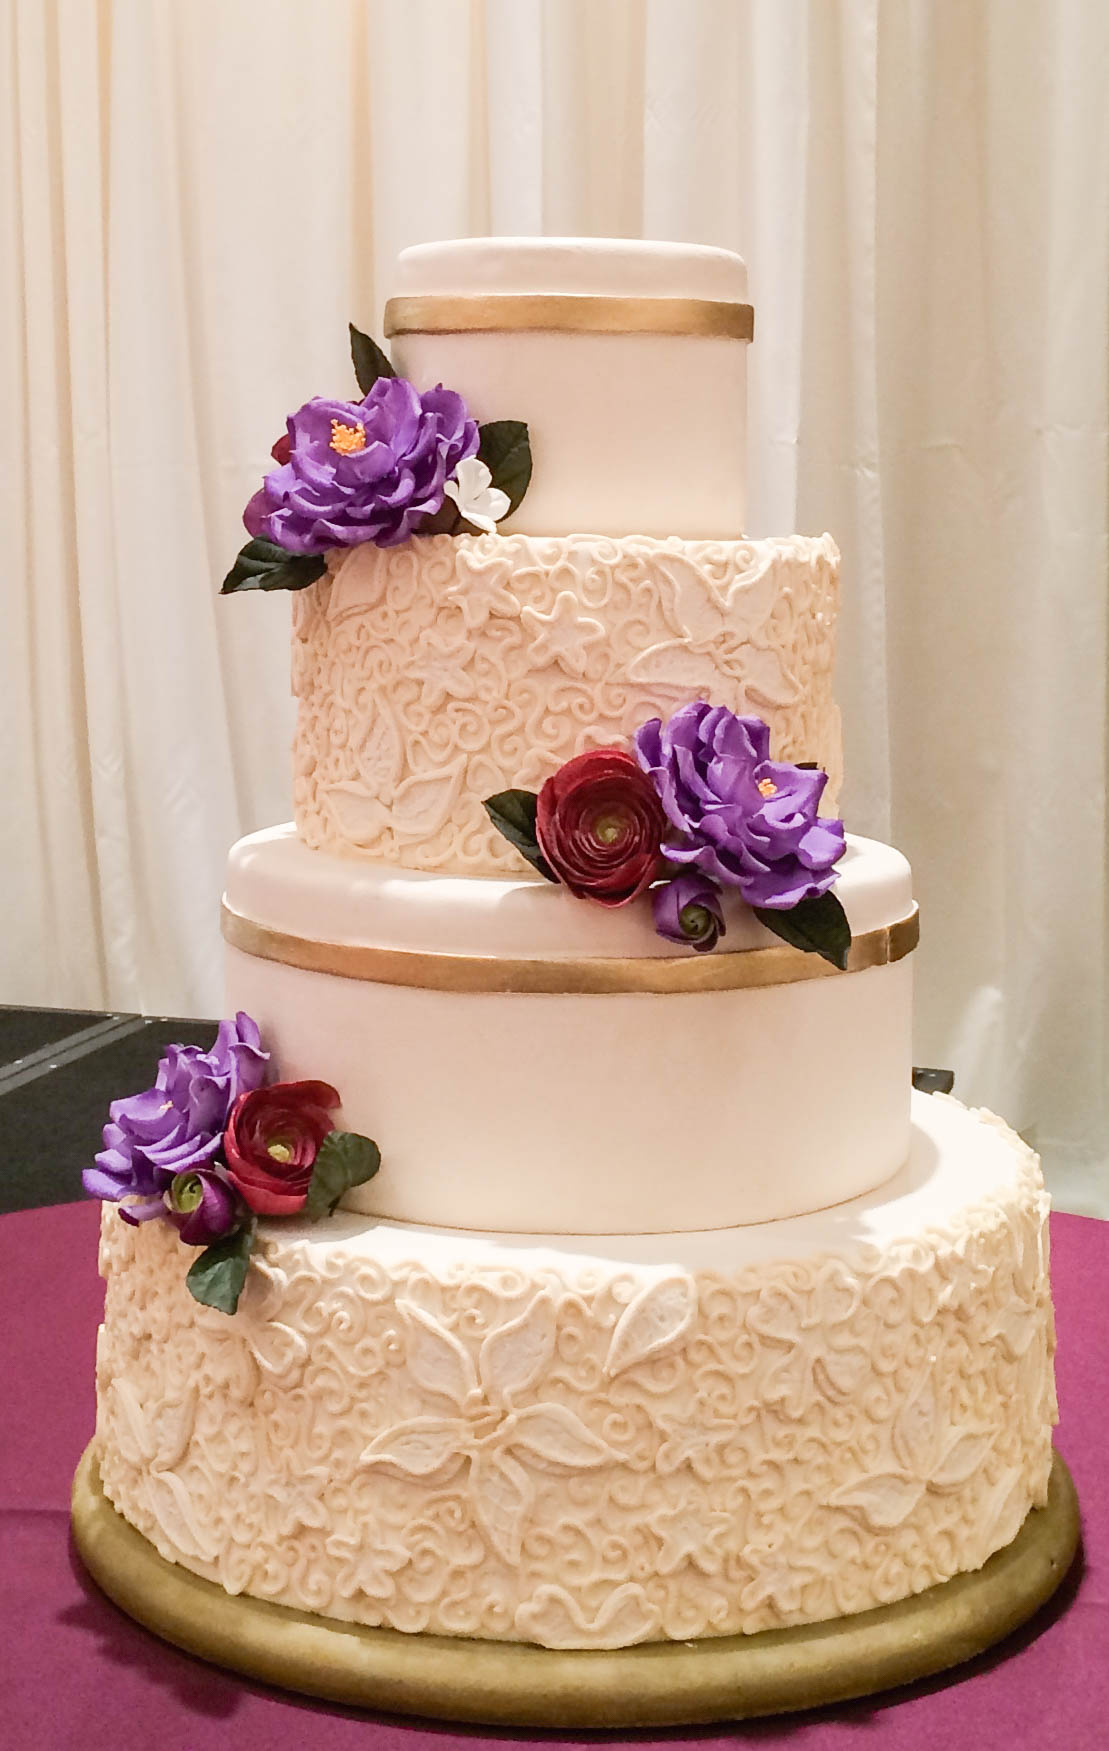
Image via Erin Gardner
Enhance your next cake with elegant details!
Find out how to pipe filigree & gilding, stencil damask & mold cake jewelry today. Enroll Here Now »
You don’t have to dread piping, like I used to, if you prepare your space ahead of time, have a few handy tools nearby, and use S’s and C’s to build your piped scroll designs.
Prep yourself and your space
- Make sure your cake is at a height that works for you. Having to hunch, stretch, or bend to get to your cake is going to make piping more of a chore! It can also contribute to long-term repetitive use problems with your neck, back, or joints. I’m tall, so I’ll sometimes place my turntable on a box that’s been flipped upside down to keep from having to bend or hunch over to get to the cake.
- Roll those sleeves! There’s nothing worse than finishing a good section of piping only to see you’ve been smearing the bottom with your sleeve the whole time.
- Gather your tools and supplies and make sure they’re within arm’s reach.
- Fill your bag, but not too much! Over-filling is a common problem that I’ve encountered with decorators new to piping. Fill the bag so that it sits comfortably in your hand, with the tip of the bag not too far from the tips of your fingers. This will help you maintain steadier control. It’s better to stop and refill frequently rather than make yourself uncomfortable or have to redo your piping because you didn’t have good control of the bag.

Image via julieski
Quick fix supplies
- Paper towels – I always keep a few dry, torn, and stacked paper towels next to me while piping. That way I can grab small pieces as needed. I also keep one or two dampened pieces nearby for keeping my piping tip clean and for clearing larger sections that need to be redone.
- Small bowl of water – For re-dampening paper towels, dipping your brushes, or even your finger tips if they start to feel sticky.
- Fine-tipped paint brush – Dip in water and use to tap down the pointed ends where you leave off, or to clear away small sections that need to be redone.
- Dry towel – Piping bags can get slippery, so I try to keep my hands clean and dry. You can also use the dry towel to wrap your piping bag if you’re having trouble with it slipping in your hand.
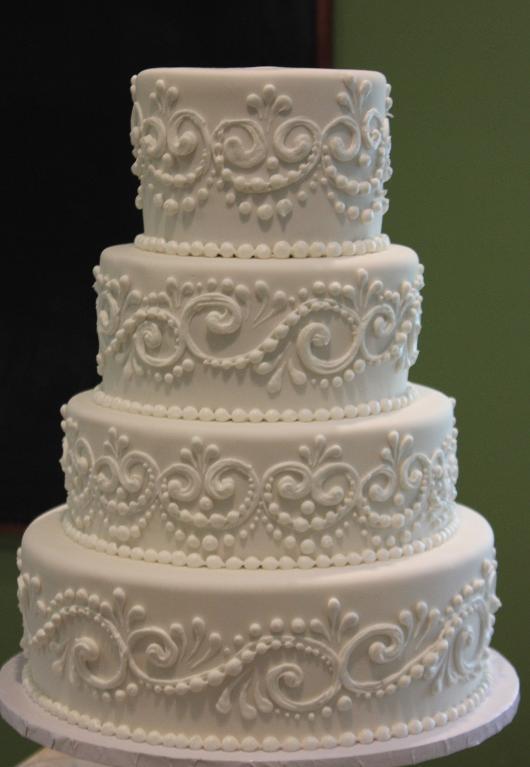
Image via Joshua John Russell
Simple S and C scroll piping
S’s and C’s are the foundation of scroll piping. Once you master these two simple shapes, the possibilities are limitless. You’ll be piping impressive and intricate designs before you know it!
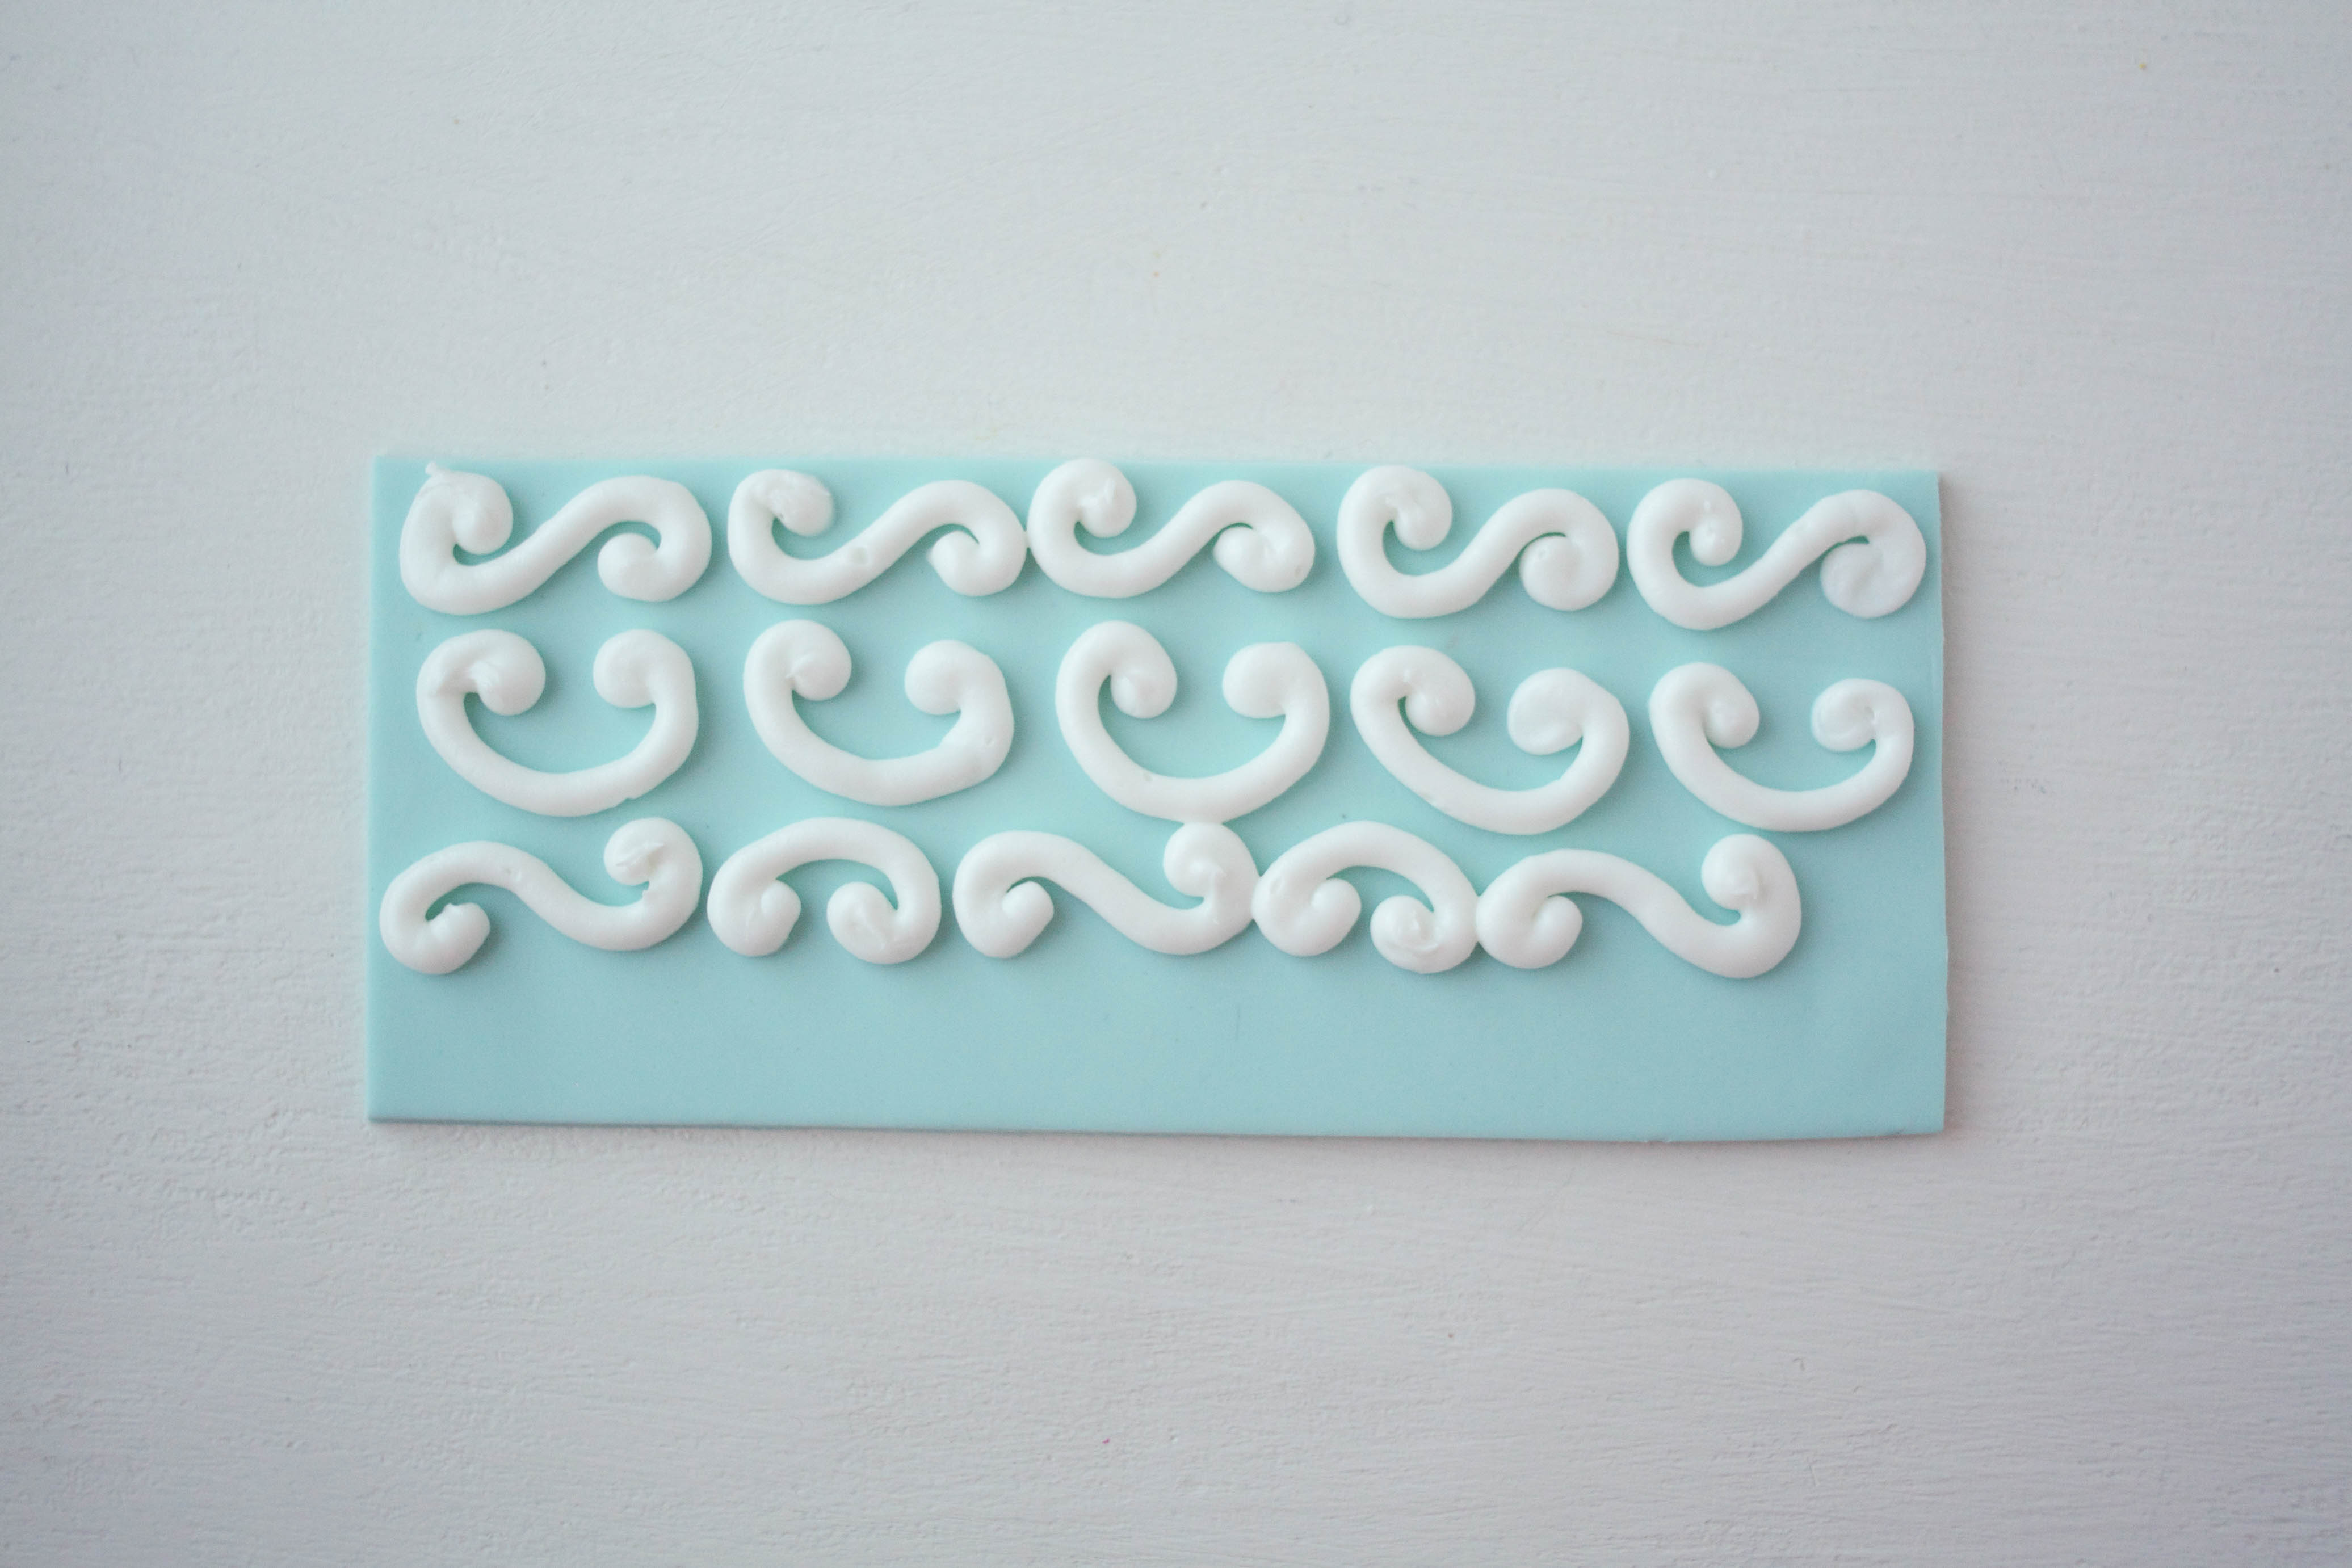
Piping S’s And C’s
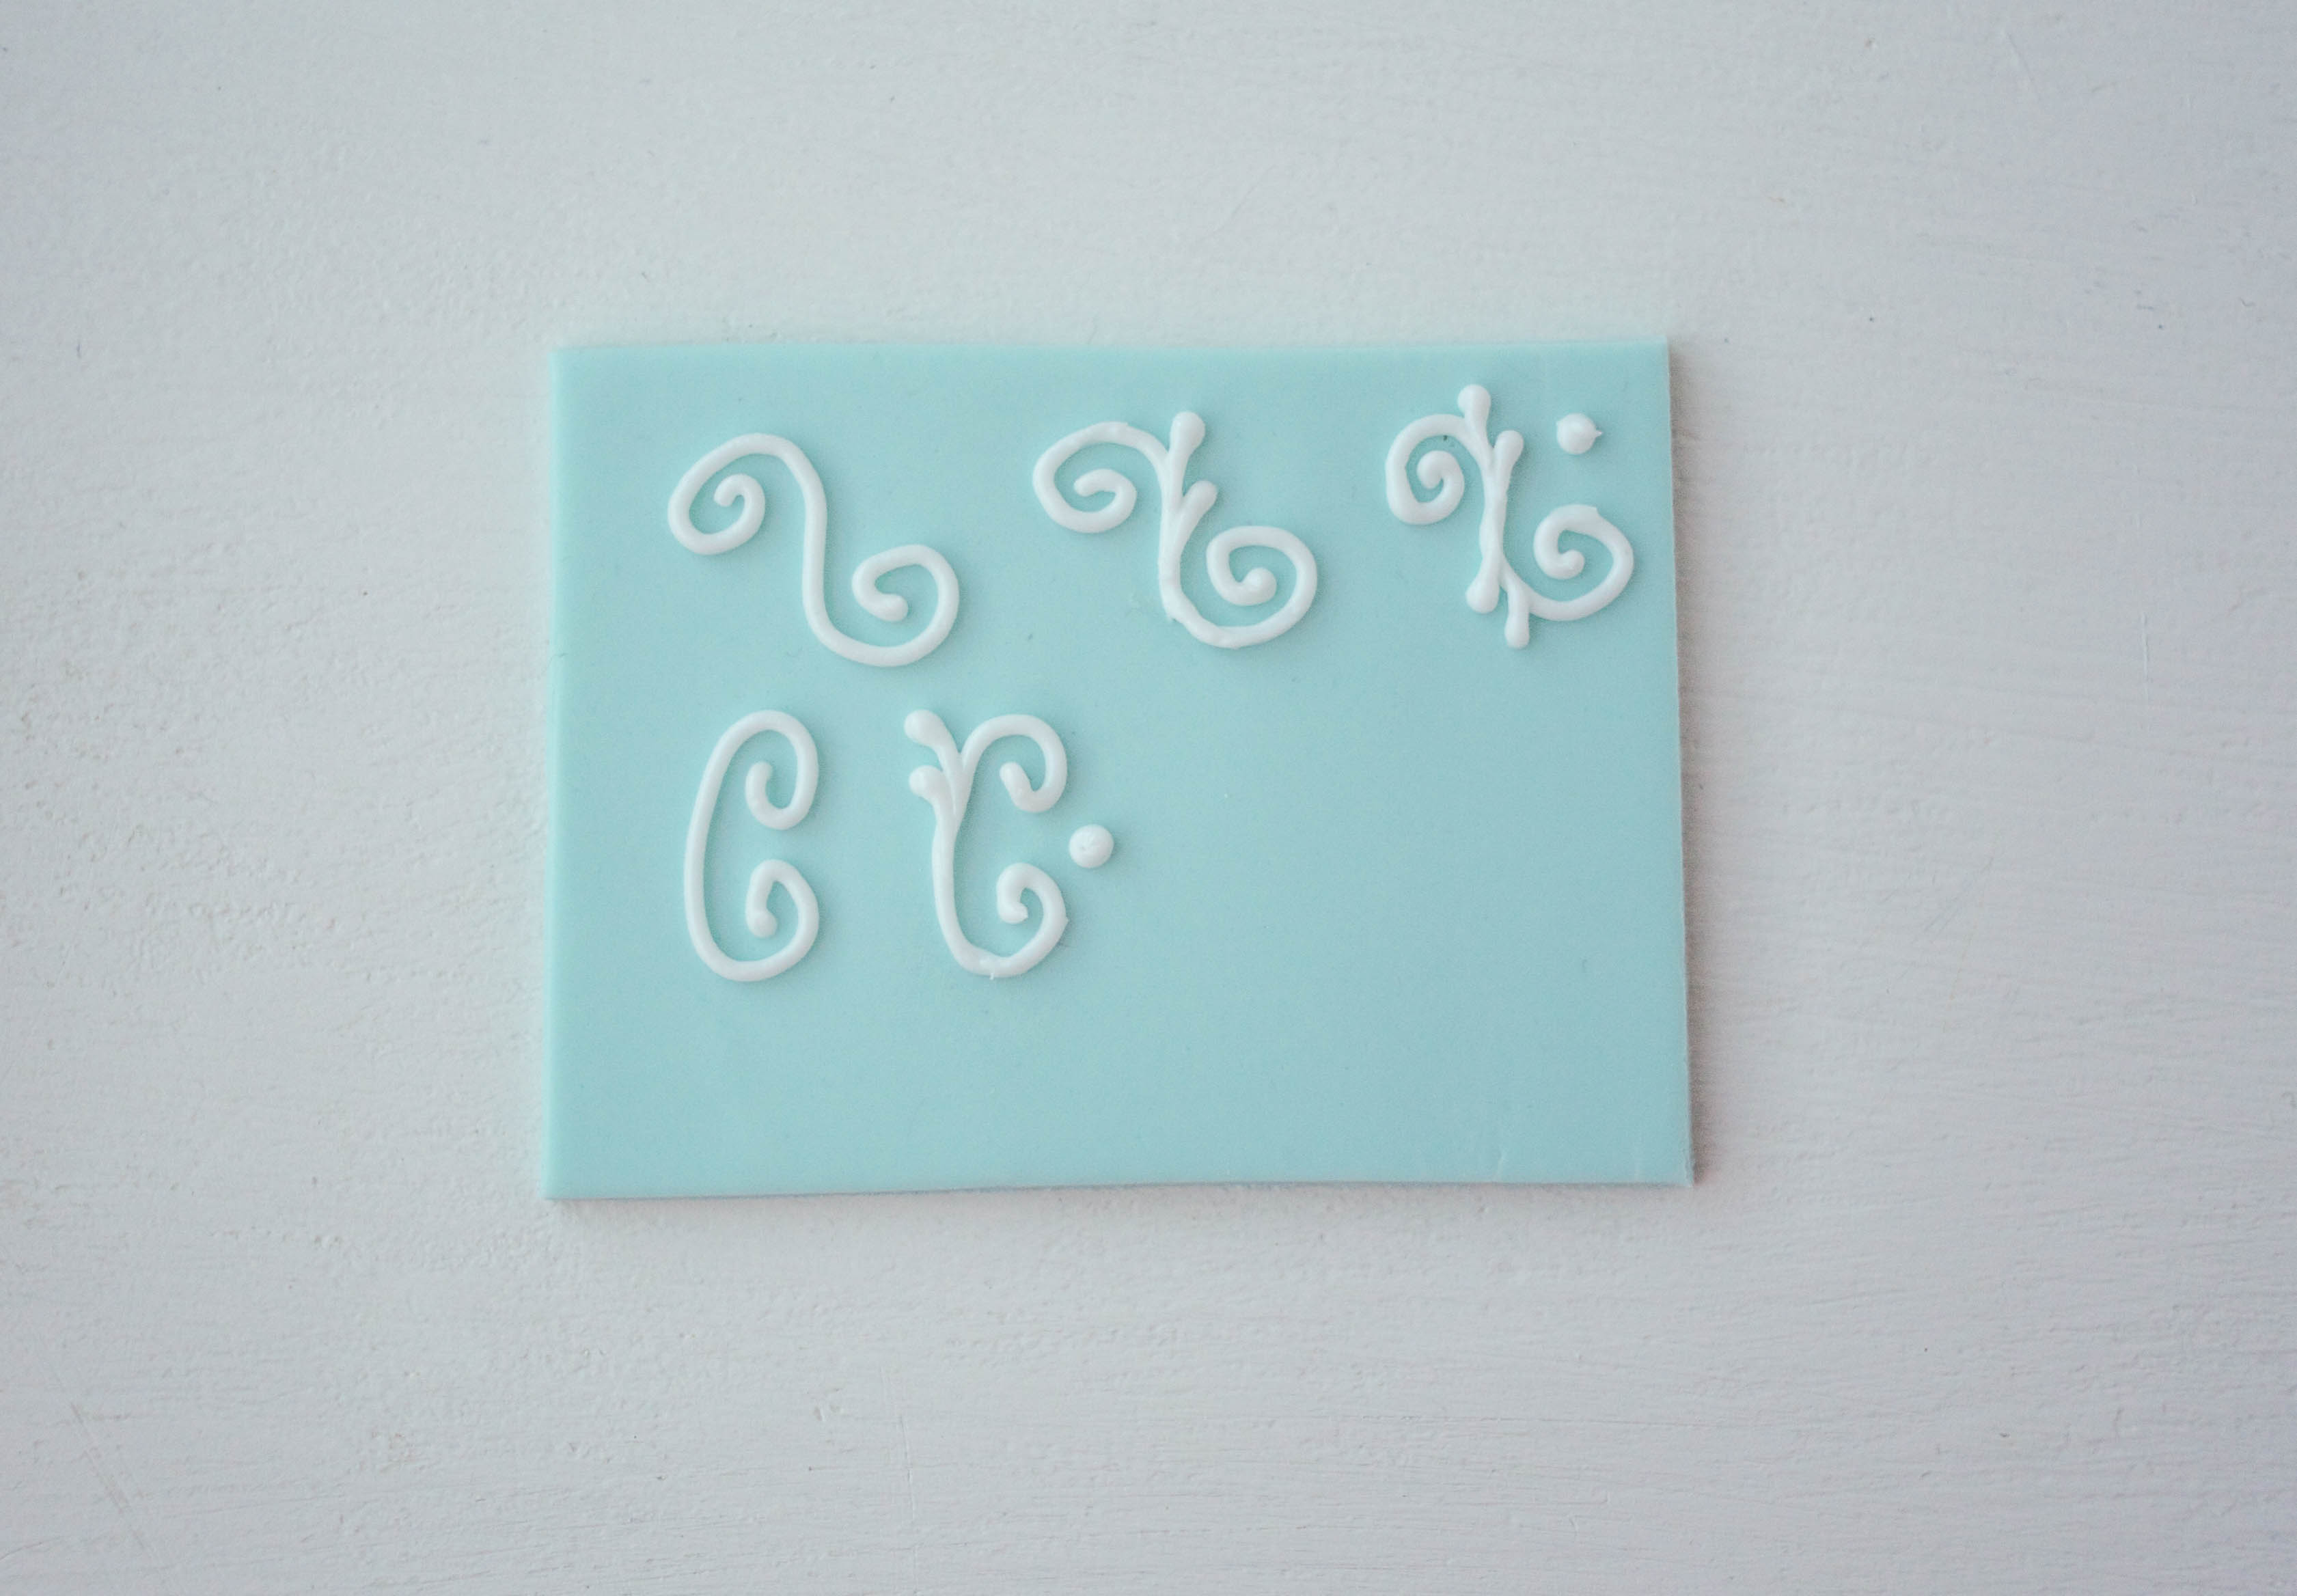
If you’re new to piping, start by practicing the basic S and C shapes. Here I’ve piped a row of simple S’s, C’s, and a final row alternating the two:
Next, I’ve taken those same simple S’s and C’s and piped them in more of a free-form pattern, filling up the piece of fondant.
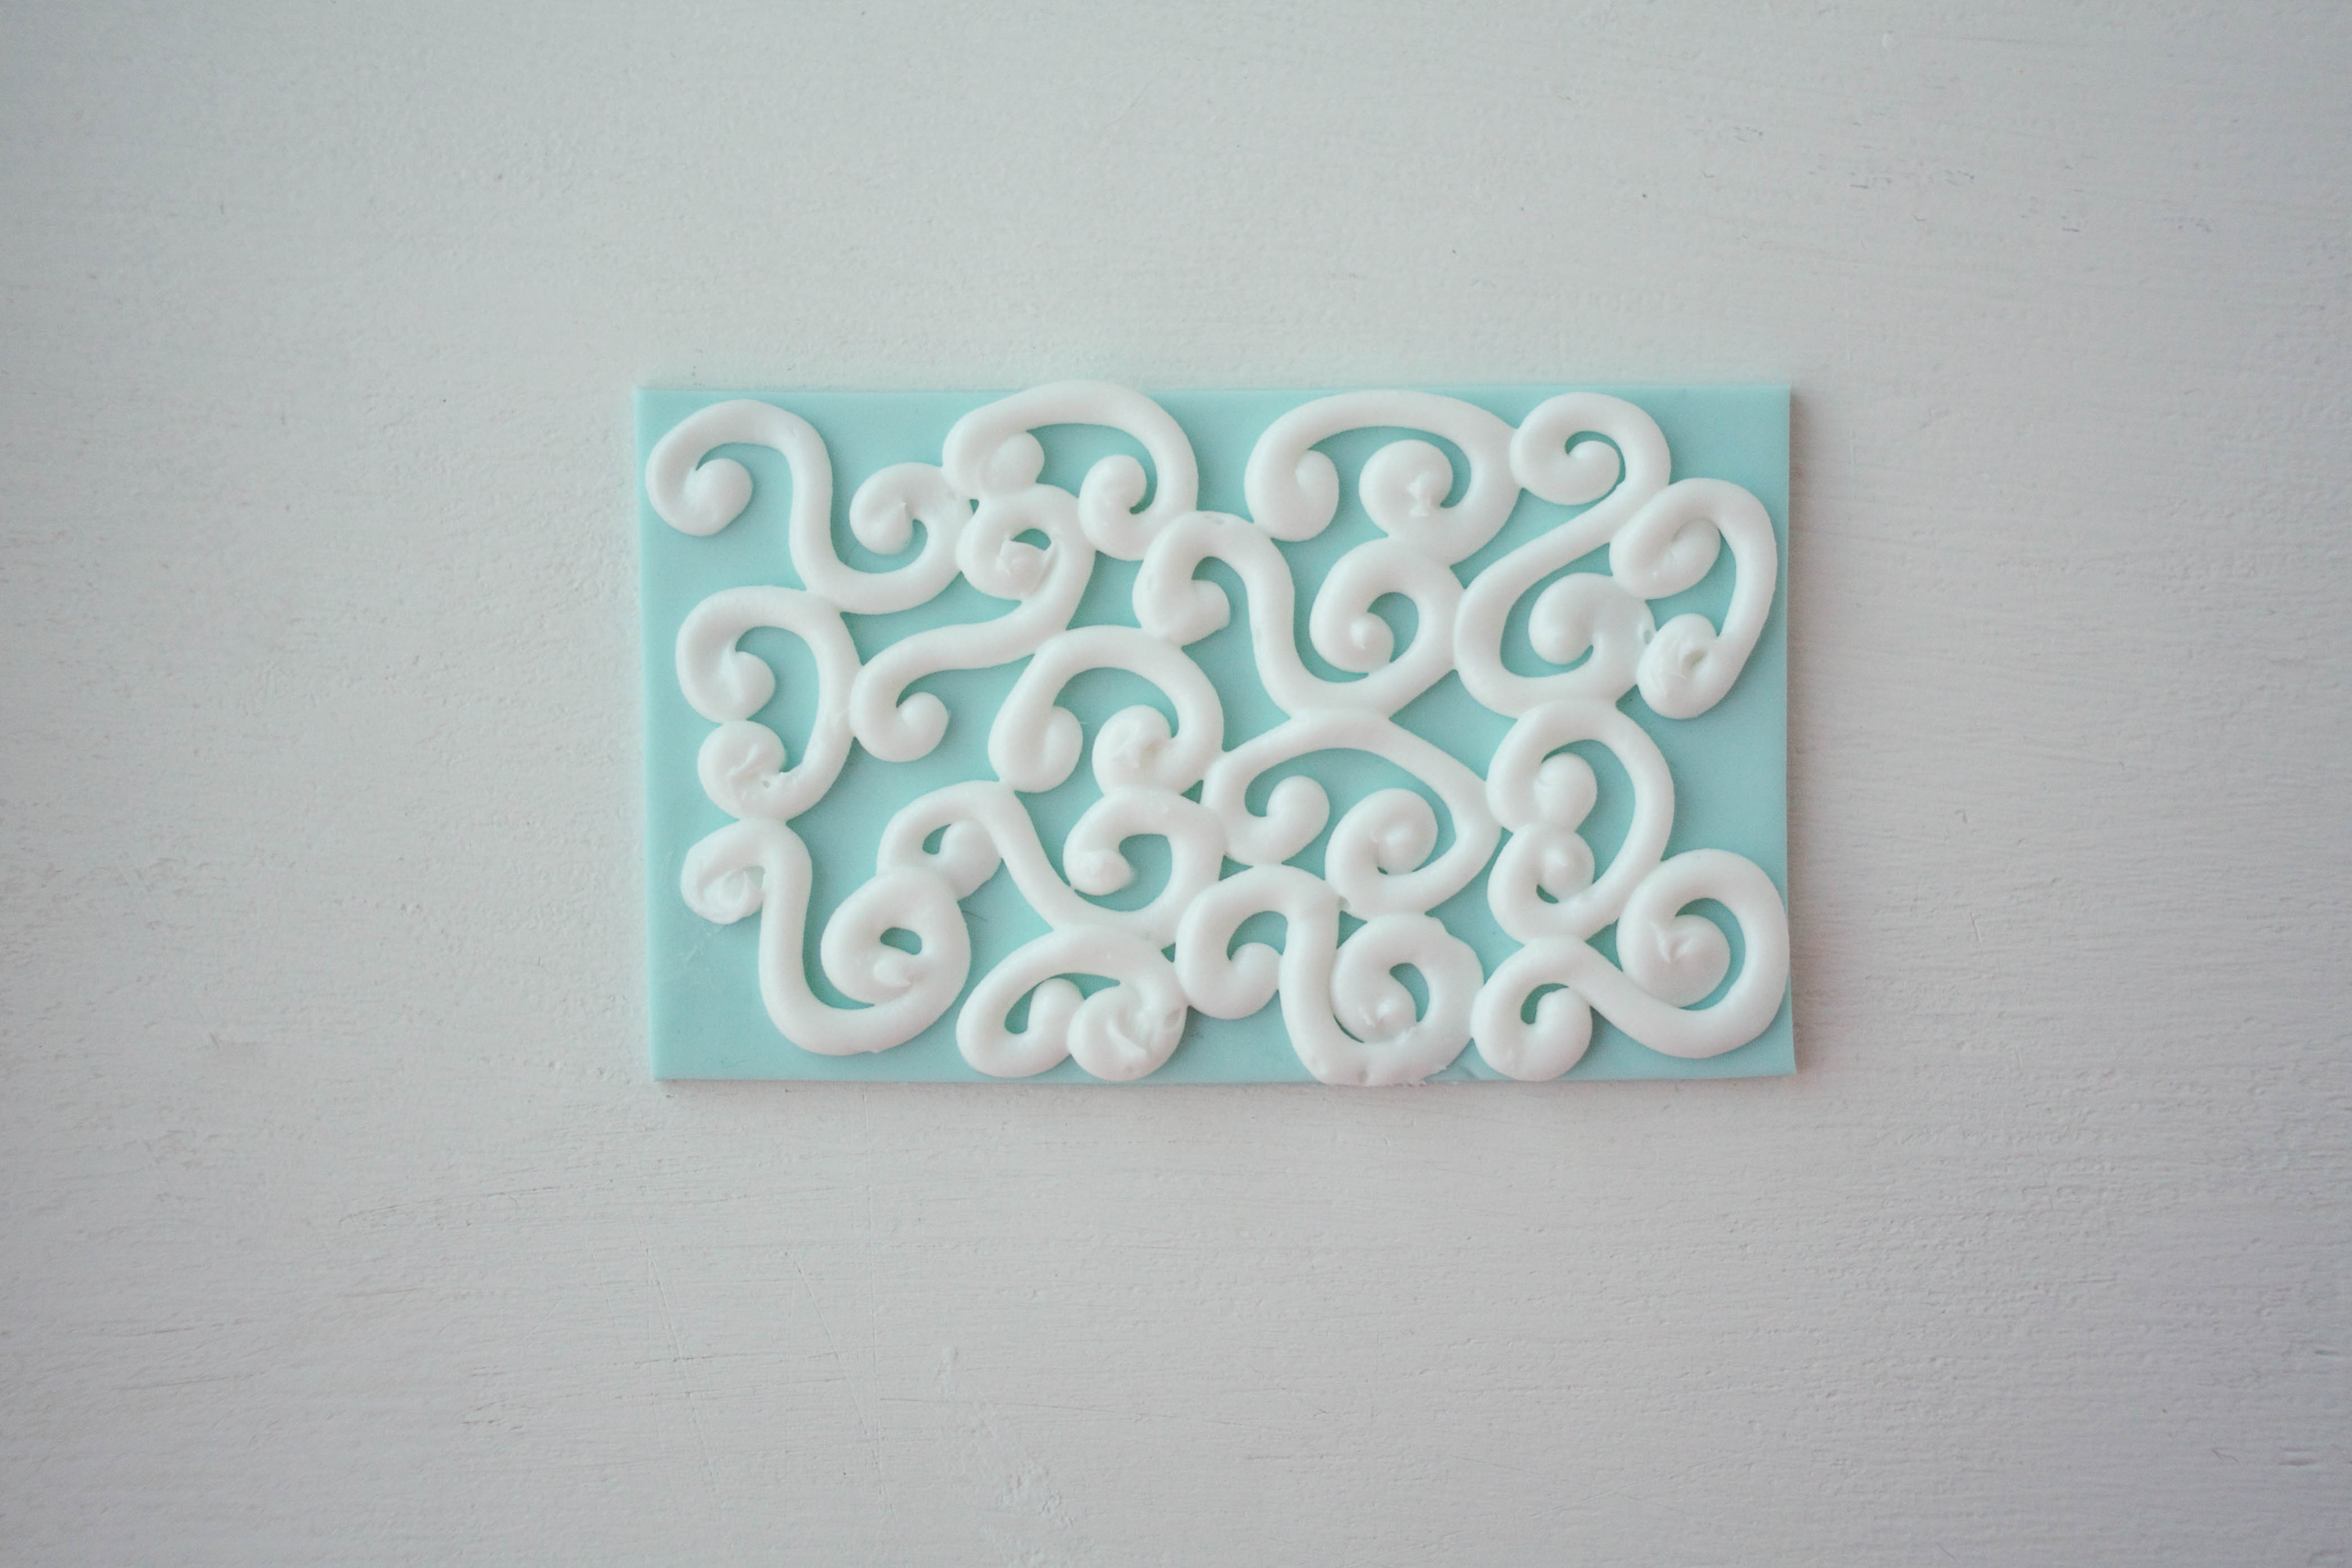
This simple piped pattern is a great way to cover a tier of cake, or to fill in space between other elements like sugar flowers or molded lace.
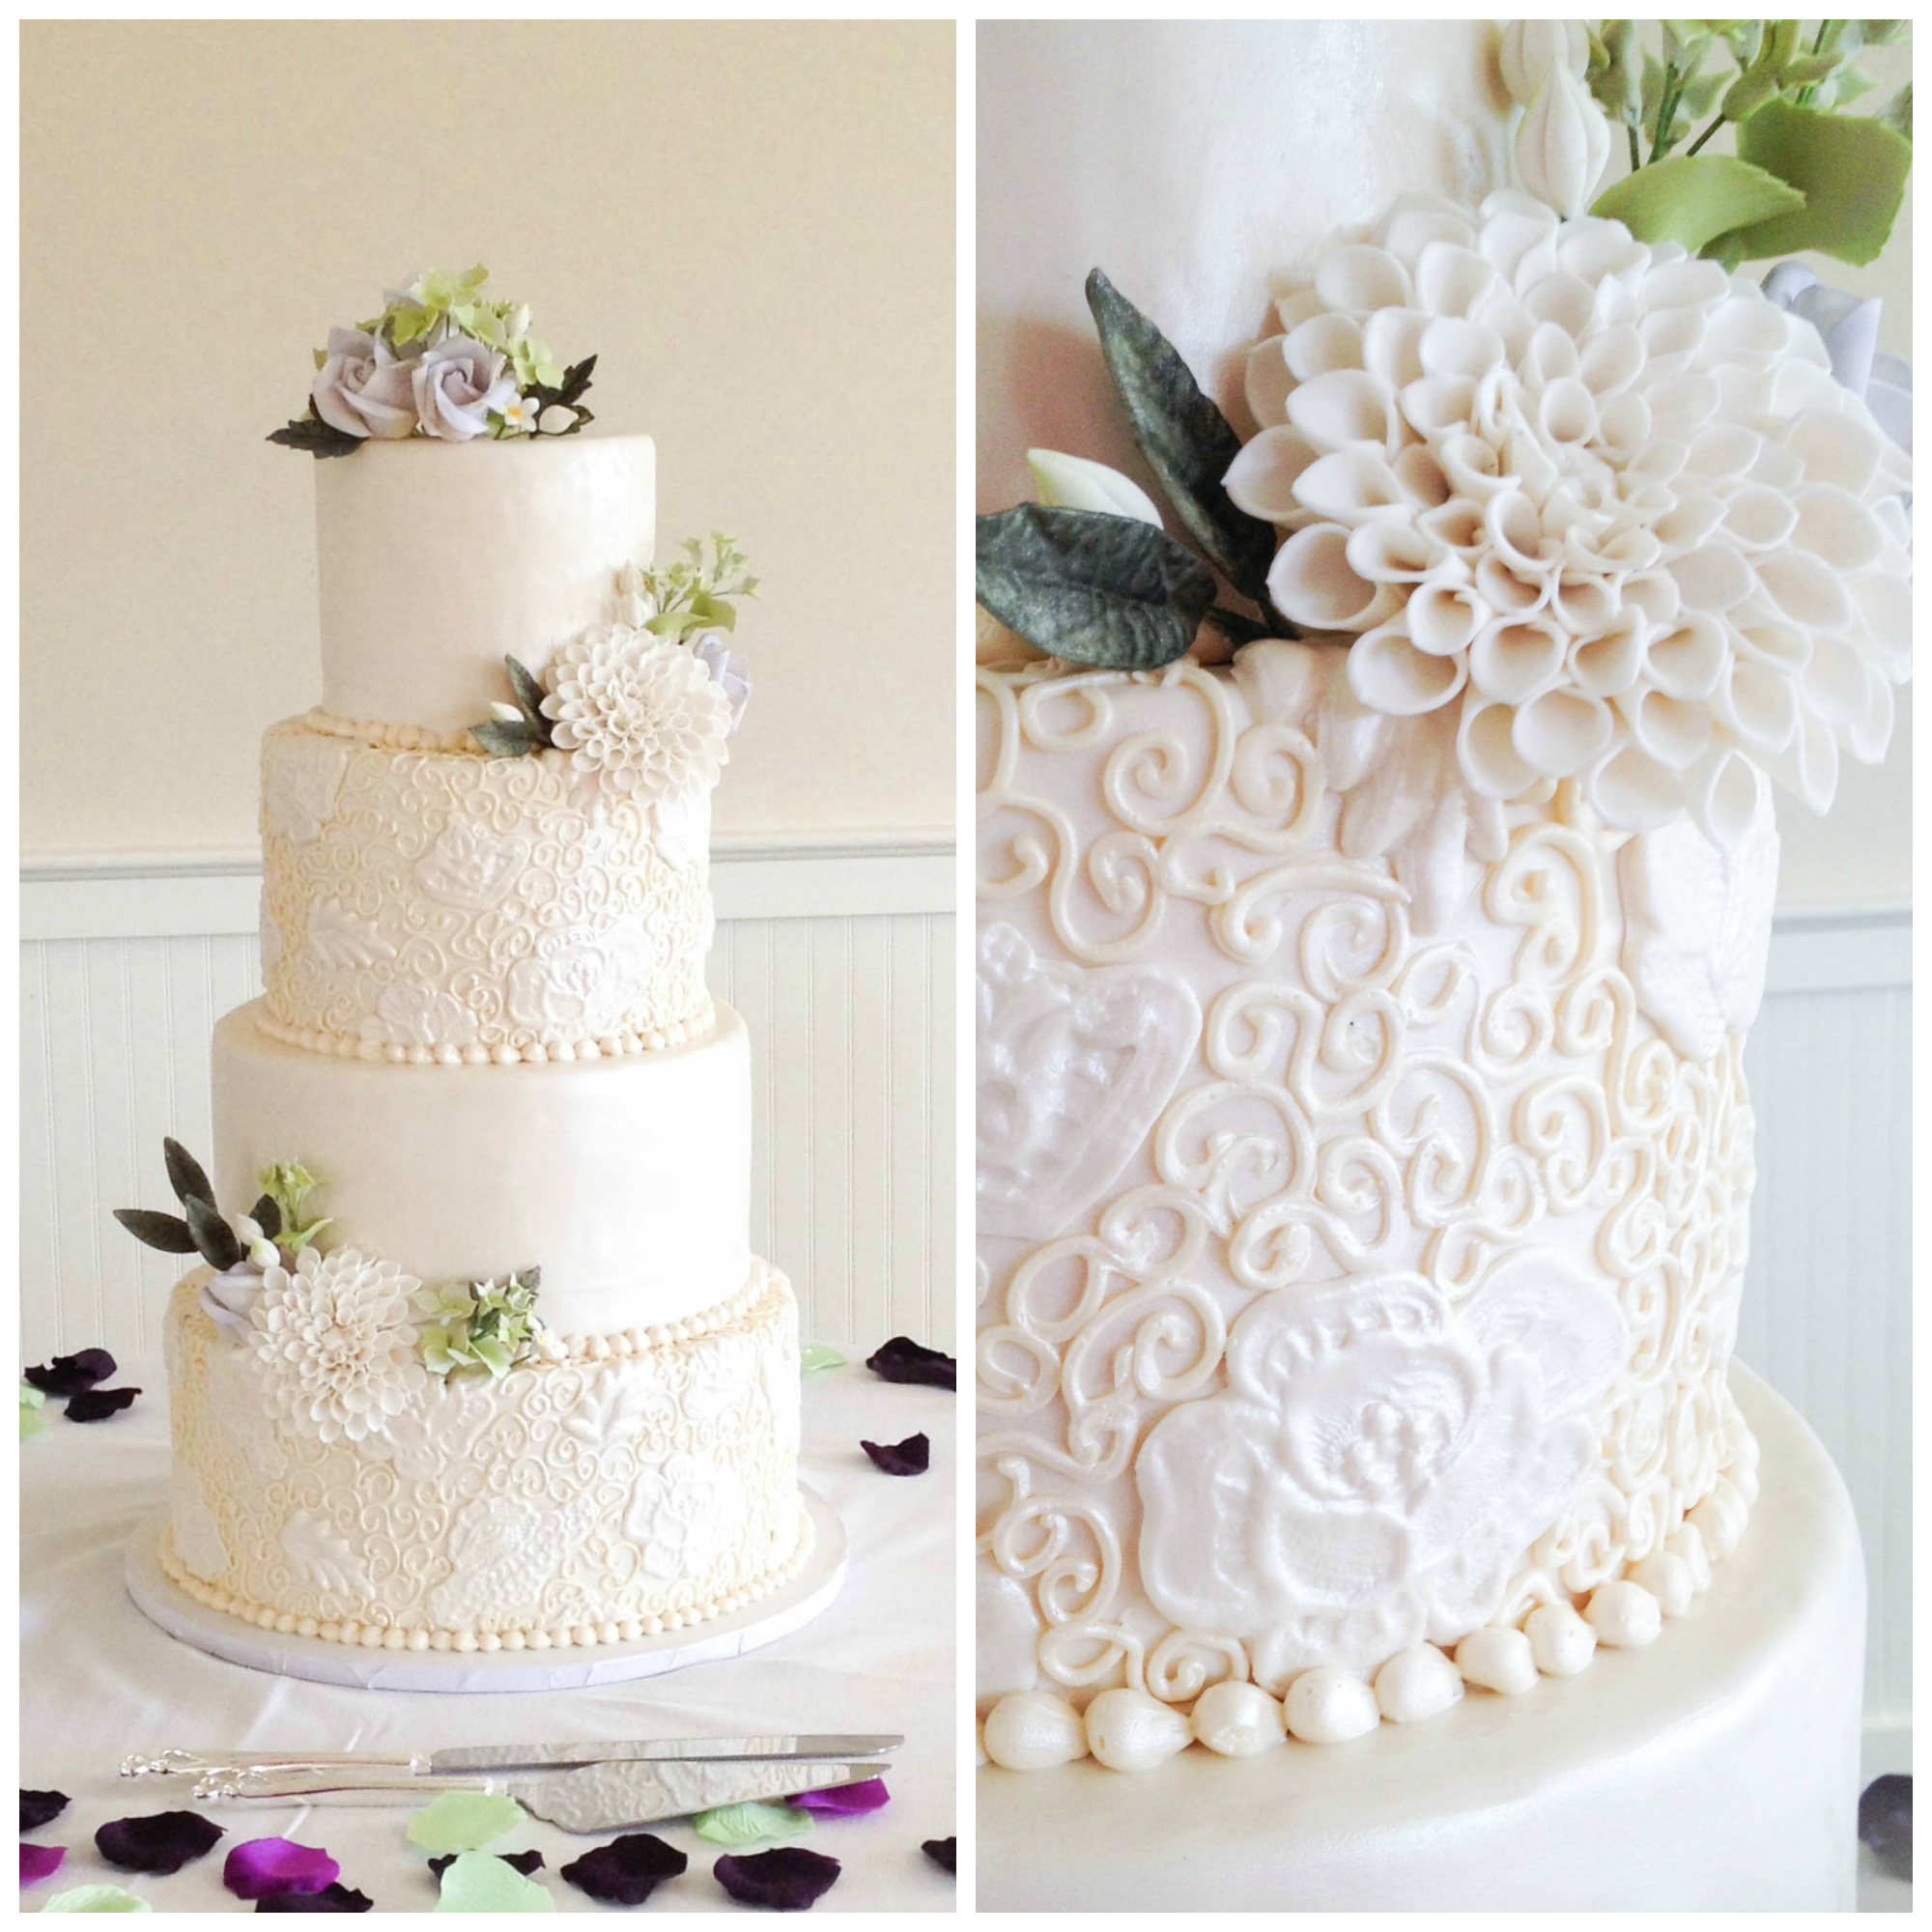
Image via Erin Gardner
Try different tip shapes
Once you’ve gotten the hang of piping S’c and C’s with a smooth tip, try mixing it up with other tip shapes. Here are the exact same piping patterns, but with a small star tip.
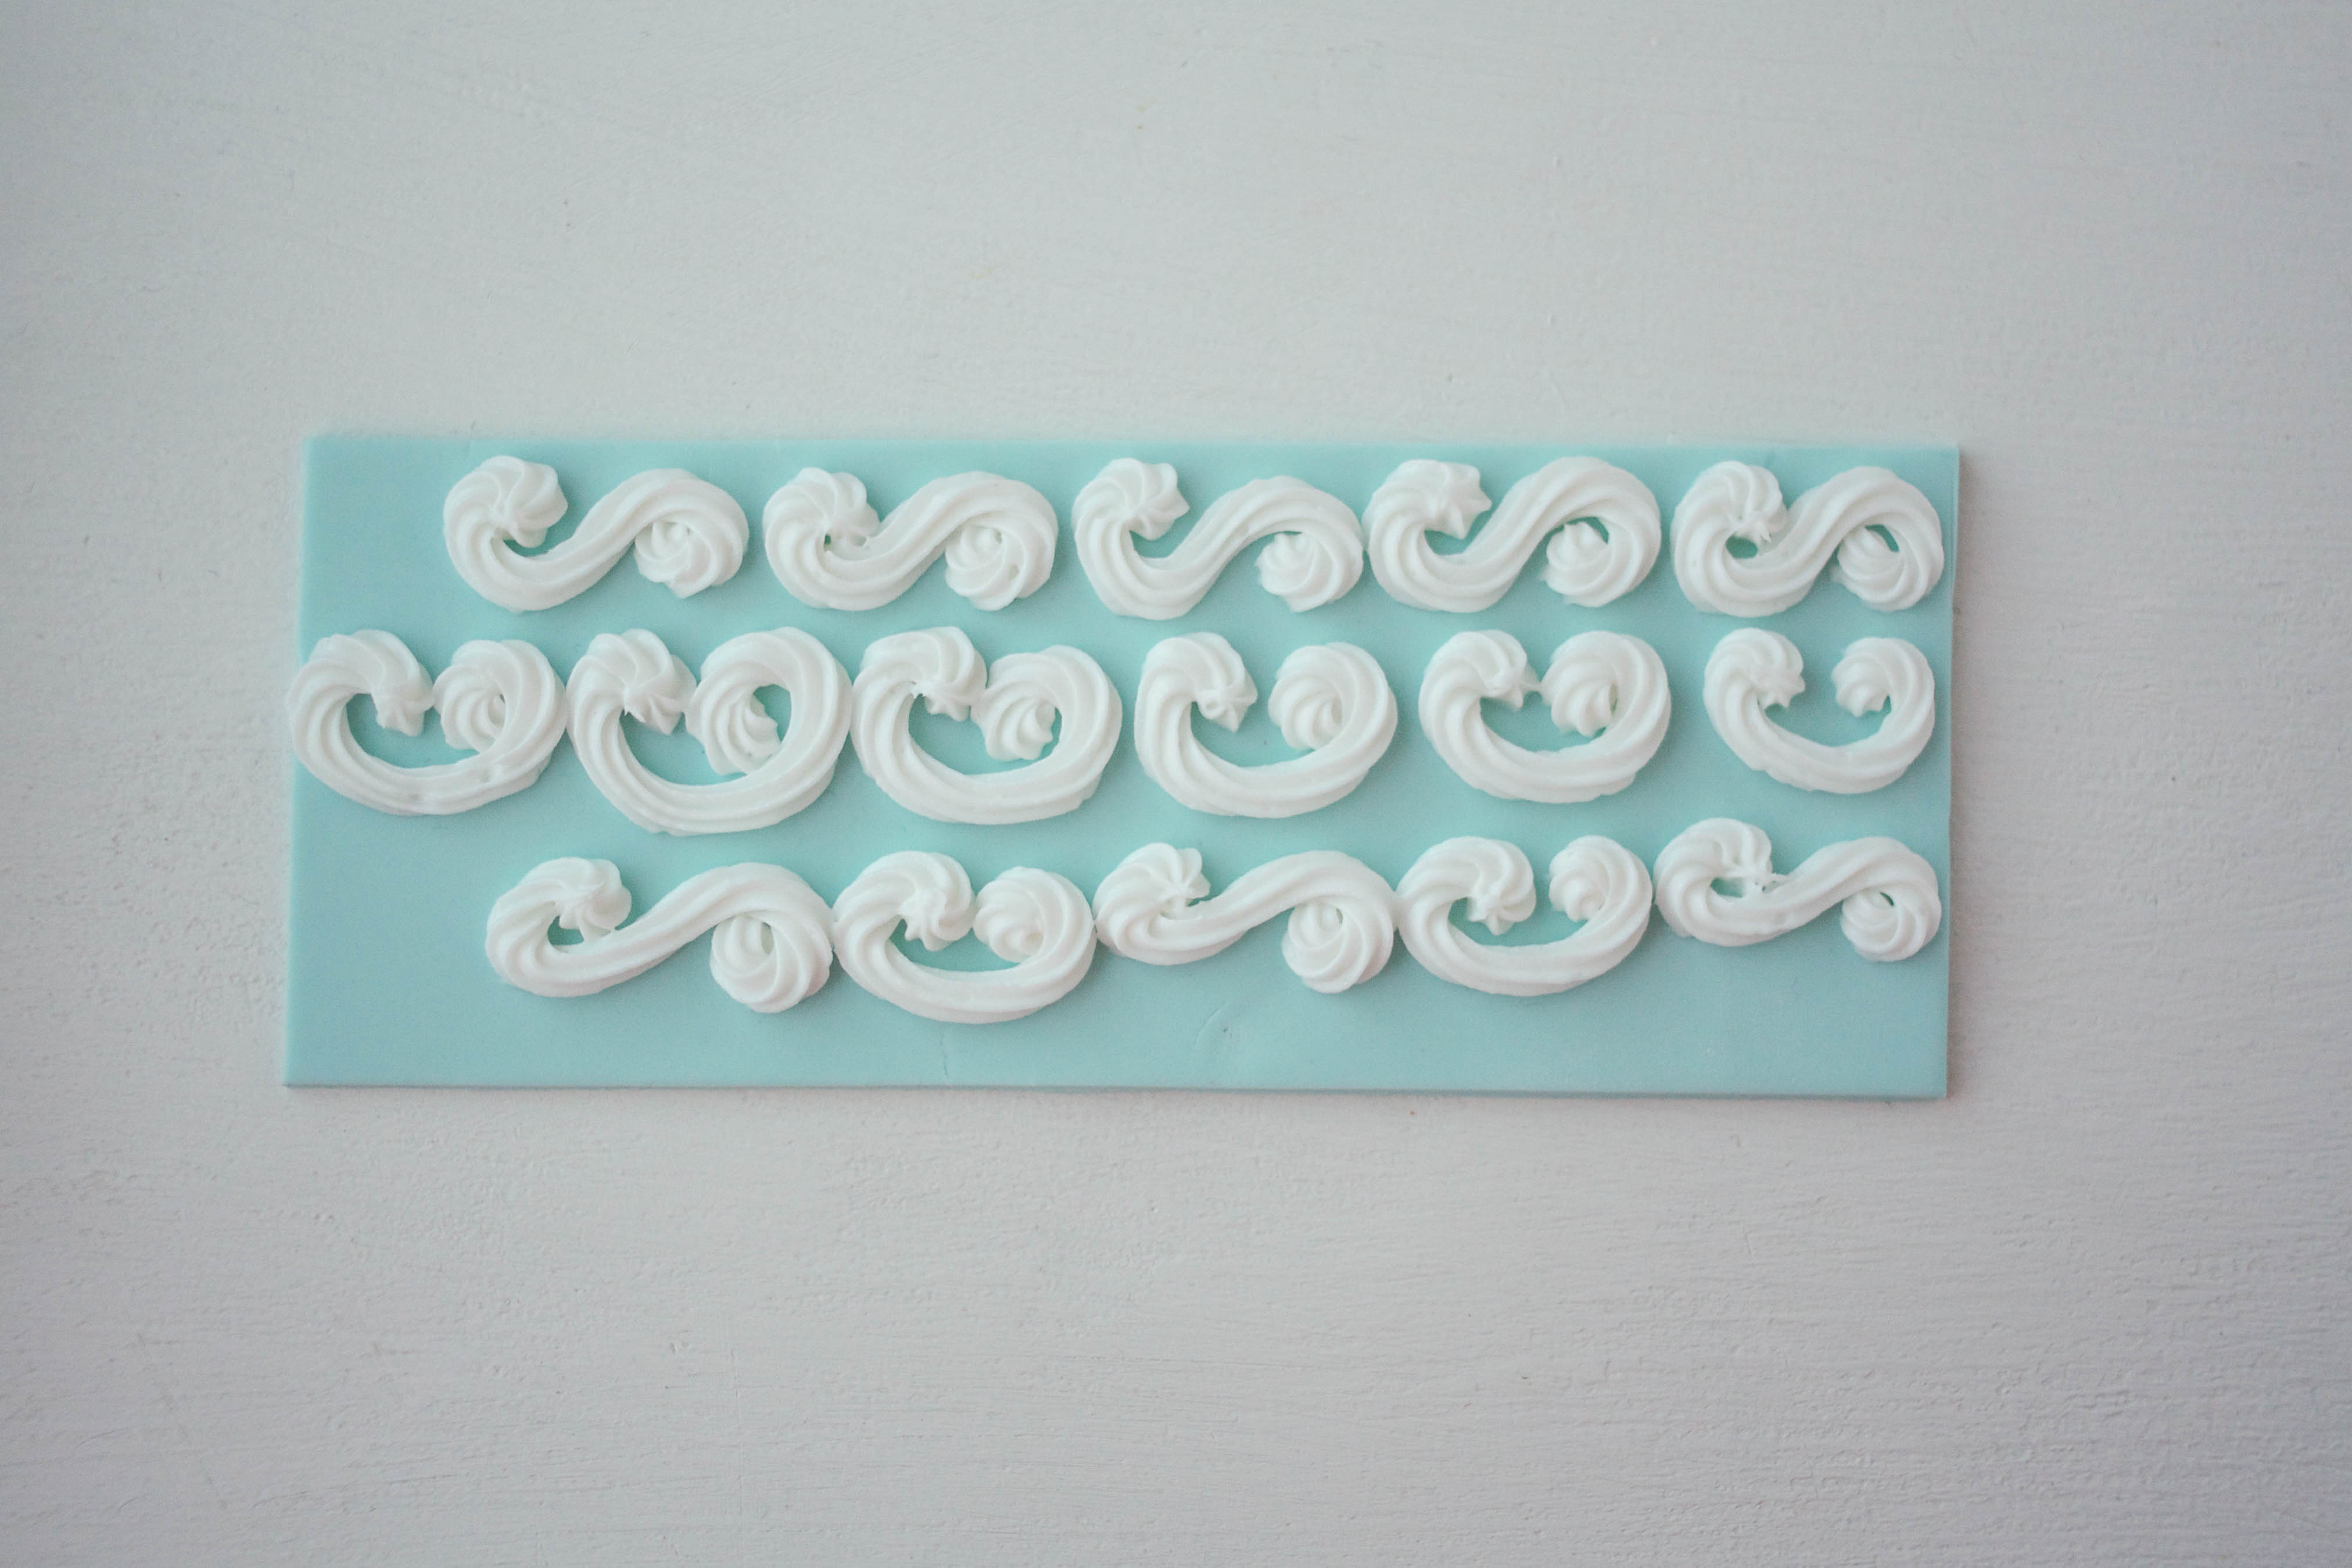
By just switching up the piping tip, the patterns now seem more ornate. This is a great way to add extra detail to a cake design, without adding to your decorating time.
Layer in additional details
Now that you’ve got the hang of S’s and C’s, create more variety in your patterns by adding in simple tear drops and dots.
Here’s the same pattern first done very simply, then done with a few added tear drops and dots.
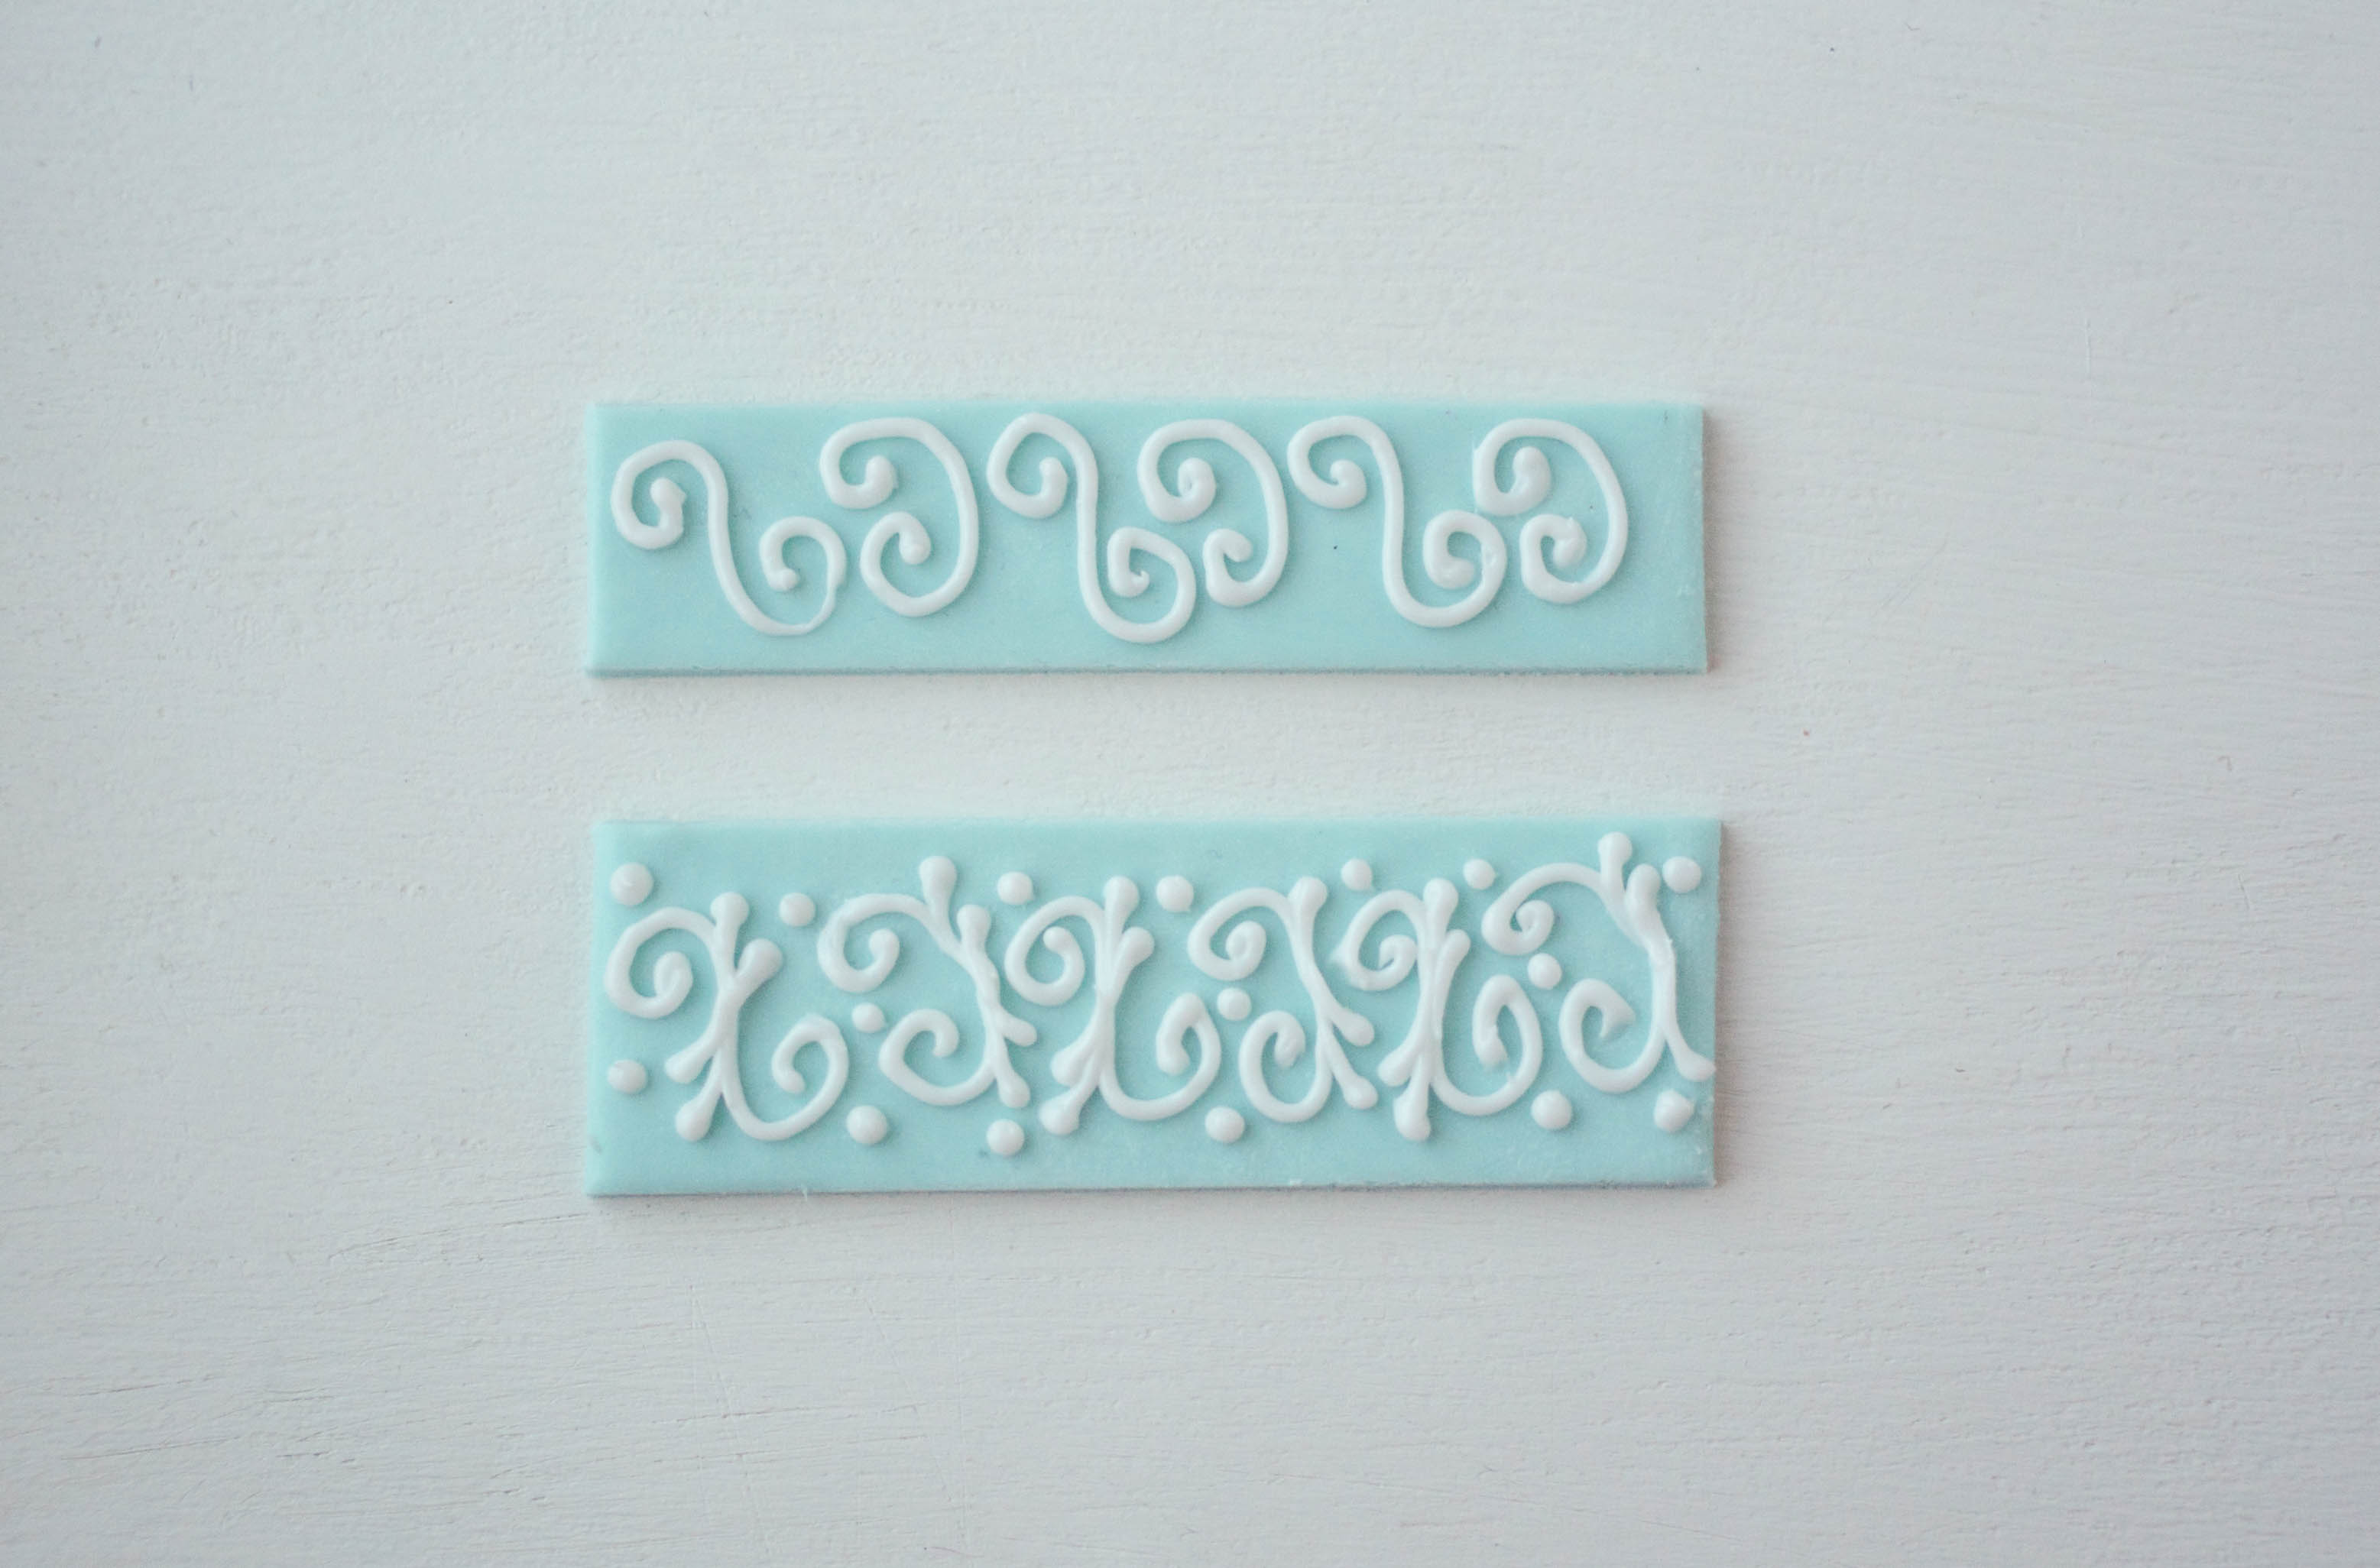
Just a few extra steps took a simple scroll pattern and turned it into something really special! Start with this idea and expand on it even further. Add vines, dots in various sizes, or even simple floral shapes.
Enhance your next cake with elegant details!
Find out how to pipe filigree & gilding, stencil damask & mold cake jewelry today. Enroll Here Now »
Share tips, start a discussion or ask one of our experts or other students a question.
No Responses to “Essential Cake Techniques: A Simple Scroll Piping Method for Impressive Results”