
Have you come across a garment made from a great fabric but the style is out of date? Then you have found an ideal candidate for a refashion project, especially if it’s a lovely silk fabric perfect for a floaty tank top. By creating a basic sloper you can adapt a traditional shirt pattern to make a variety of different looks and come up with different blouse and top variations using some simple pattern manipulation.
This refashion blouse project will take your top from tired to trending in no time flat!
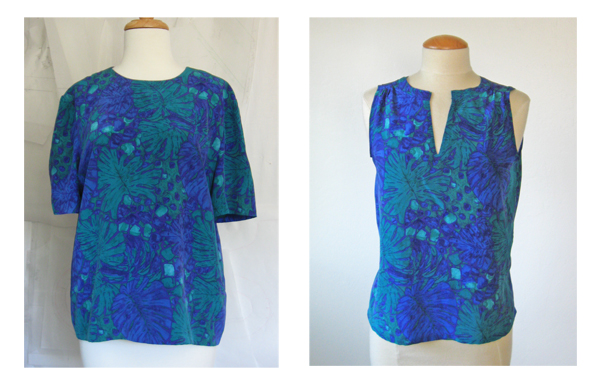
Images via SunnyGal Studio
This silk short sleeve top shown on the left was given to me and while the fabric was luscious the shape and the neckline were definitely past their prime. Some of these not quite vintage items yield a nice amount of fabric so I got started with a little pattern designing to take advantage of usable sections.
A basic shirt pattern can be used as the building block to create variations. In this instance, I decided to manipulate the darts into gathers. Here are the steps used to create this top.
1. Trace the basic shirt pattern pieces.
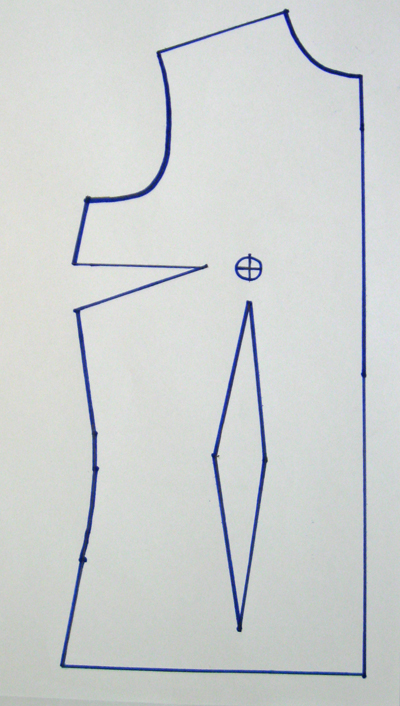
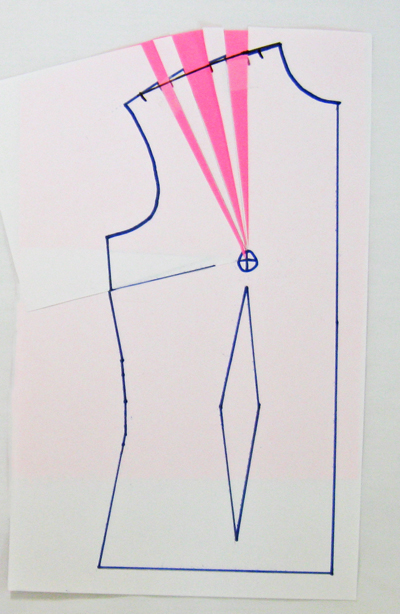
For a sleeveless top trace the front and back pattern pieces. For this top, I just made changes on the front only. Here the bust and waist darts are traced and the seam allowances removed. After all the design changes are completed I will add back the seam allowances but it is easier to work with a sloper with no seam allowances. Mark the bust point on the sloper, that will be used as the radius point for the dart manipulation.
2. Draw in your design changes.
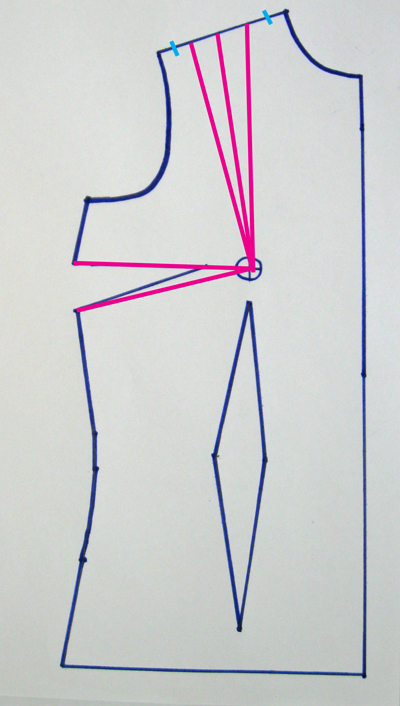
The bust dart will be closed and the dart fullness will be pivoted into gathers at the shoulder. Mark the dart legs all the way to the bust point. At the shoulder, make two marks slightly in from each edge (blue lines). The gathers will be distributed between those points. Then draw three lines from the shoulder seam to the bust point. Start in the middle and then divide the remaining space on either side, placing the remaining two slash lines there.
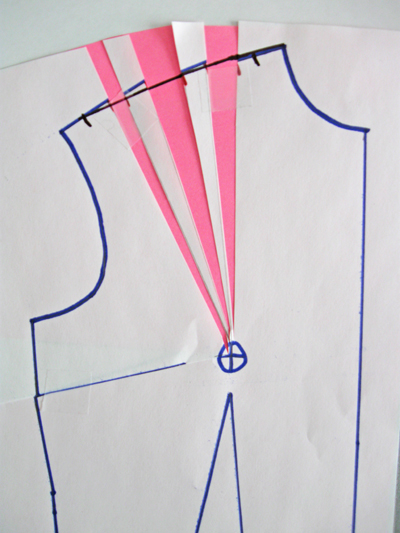
3. Slash and spread
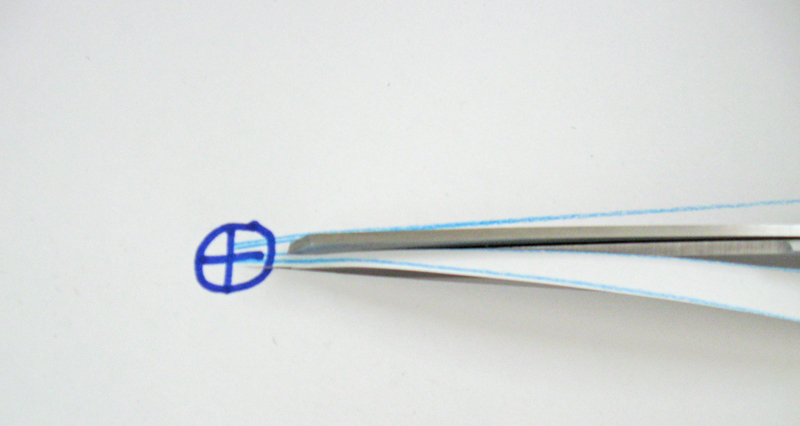
Nothing frightening here, despite the wording. This is the fun part, actually changing the shape of the pattern. Slash along the lines from shoulder to bust point, leaving a tiny piece of the paper attached at the tip of each slash. This will allow you to pivot the pieces and spread the pattern apart to create the fullness. Leave this section as is for now.
4. Close the bust dart and spread at the shoulder area.
Bring the two edges of the bust dart together to close it and tape together. The fullness that had been there will now be able to open up in the shoulder area, which has already been slashed.
I always find it fascinating to see how the paper pattern responds to the changes. Now that the bust dart is closed, the fullness finds a home at the shoulder area where we have slashed and now can spread. The reason for more than one slash is to be able to spread the gathers evenly across the area. Slide a piece of paper under your pattern which will serve to fill in these spaces made by spreading at the slash points. Once you have spread the pattern evenly (no need to measure, just shift the paper so it looks evenly spread) then tape it all down onto the paper underneath. Here I used pink paper underneath so the slashing and spreading is very visible.
5. Redraw the shoulder seam.
Now that we have slashed and added fullness to the shoulder seam it needs to be redrawn. Use a curve to get a nice line and connect the shoulder seam, here shown in black marker.
6. Add back your seam allowances and walk your seams.
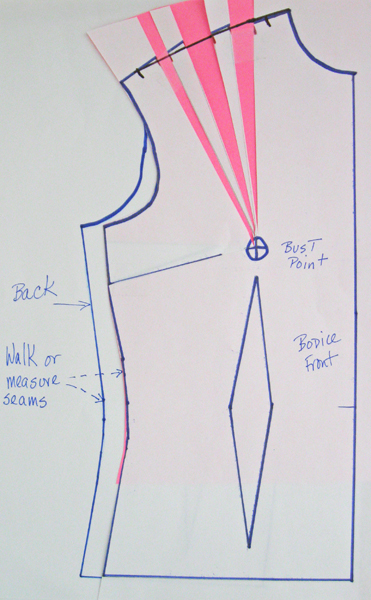
Make sure that all the seams match up properly. In this example it is the side seam where the bust dart has been removed where the front and back need to match. Lay the front piece over the back and make sure the side seam length matches. Adjust where needed.
To test my new pattern, I used a lightweight cotton fabric and sewed up a wearable muslin.

The shoulder gathers are easier to see on this light color version. The armholes are finished with a self-fabric bias binding and I made a placket for the neckline edge using the pattern as a template.
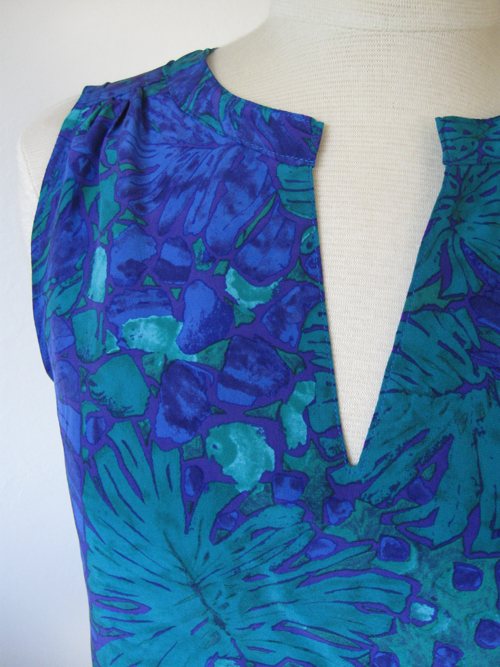
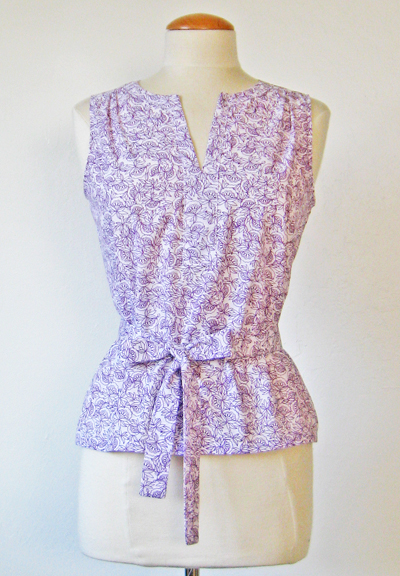
Same treatment on the silk version, with a slight change on the neckline to create a front V-neck opening that was topstitched.
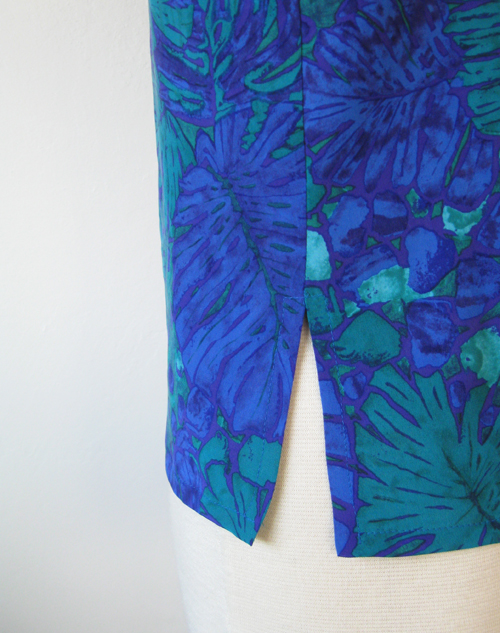
I skipped the front and back waist darts but left the side seams open about 3″ above the hem to create a vent.
So now I have a floaty new top and a new blouse sloper in my pattern repertoire. The original silk outfit included a skirt so there may be more refashioning in the future!
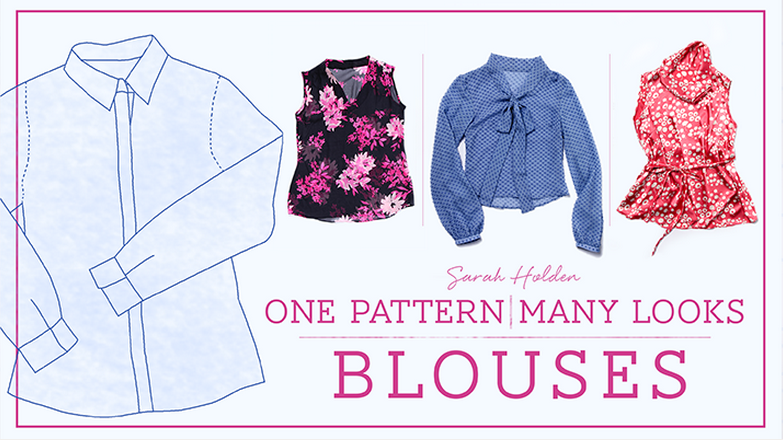
The techniques shown here, plus so much more, can be found in the Craftsy class One Pattern, Many Looks: Blouses. I can’t wait to try a cowl neck top with some silk charmeuse that has been in my fabric stash for too long!
Share tips, start a discussion or ask one of our experts or other students a question.
No Responses to “Fashion Redemption: How to Refashion a Basic Blouse to Elegant Tank”