
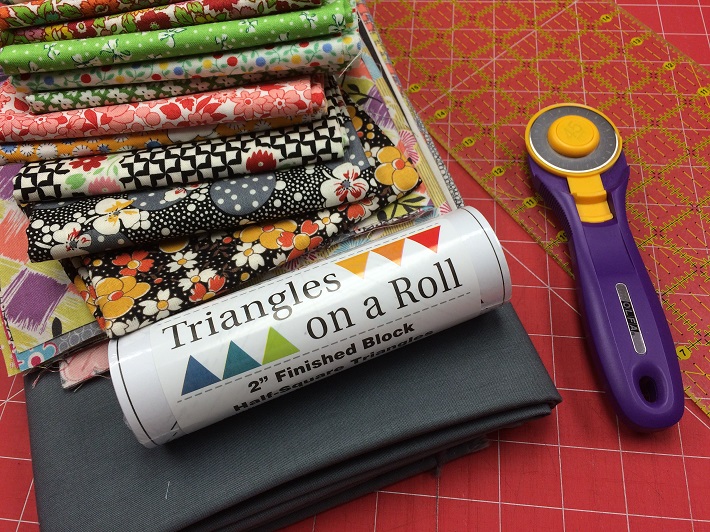
Do you want to sew perfect triangles every time? Do you need to make a lot of triangles but don’t enjoy trimming each and every one? Do you have a pattern that calls for triangles and you want to make sure they are precise? Consider using Triangles on A Roll! Available in almost any size you might need, this product makes perfect triangles every time, and there is no waste and no tedious trimming!
Follow along with this simple tutorial that will show you how to use this quilters’ secret for sewing perfect triangles every time!
How to sew Triangles on a Roll
Step 1:
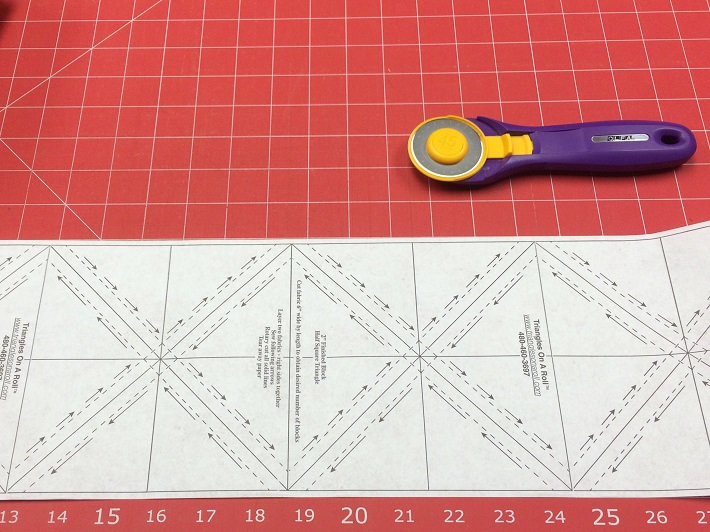
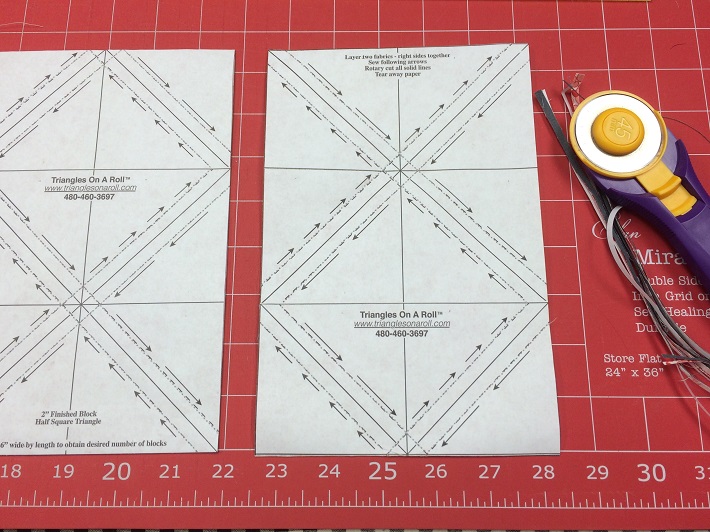
Unroll the paper and cut along the line that will give you the number of triangles needed. Working in sections of 18” or less is easiest and allows for cutting from fat quarters and smaller pieces of fabric. The strip will need to be cut as wide as the paper roll. In this example for 2 1/2″ finished triangles, the roll is 6” wide. The two strips of fabric are cut 6” x 18” in this example.
Step 2:
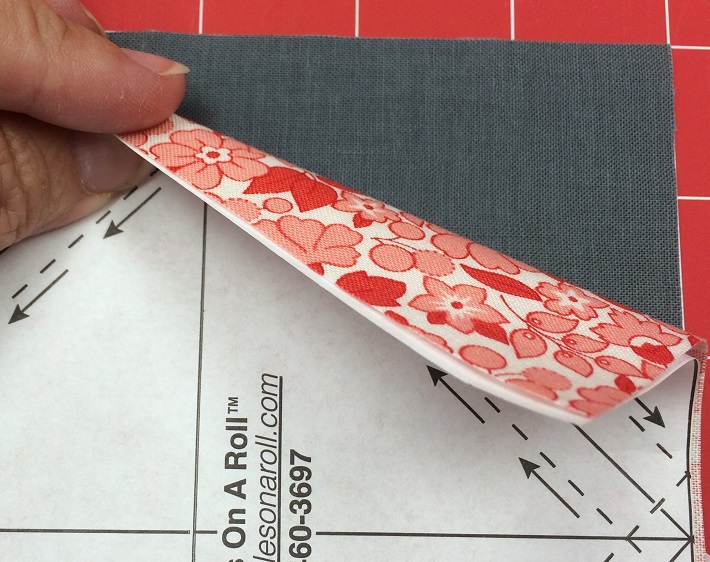
Layer the fabrics right sides together, with the paper on top. Notice how the lighter fabric is next to the paper and the darker fabric is not touching the paper. This will be helpful when pressing later. Pin the layers together with straight pins.
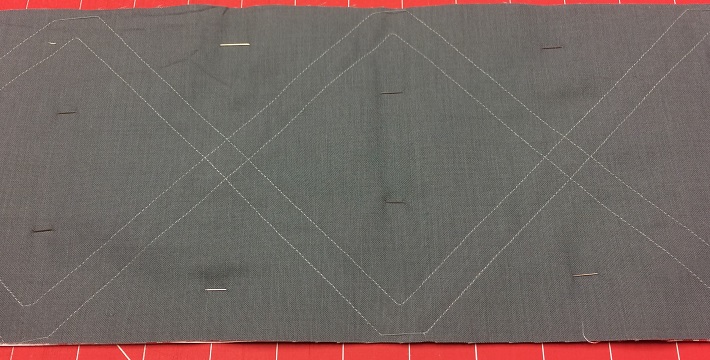
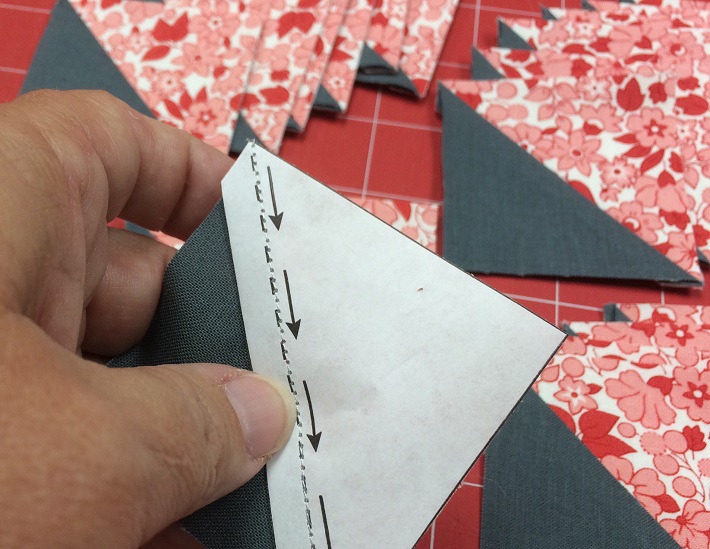
Step 3:
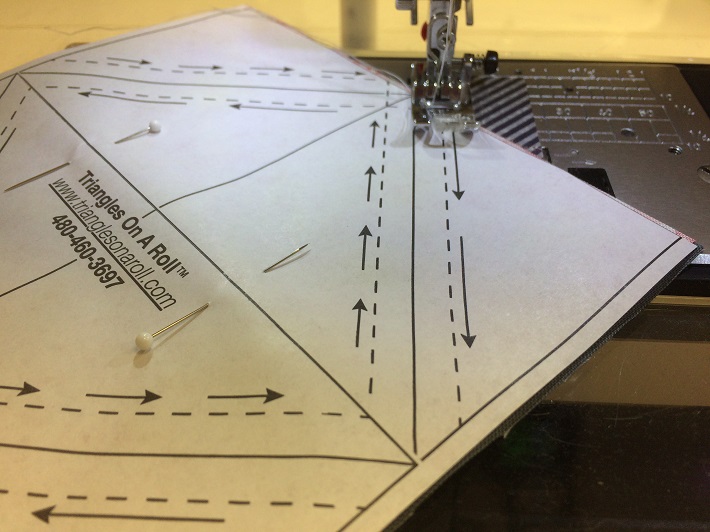
The dotted lines are the sewing lines, and the solid lines are the cutting lines. Simply follow the arrows and sew along the lines dotted lines until they have all been sewn. Using a shorter stitch length will make removing the paper easier. Typically a 1.8 or 2.0 stitch length is perfect. Machines vary and this is really personal preference. The fabrics will look like this from the back once they are sewn…
 Step 4:
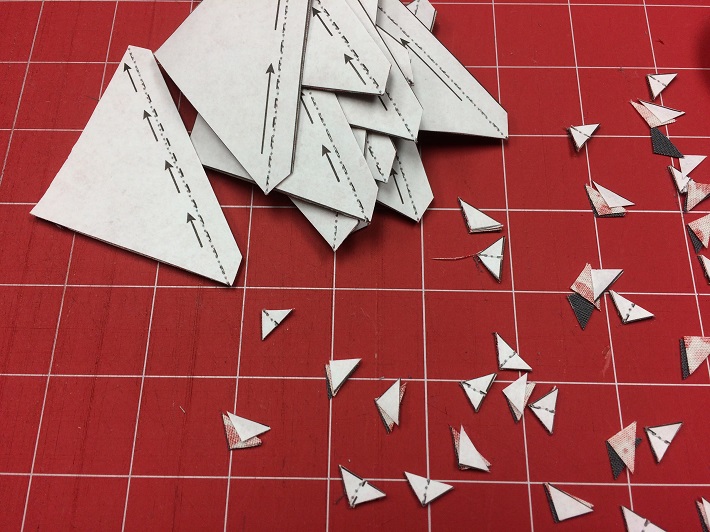
Now that the sewing is complete, use a ruler and rotary cutter to trim along the outside lines and discard the trimmings. Using a ruler and rotary cutter, cut along all of the solid lines. This can easily be done by leaving the sewn units in place and moving the ruler as needed. Once all of the solid lines have been cut the triangles are complete.
 Step 5 (optional):
However, trimming the seam allowances at the corners with a rotary cutter is a speedy way to save time and effort later. This step is the only waste produced and can be discarded at this step. Trim at a 45-degree angle so that there are no points sticking out once the triangles are pressed open. This step is not necessary but does reduce bulk when piecing the triangles into patchwork later.
 Step 6:
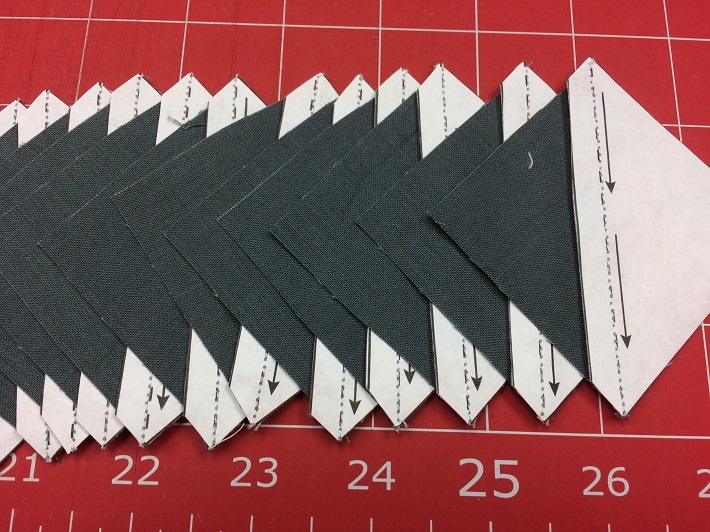
Now that the units are ready for pressing, press one layer of fabric away from the paper triangle. Remember that we put the darker fabric away from the paper and the lighter fabric next to the paper? This step is the reason why. Pressing in this manner will ensure that all seams are pressed toward the darker fabric. No ‘shadowing through’ of the seam allowance will be visible from the front of the blocks. Also, pressing with the papers on will ensure that the seam and blocks remain straight and square. No stretching or distortion can occur while the paper is still attached.
Step 7:
To remove the paper, simply place your thumbnail on the sewn line, and grip the opposite corner of the paper. Pull quickly and entire seam will separate. The shorter stitch length ensures a clean tear by perforating the paper. Now the small strip next to the seam can be lifted away as well. This is a quick and easy task that can be done while watching TV or talking on the phone. Keep a small paper bag nearby for the discarded paper pieces. Small shopping bags or lunch bags are perfect for this task and then the entire bag and paper contents can be tossed into the recycle bin!
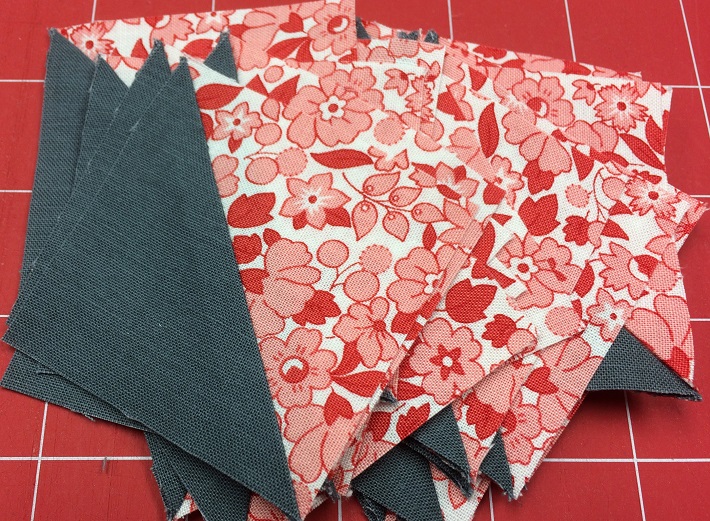
 Step 8:
The triangles are complete and perfectly sized and squared up. No trimming, so measuring, no fuss. This method works perfectly every time and results in lots of triangles in very little time! Check out the supply of Triangles on a Roll in the Craftsy shop, and don’t forget to use them for your next project requiring triangles.
Share tips, start a discussion or ask one of our experts or other students a question.
No Responses to “A Quick Hack for Sewing Perfect Triangles Every Time”