
The log cabin block is a favorite of quilters everywhere because the options are unlimited! While there are many great patterns for log cabin blocks and quilts, you don’t always need a pattern.
Make some freeform, no-pattern-needed blocks by following these steps.
Step 1: Choosing the scraps you’ll use
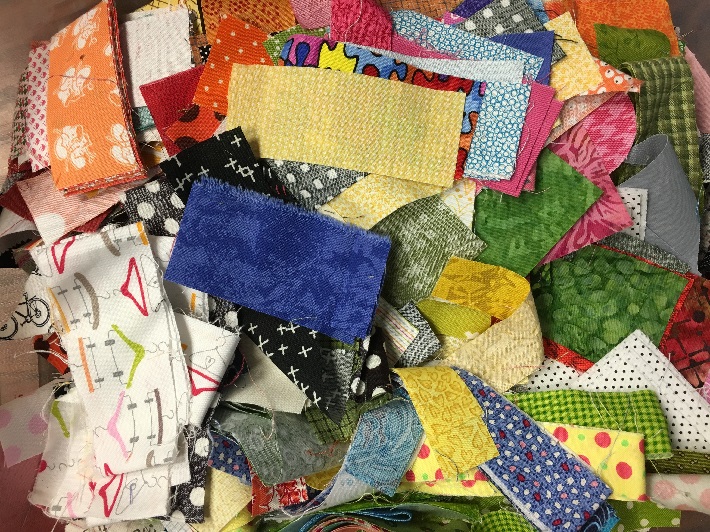
Before you begin, take a look at the scraps you have available. My bin pictured above is just for the smallest of scraps — nothing larger than 3″ gets put in this little bin. The skinniest strips, smallest squares and oddest shapes wait patiently in this bin to find a home.
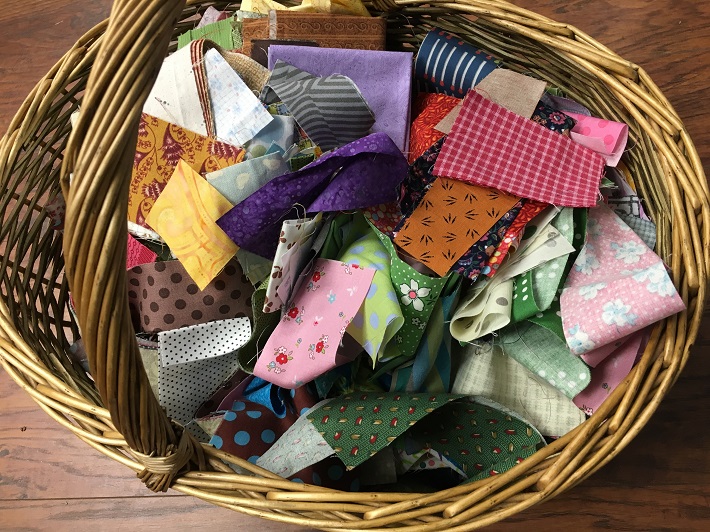
My larger scraps live in this basket. These are pieces that are too small to be folded and put back in my fabric stash but too big for the tiny scrap bin.
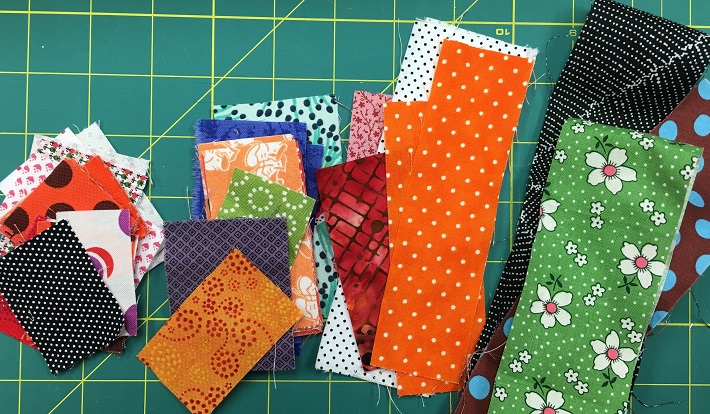
Choose scraps in a variety of sizes and colors. Start by choosing the smallest pieces, which will be in the center of the block; then choose pieces that are a little larger and longer and so on. Lay them out in piles based on the length of the fabric scraps.
Step 2: Make the center piece
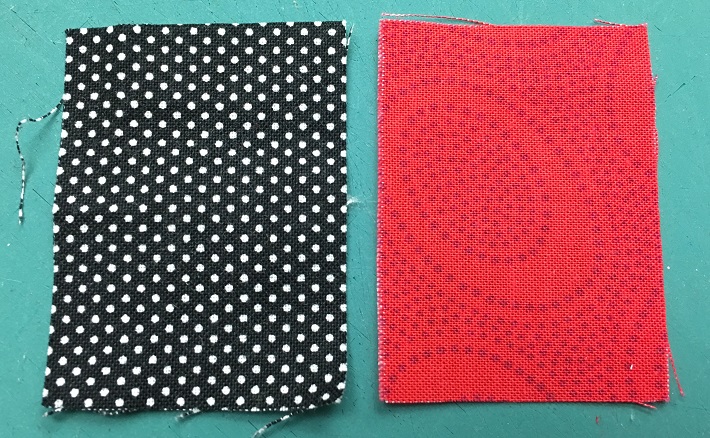
Choose the first two pieces that will form the center of the block. These don’t have to be the same size, but they should be similar sizes — small enough to add other scraps around the edges as we build the blocks. The pieces above are approximately 1 1/2″ x 2″.
Sew the first two pieces together to form the center. Notice that I’ve finger pressed the seam open, I haven’t trimmed up the edges. If you need to, you can trim the edges here.
Step 3: Add pieces around the center piece
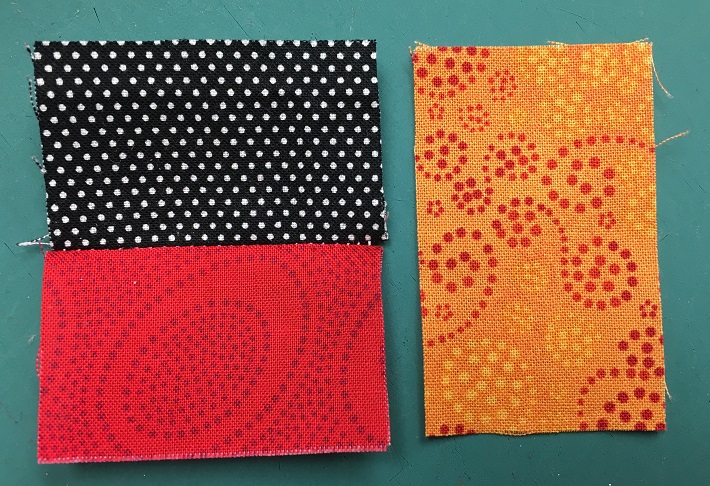
Choose the next piece to add as shown above and sew it onto the center unit. Finger press the seams toward the piece that was most recently added.
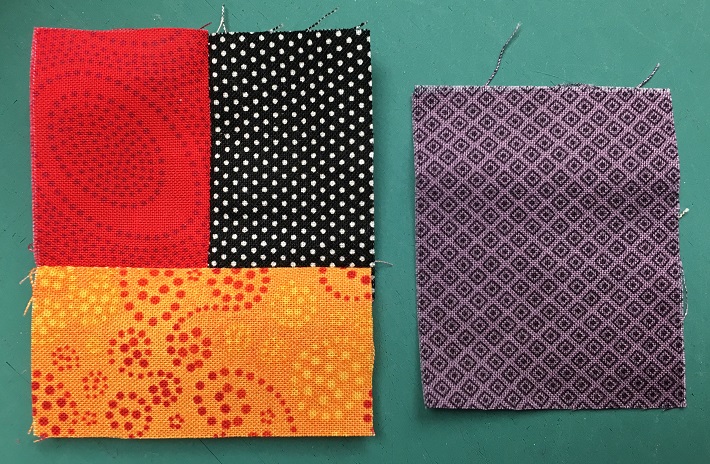
Choose the next scrap. You’ll notice this purple scrap isn’t quite long enough, but that’s not a problem. Just sew it to the side of the unit, then trim the edges to fix any irregularities.
Simply using a ruler and rotary cutter, I trimmed up the edges to match the purple piece. It’s now ready to have another scrap added.
Step 4: Being the traditional log cabin quilt block process
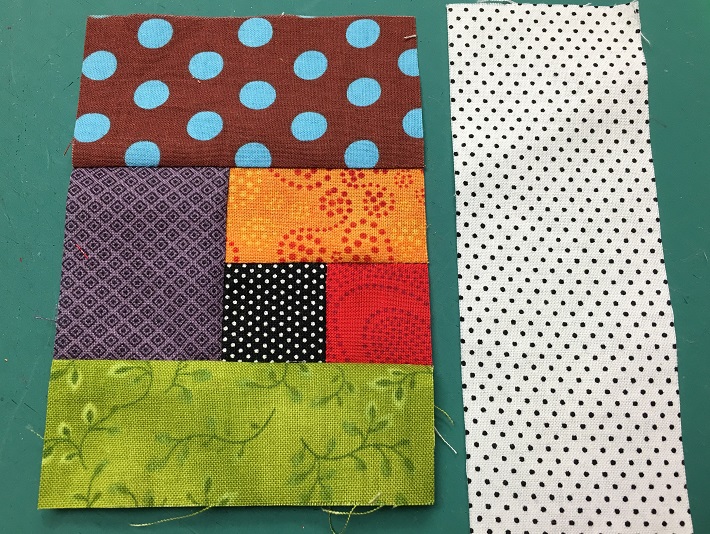
In a traditional log cabin block, the next piece is always added to the side of the block with three fabrics. Of course, in this fun block, you can add your pieces to any side you like!
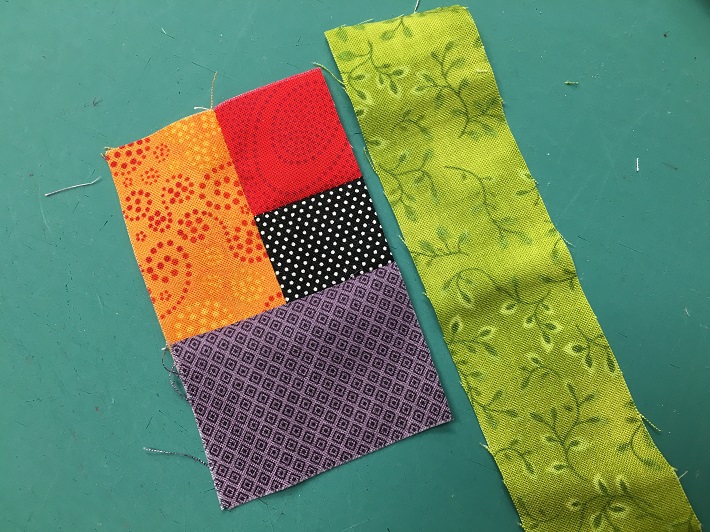
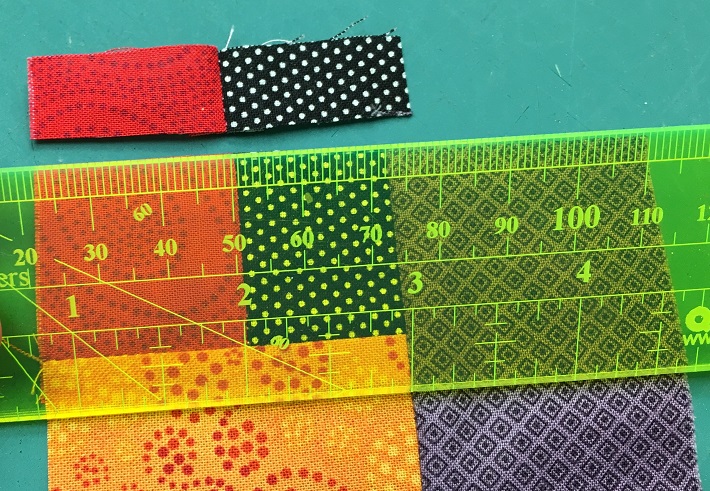
The next scrap I chose, the green strip shown above, was much too long for the existing piece. To make sewing the block easier, I trimmed the strip to the approximate size needed. It doesn’t need to be perfect because we will trim the edges again later.

Now that the green scrap is a usable size, sew it to the edge of the block.
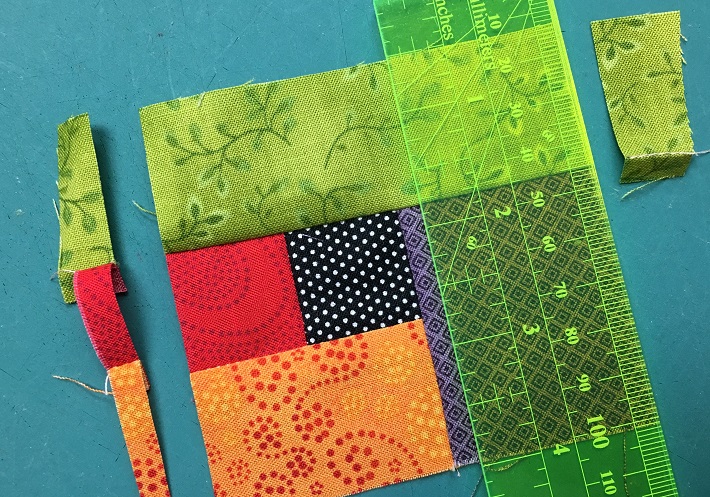
Again, once the piece is attached, trim up the sides of the block to keeps things nice and neat. It also makes sewing the next pieces easier. Don’t worry if the block isn’t completely square — it will get squared up at the end.
Step 5: Continue adding pieces around
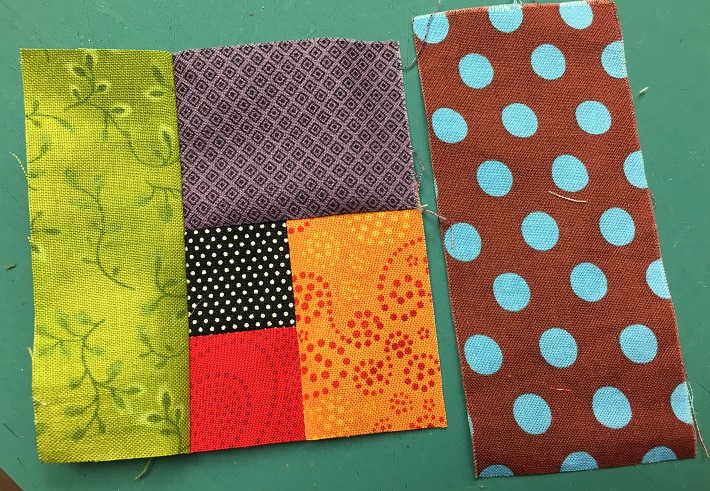
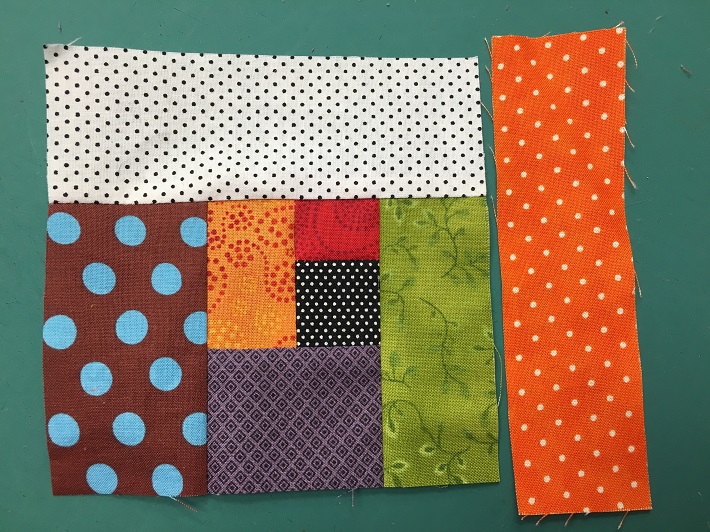
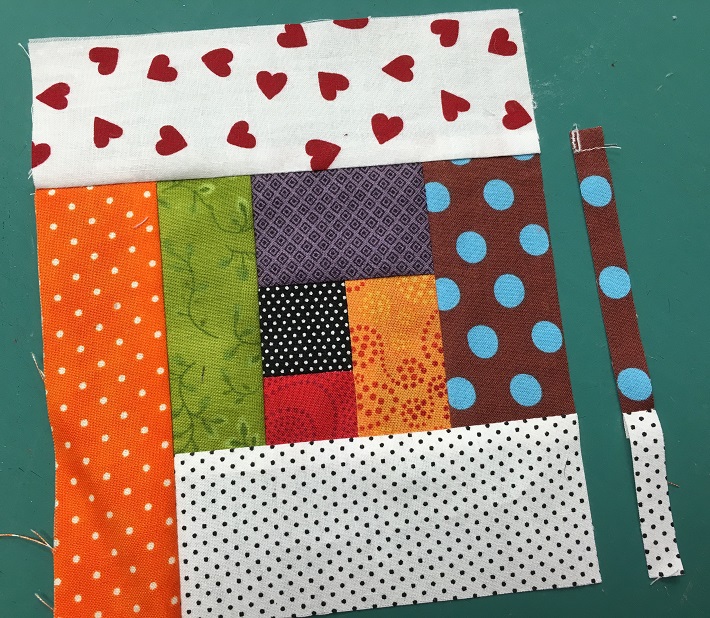
Again, for a traditional log cabin quilt blog, we’d add the next piece to the side with three fabrics. But I wanted to keep things fun, wonky and easy, so I added this strip was added to the “wrong” side. You can vary this in different steps with each block you make for more variety!
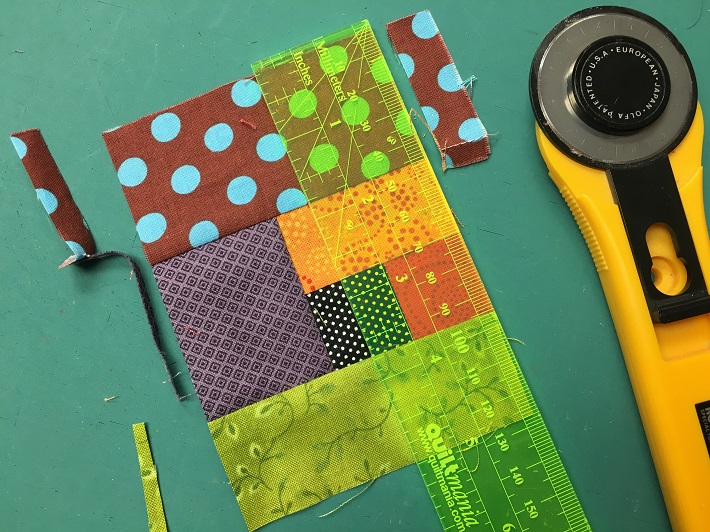
Again, trim the edges with a ruler and rotary cutter. Continue adding strips following this method.
Step 5: The final trim
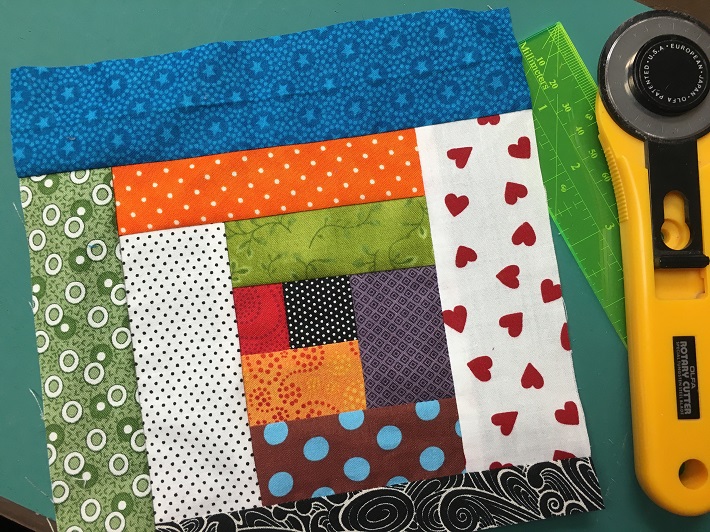
Keep adding scraps, finger pressing and trimming the edges until the block is as big as you want. This block is 8 1/2″ because that is the size of the square ruler that I had for trimming. (You can make yours bigger, even with a small ruler, using this method.)
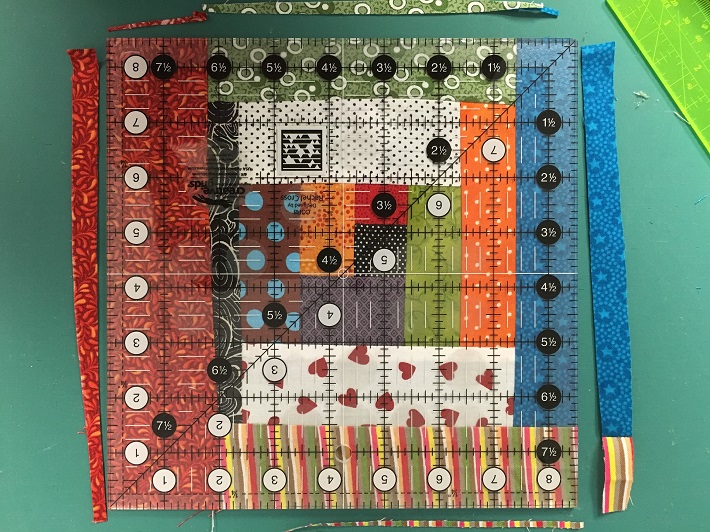
Place the square ruler on the center of the block and line it up evenly with the seam lines or however it looks best. This is simply a personal preference. Rotating the ruler to an angle would create a wonky block that would be a really fun option. Get creative!
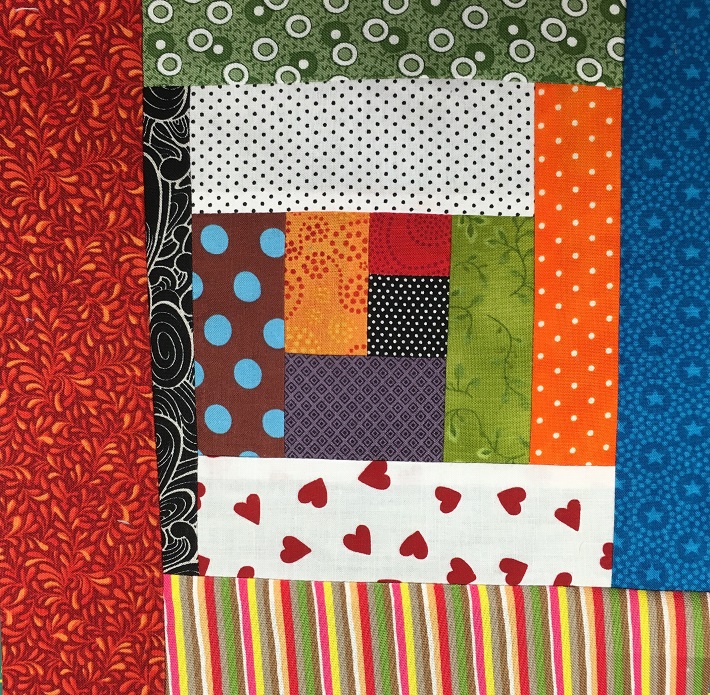
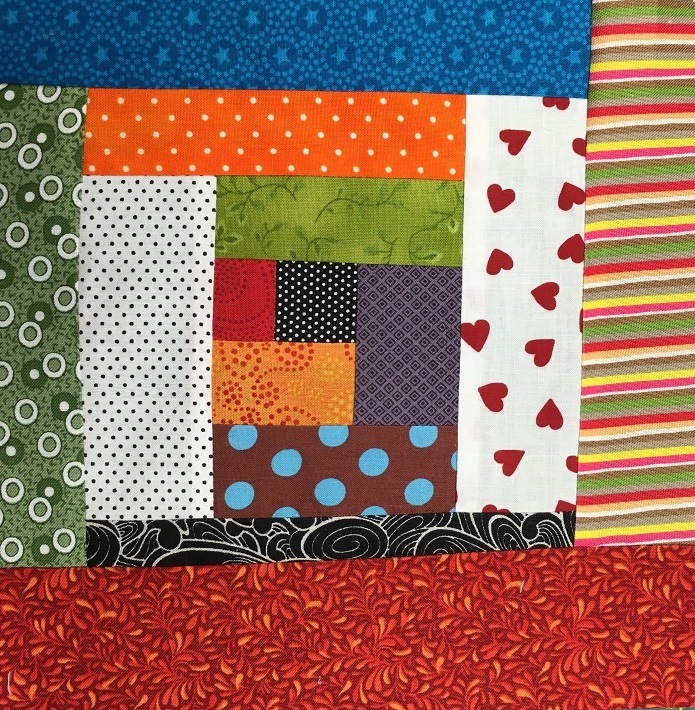
Once the block is trimmed to the desired size, stand back and admire how a handful of scraps turned into a bright, whimsical quilt block! The more scraps you use and the wider variety of fabrics you choose, the more fun you will have!
Tips and ideas for your quilt-as-you-go log cabin quilt block
1. Notice that not all scraps have even edges or are cut straight. That still works because we finger press the seams and trim after every step. Pressing and trimming keep things nice and tidy!
2. Sometimes the entire block needs to be trimmed instead of trimming the piece that was just added. As long as the edge is straight, another piece can be added.
3. Notice the variety of colors and scales of prints. Try not to add the same fabric or even the same color next to itself. But don’t spend a lot of time trying to make things match or coordinate either. The randomness of color and design will give this block more energy.
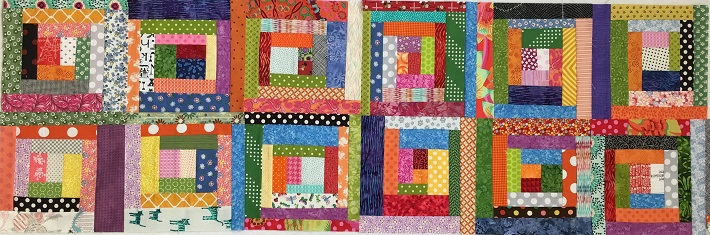
4. Keep building these blocks to make an entire quilt. If you want to make just four blocks, they can be sewn into a happy pillow. Sew two rows of blocks together to make a table runner for a fun occasion.
5. Consider making these blocks just a few at a time and setting them aside until you have more scraps available. Because each block is different, and no special sizes are needed, you can add to this collection over time until you have enough for the project of your choice.
Love to quilt
I would love to try this. Thank you
I love, love, love this quilt and will try it myself! Thanks for sharing!