
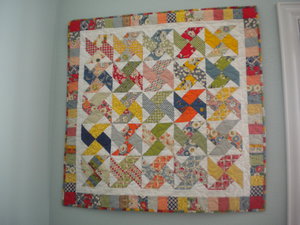
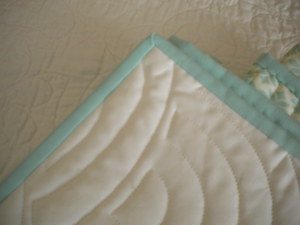
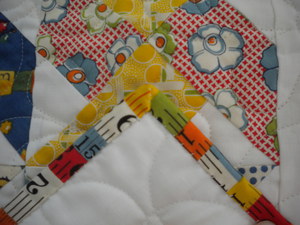
There are many exciting ways to finish the edges of your quilt; choosing a binding fabric and specific technique to use are ultimately very important to its overall appearance and wear. Although some quilts are finished with fold-over binding (where the backing fabric is simply folded over to the front to create a binding), this technique is not very durable. Bindings made from one layer of fabric will not wear as well as a double-fold or French fold binding, and bindings created without a miter at the corners are often bulky and not very attractive. Mitered binding corners are neater and more durable. In general, no finish is as professional and sturdy as a double fold binding with mitered corners.
By definition, a sewn miter is a seam created with fabrics cut at an angle. This type of cut and sewn miter is often used in border construction. In creating a mitered binding, however, you don’t need to cut the fabric to create the miter finish. The binding can be sewn and folded to create beautiful mitered corners.
For directions on creating mitered bindings see the great tutorial here.
One step many people often leave out when creating mitered binding corners is hand-stitching the edges of the mitered corners together. By using an invisible stitch to tack the edges down on the front and back of the quilt, the mitered binding will be even more durable. And it will retain its crisp finish even through repeated washings.
Creating a perfect mitered binding corner will take a little practice; however, each time you make one the process will get easier, and before you know it, mitered binding corners will be a breeze!
Share tips, start a discussion or ask one of our experts or other students a question.
No Responses to “Mitered Bindings”