
So, your daughter (or son — or you!) just ripped the knee of their leggings — again! Leggings are prone to damage, but one tear doesn’t mean you have to trash them. This quick fix can save your sanity.
A few minutes of sewing can turn torn leggings or track pants into shorts for spring or summer. Plus, you can add a cute side detail.
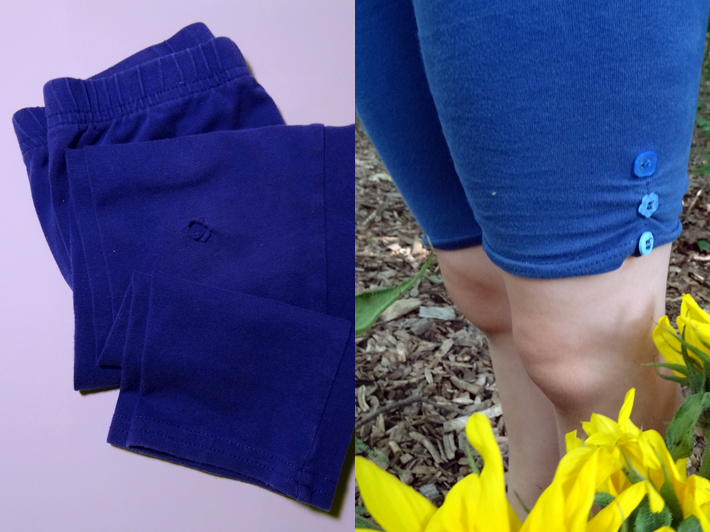
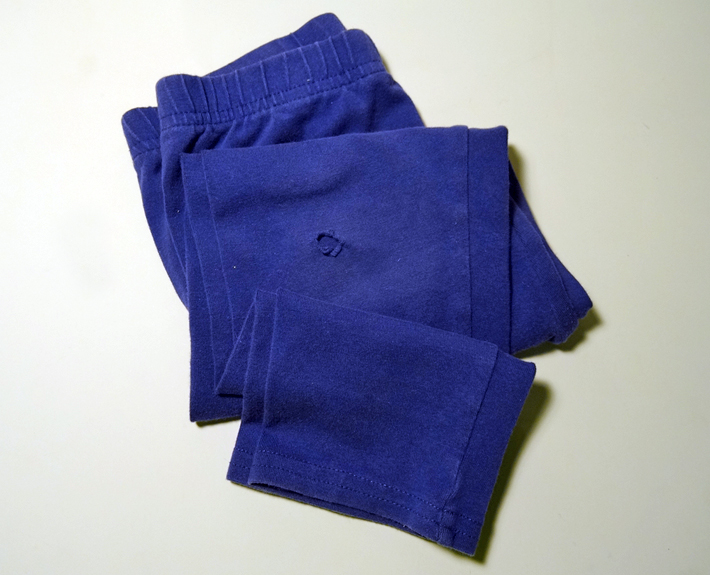
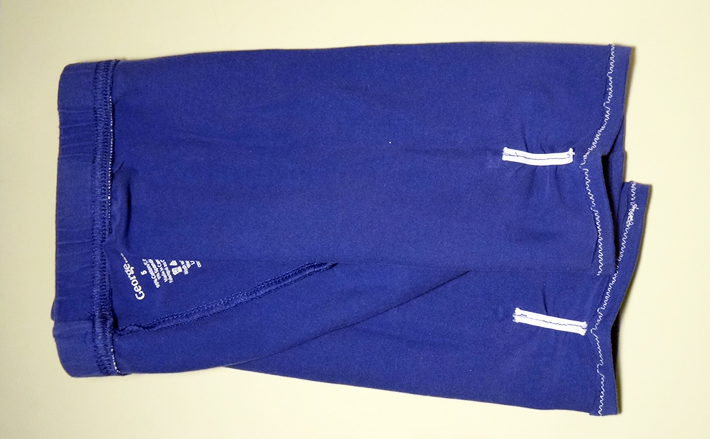
Learn how to turn torn leggings into wearable bike shorts.
Materials:
- Ruined leggings (with a tear or hole at or below the knee)
- Matching thread
- Ballpoint/jersey or twin needle
- Iron and ironing board
- Sewing machine and your go-to sewing supplies
- Eight inches of ¼” elastic and six buttons (optional)
Step 1:
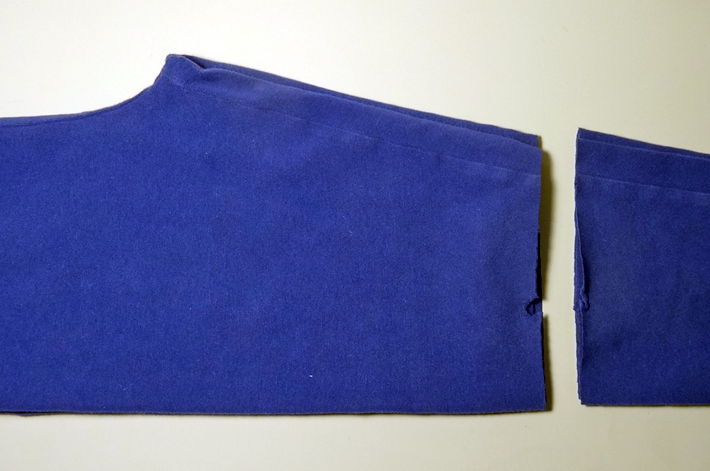
Fold the leggings with one leg over the other, matching up the side and crotch seams. Carefully cut both legs off at a 90-degree angle to the side seam. Cut at your desired length, above or at the ripped hole. Keep in mind that you will use ½” to 1″ of the final length to hem the shorts.
Step 2:
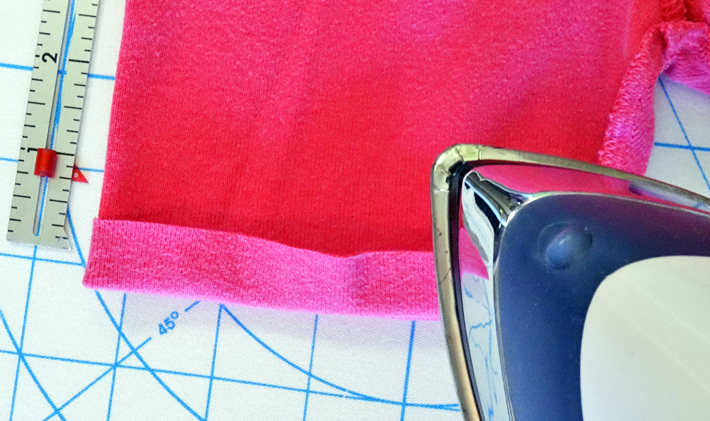
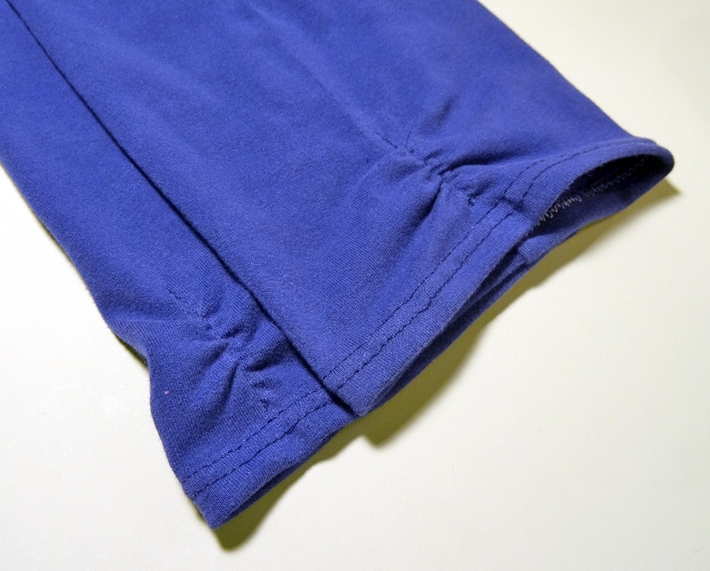
Turn the leggings inside out. Press ½” to 1″ of the edge of the fabric up toward the wrong side of the shorts. This will be the hem height. Pin along the raw fabric edge if desired.
Step 3:
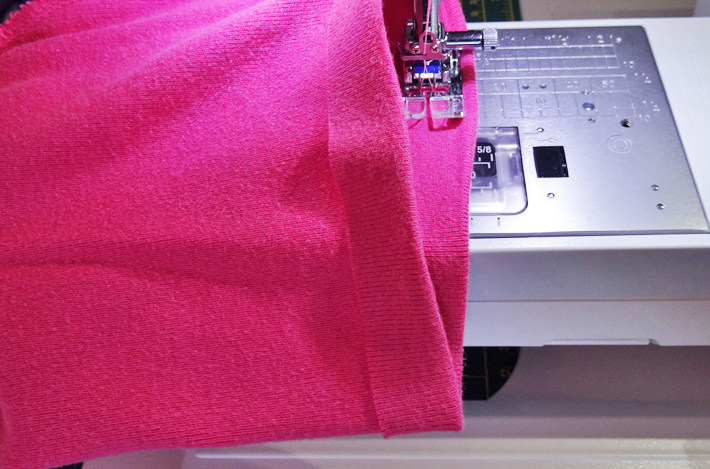
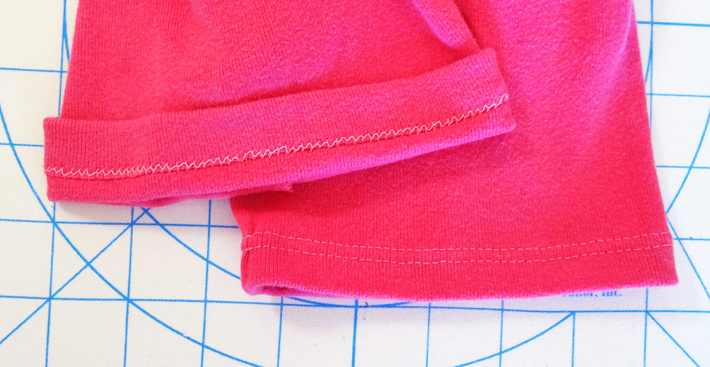
Stitch the new shorts just below the top of the folded hem. Your seam will be between 3/8″ and 7/8″ from the folded edge. Hem from the right side of the leggings with matching thread.
Use a ballpoint needle with a zigzag stitch, a stretch stitch or a twin needle when stitching. This will allow the hem to stretch to fit the wearer. Make sure to secure your stitching with a back stitch at the beginning and end of the hem.
Want to add a cute side detail to your new shorts? Here’s how!
Step 1:
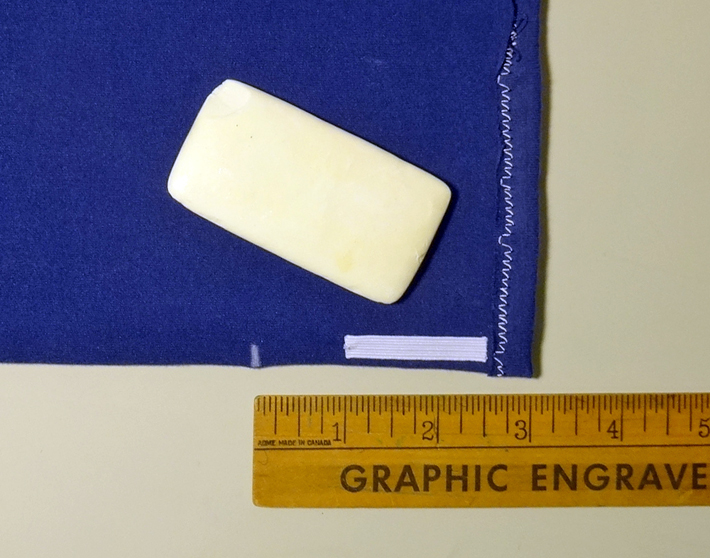
Measure and mark a length of approximately 3″ from the hem along each legging side seam. Cut two pieces of ¼” elastic to 1½” long. (I used a white bobbin thread color to show the seam more clearly.)
Step 2:
Pin one length of elastic to each side seam. Pin the ends of the elastic only — once at the hem and once at the 3″ mark.
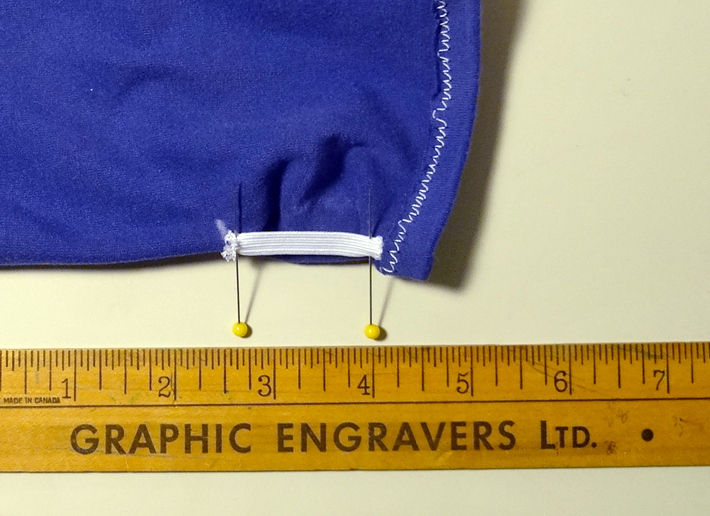
Step 3:
Sew from pin to pin along each leg’s side seam, making sure to stitch along the middle of the elastic. As you sew, stretch the elastic to fit the original 3″ length marked on the shorts. Secure your stitching with a back-stitch at the beginning and end of the elastic.
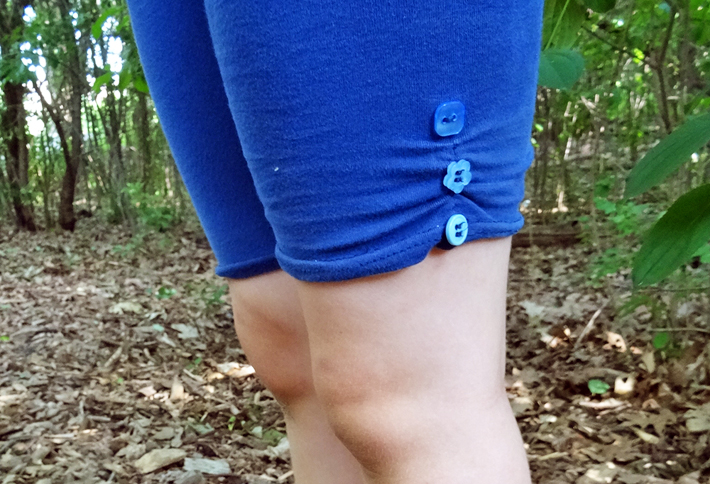
Once the stitching is finished the fabric will magically gather up into your ruched side detail! If you want the ruching to show more, mark the shorts at 5″ or 6″ and use a piece of elastic about half that length to gather the side seam.
Step 4:
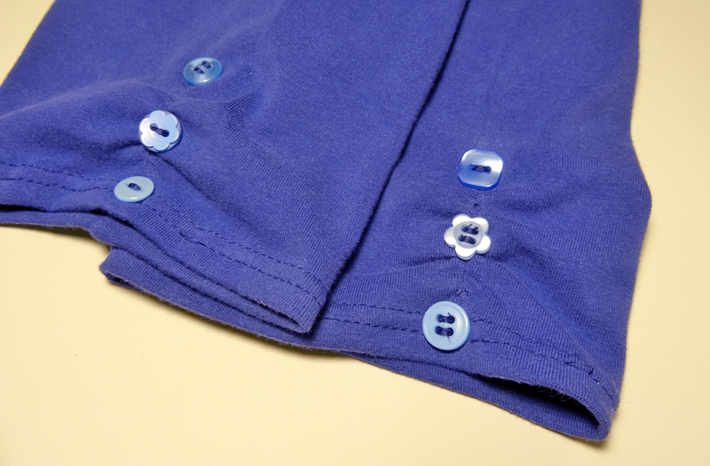
Hand sew three matching (or mis-matching!) buttons onto each side seam, over the ruching on the shorts, if desired.
Share tips, start a discussion or ask one of our experts or other students a question.
No Responses to “Leggings With Holes in the Knees? Here's How to Fix 'Em”