
Sewing pattern pieces come in all kinds of unusual shapes, and sometimes it’s a challenge to figure out how they match up. Today, I’m sharing the golden rule for matching up seams. You’ll want to remember this one.
Here it is: To assemble the pattern pieces properly, you need to use the seam allowances as your guide.
Take the puzzle out of patterns by paying attention to the alignment of the edges and your result will be perfect.
To help you really understand this concept, I’ll walk through three common types of pattern pieces that confuse many sewers. You’ll see the rule in action and then can apply the learning to all other seams.
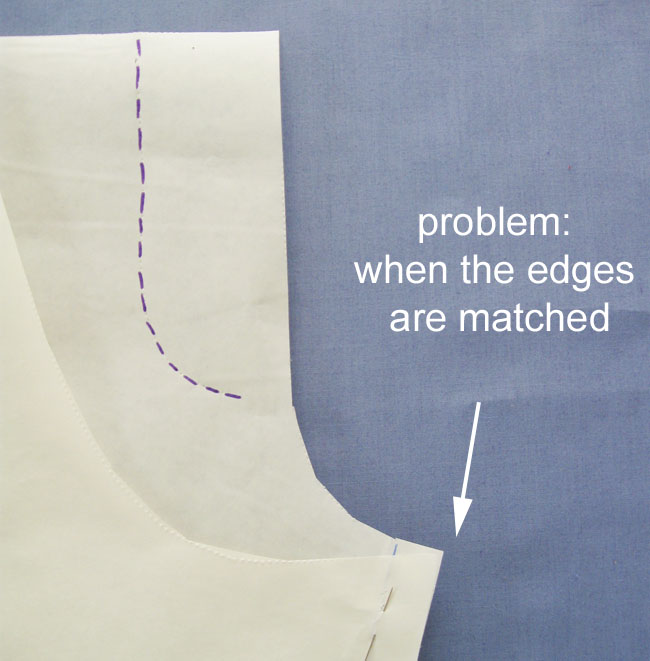
This is a common issue when sewing shoulder seams.
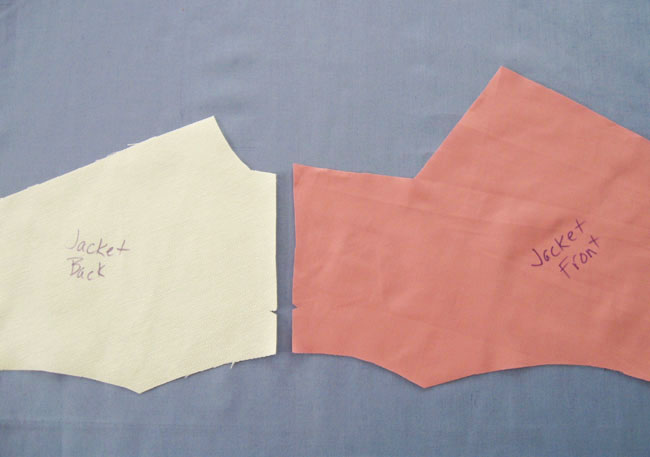
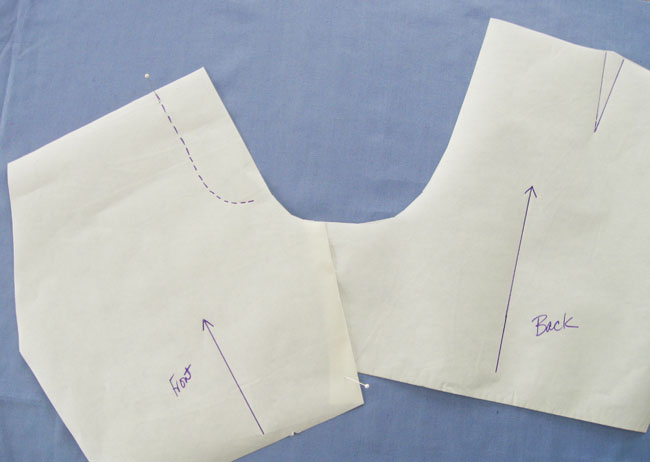
For example, look at the shoulder seams on the jacket front and back pattern pieces shown above. The length of the front shoulder seam edge appears longer than the back shoulder seam edge.
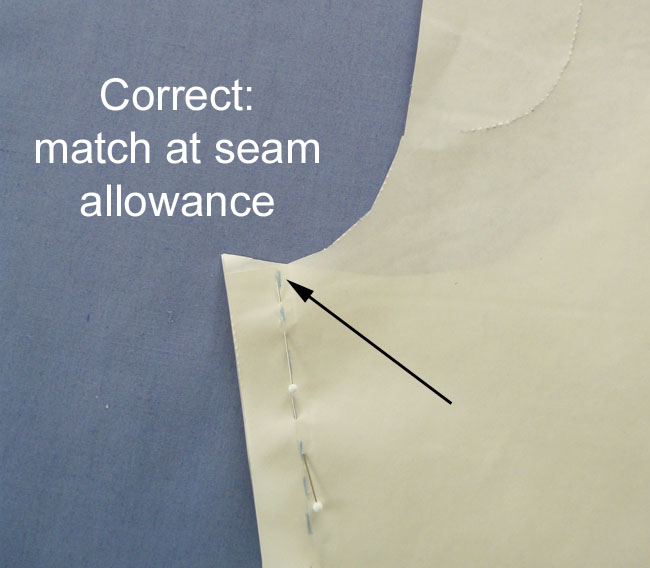
The key to stitching this up correctly is to match at the stitching line, not at the fabric’s cut edge.
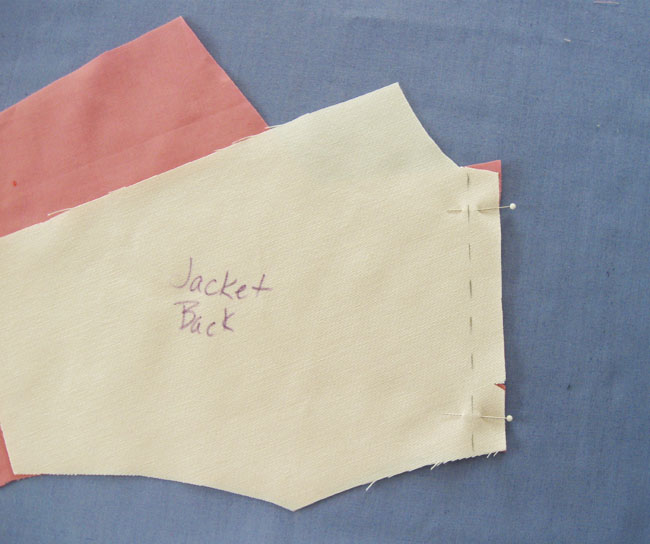
When you match up the edges at the precise point where the stitching line lands at the edge of the fabric, then the two pattern pieces match up perfectly.
You can see the small, triangular bit of extra jacket front fabric (in pink) that peeks out from under the jacket patten piece. This is perfectly fine, and pattern designers do this intentionally: When the seam allowance is pressed open, that extra bit will be caught in the stitching of the next part of the garment assembly.
Another place where this situation occurs is with princess seams.
Every designer or pattern company might deal with this issue differently. If you get in the habit of visualizing the stitching line on your fabric, then you will have no trouble with matching up the seams to sew.
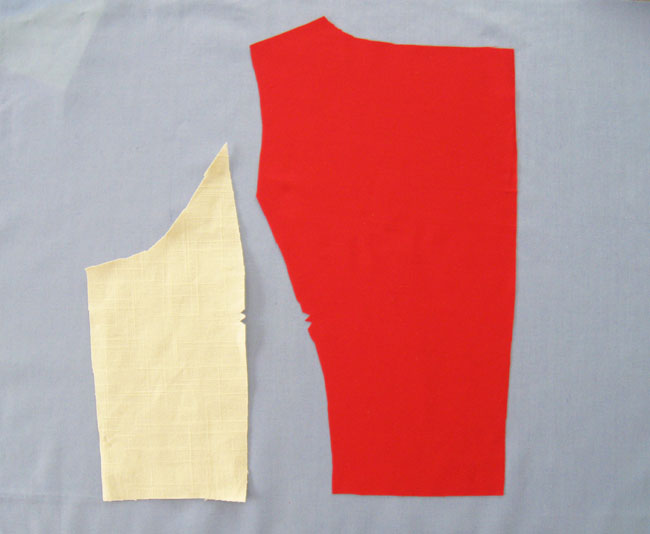
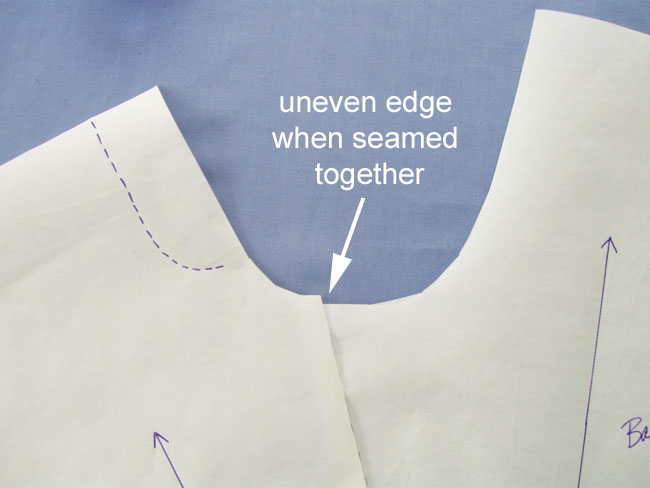
This example is the back of a dress with princess seams. The side back portion does look longer than the center back piece in red.
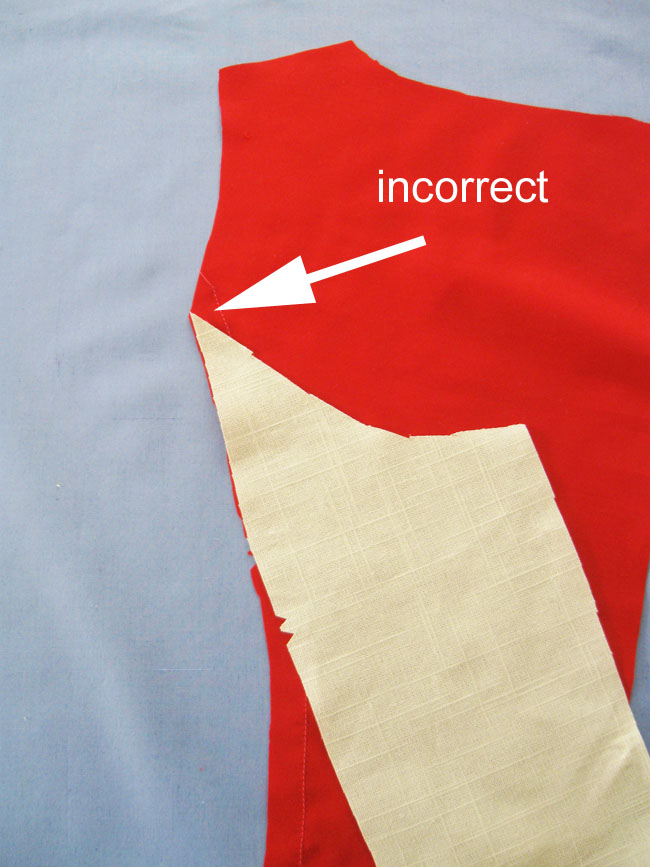
If you start at the edge, then the pattern pieces will not match up correctly, as you can see above.
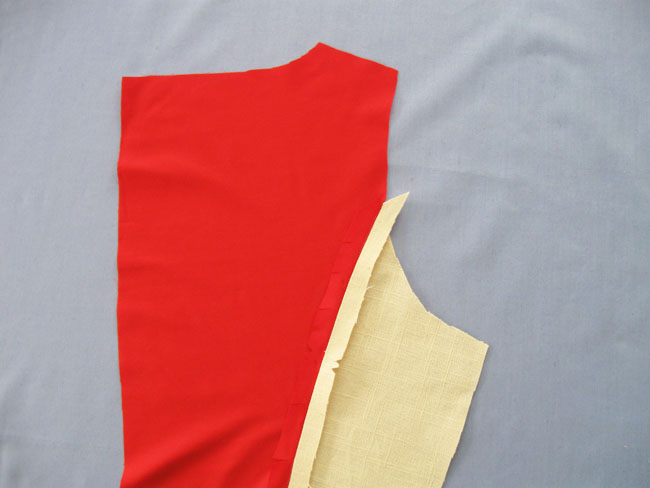
Instead, match the pattern pieces where the stitching line intersects with the edge of the garment.

With princess seams in particular, there’s sometimes a triangular bit that sticks out (as you can see with the yellow fabric above). That is intentional, and allows you to sew the two pieces together.
Here’s the completed princess seam. You can see that the armhole now has a continuous curve from shoulder to armhole and the notches match.
Another spot where the seam alignment is a bit tricky is the inseam of pants.
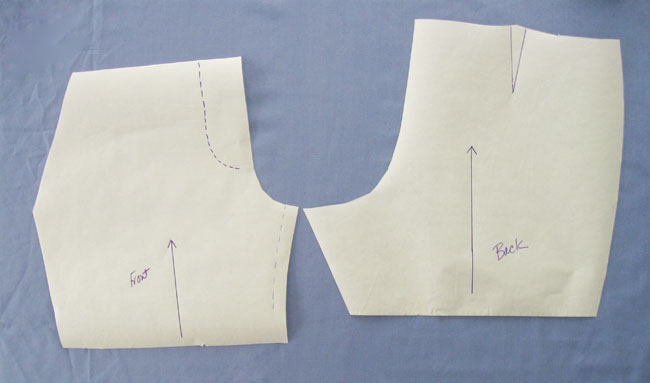
When sewing pants, you stitch together the front and back pieces at the inseam
Lining up the edges of the pattern pieces, as I did below, is incorrect.
This results in uneven edge when the seam is stitched. Here the difference is about ¼”. If you were to ignore that and cut the excess off, then you’ve changed the crotch seam, so it will be made too long or too short for fit.
To sew them together correctly, line up the cut edges of the pattern front and back, with the stitching lines intersecting.
Now your crotch seam is a smooth curve and the fit is not changed.
Two-piece sleeves have this same situation (you read see more about matching up sleeve seams in this Craftsy Blog post).
You can see that what many of these examples have in common are pattern pieces that end in a sharp angle, or a situation where you are joining a straight piece to an angle. Just remember to line up the seam allowances, not the edges, and you’ll be set for success.
Share tips, start a discussion or ask one of our experts or other students a question.
No Responses to “The Golden Rule for Matching Up Seams”