
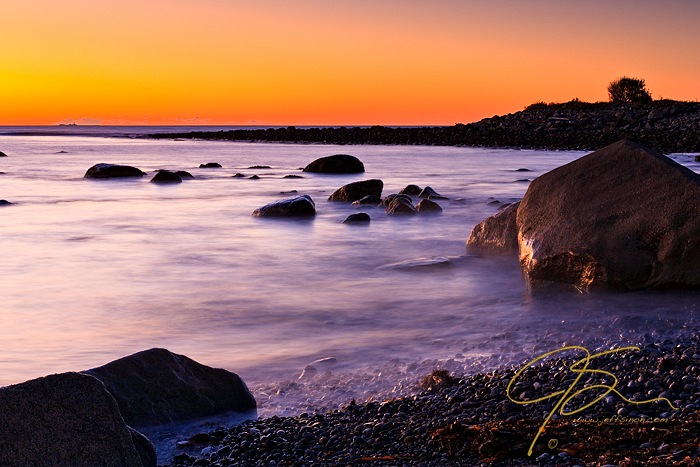
Have you ever wondered how they get the ocean in a photograph to look like a ghostly fog rolling over the shoreline? What about a picturesque waterfall or gently cascading stream, with the water looking like a beautiful silky veil as it dances among the rocks? Capturing motion in landscape photography, specifically water, is both deceptively simple and shot entirely in the field with nothing but the press of the shutter.
Photos via Jeff Sinon Photography: Nature Through the Lens
Here are tips to capture the ocean motion and wonder in a waterfall.
That ghostly appearance of the ocean, or cotton candy look of a waterfall, is simply the result of a long exposure — not some computer generated trick, as many people think. The shutter staying open an extended amount of time while making the picture.
Tip #1: Bring support For the long haul.
When it comes to landscape photography, I consider a good tripod as important as the camera itself. A good tripod securely supports the camera, preventing any movement that may cause a loss of sharpness in the final photograph. A tripod is even more important when using the long exposures needed for photographing moving water.
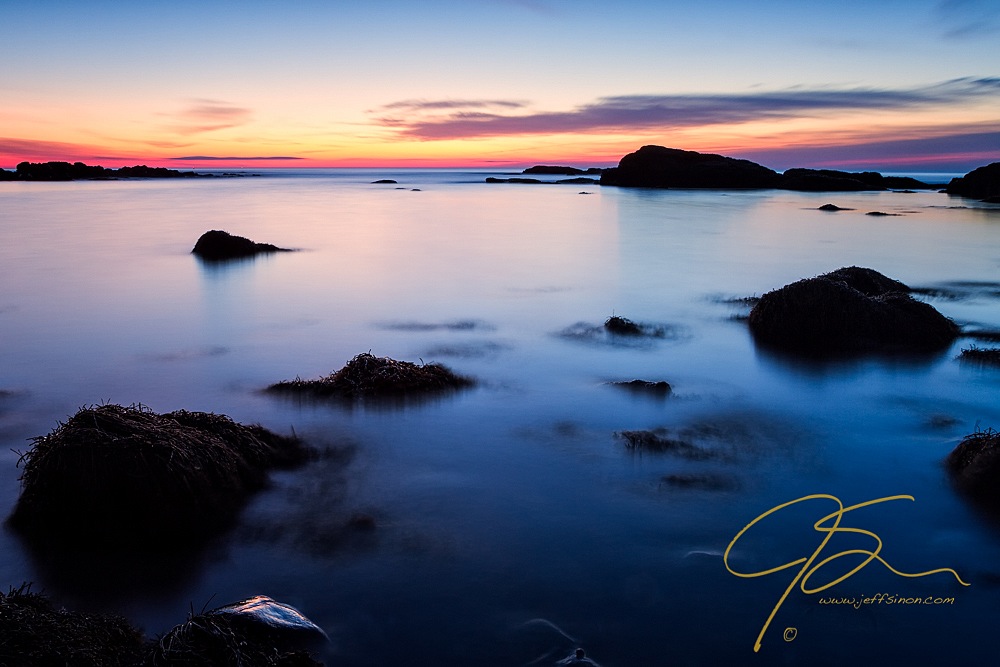
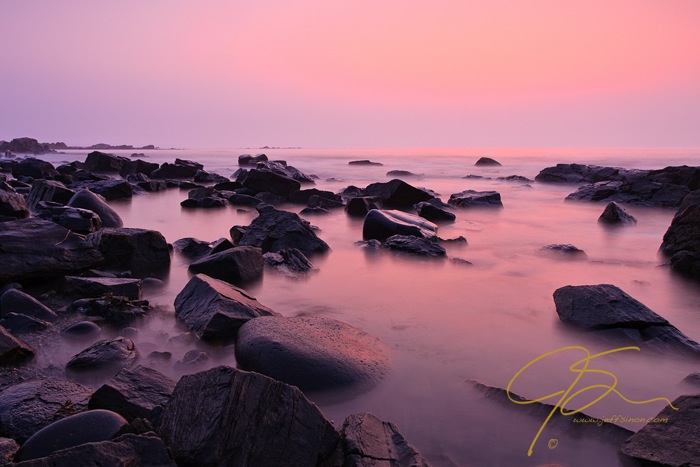
Take for instance the photo above, which has an exposure time of 1 minute 20 seconds.
To have the seaweed covered rocks in the foreground come out sharp and in focus during such a long exposure, the camera needs to be held perfectly still. Otherwise, while the water may indeed have that soft and misty look I was after, the rocks throughout the composition would have also been soft and blurry due to the unavoidable camera shake that would have resulted.
Tip #2: Experiment with exposure.
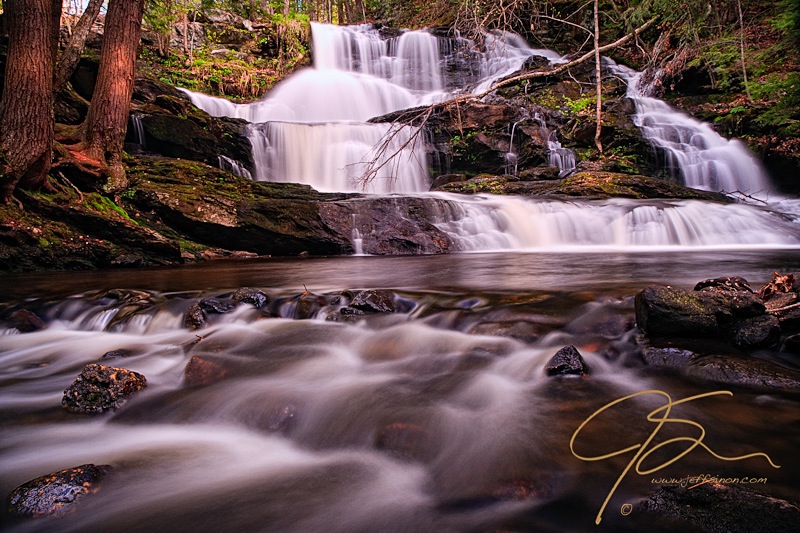
When photographing a waterfall or a fast-flowing stream, a good rule of thumb is to aim for an exposure time between 0.5 and 10 seconds.
When it comes to the ocean, however, I usually start at around 10-15 seconds, increasing exposure time until I’ve captured the look I want. Regularly this leads to exposure times of well over 1 minute.
Use the preview on the cameras LCD as a guide, paying attention to any over exposure warnings or the histogram, to make sure you haven’t overexposed the lighter areas in the image.
Tip #3: Know when to go long.
When it comes to waterfalls, the best time to photograph is on an overcast day. The diffuse even lighting makes getting a good exposure much easier, since the light on the water and the surrounding scene will be similar, with no harsh shadows or overly bright highlights.
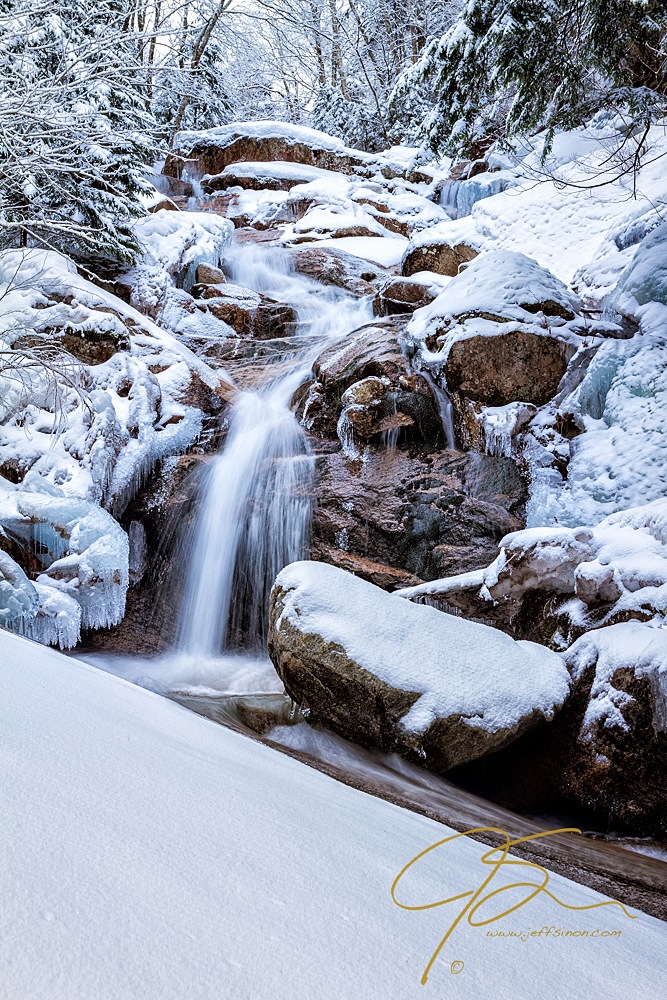
But, on a clear sunny day, you may find part of the waterfall in the shade and part in direct sunlight. This is going to cause nothing but headaches when it comes to getting a good exposure. Either the flowing water is going to come out perfect, and the shaded areas grossly underexposed and dark. Or, the shaded areas will be perfectly exposed, yet the whitewater of the falls will come out looking like nothing but a bright featureless blob. Neither of which is very appealing.
So, if you can’t wait for an overcast day, plan to be there when the sun is lower in the sky and not shining directly on the water, or when the entire waterfall is in the shade.
As far as long exposure seascapes goes, I always plan them around my coastal sunrise or sunset shoots. I arrive 30 minutes to an hour prior to actual sunrise and will stay that long after sunset. This allows me plenty of time to finalize a few compositions, as well as giving me time to play around with long exposures.
Tip #4: Be aware of cameras and settings.
For capturing motion in landscape photography you’ll need a camera that allows you full manual control. This usually means a DSLR; however, more advanced point and shoot style cameras, like the Canon G16, also give full control in a camera that still fits in your pocket.
The camera modes I use most often are Aperture Priority (AV on the camera dial), Manual, and Bulb, ( M and B, respectively).
2.0 second exposure using AV
Aperture Priority (AV)
In AV, you select the aperture. I generally use an aperture setting between f8 and f16, letting the camera select the shutter speed. This can be hit or miss, as the camera is going to try to select a shutter speed for what it thinks is the “correct” exposure. And, depending on your chosen aperture and the available light, this shutter speed may be either too fast or too slow for the effect you’re after.
For this reason, of the three camera modes mentioned, AV is the least used when I photograph moving water.
20.0 second exposure using Manual
Manual
Manual, on the other hand, has you in full control of how the camera captures the scene. You set both the aperture and shutter speed, giving you complete creative control to make the photograph you want to make and not the photograph the camera “thinks” you want to make.
61 second exposure using Bulb
Bulb
Bulb is the same as manual with the exception that rather than setting a specific shutter speed, in bulb the shutter remains open for as long as you hold the shutter button down.
Pretty much every camera I’ve ever worked with has a maximum native exposure time (the longest exposure time that can be achieved with one press of the shutter) of 30 seconds, and my seascapes regularly exceed that. When photographing the rolling seas in the pre-dawn hours, I switch to bulb if I know I’ll be working with really long exposures.
Tip #5: Hands off the camera!
Speaking of bulb mode, this leads me to another piece of recommended gear, the remote shutter release. For exposure times of less than 30 seconds you can get away with using the cameras built in self-timer to reduce the risk of camera movement. The 2 to 10 second delay will allow plenty of time for any movement caused by you pressing the shutter to have settled down before the shutter opens.
However, with exposures longer than 30 seconds where you have to use the Bulb setting, no matter how still you try to be you are more than likely going to impart at least a little movement in the camera while trying to hold the shutter button down, thus creating some motion blur which in turn will result in a loss of sharpness in the photograph.
With these few tips, you should be well on your way to creating beautiful and unique photos of moving water in your landscape photos.
Looking to elevate your landscape photography technique even more? The Craftsy class Landscape Photography: Shooting From Dusk till Dawn will go over techniques like dealing with light at different times of day, composing in black-and-white and taking panorama shots to help capture breathtaking landscapes.
Share tips, start a discussion or ask one of our experts or other students a question.
No Responses to “Capturing Motion In Landscape Photography: Water and Waves”