
In parts one and two of our photography editing series, we discussed the basics of Photoshop. Now, we move on to an new, and equally useful editing tool: Lightroom. Adobe Lightroom is a pretty easy piece of software to figure out. It’s also very powerful and relatively inexpensive, so it’s a good place to start with post-processing.
In this editing series, we’ll take an overview of Lightroom.
Library module
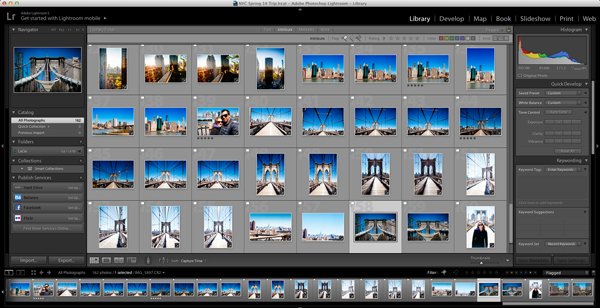
1. Library
The first module (from left to right in the top toolbar) is the library module. In this module you can see all of your image in your catalog, making this the best place to organize and sort them. You can organize images by just about anything: file name, date/time, labels, camera, lens, focal length, aperture, shutter speed, ISO, even by GPS information if your camera is recording that.
The library module also allows you to apply metadata to one image or to a whole range of images. This helps you to search for images—which is great when you are dealing with hundreds or thousands of images every year.
2. Develop
The develop module is where the magic happens. This is where you edit individual images. You can apply presets in this module or apply changes in each of the develop options: Basic, Tone Curve, HSL / Color / B&W, Detail, Lens Corrections, Effects and Camera Calibration.
Basic allows you to change the color temperature, exposure, contrast, clarity, and saturation, among other things. Tone Curve lets you adjust the black point and white point, along with the distribution of pixels in the midtones. HSL stands for hue, saturation and luminance. Color lets you change individual colors and B&W obviously lets you adjust the look of a black and white image. The Detail panel has options for sharpening and a really cool noise reduction option for high-ISO images. Lens Corrections has built in profile corrections for different lenses and allows you to adjust things like perspective for images that need straightening out. Effects has options for adding a vignette or grain. Finally, Camera Calibration adjusts for camera specific problems.
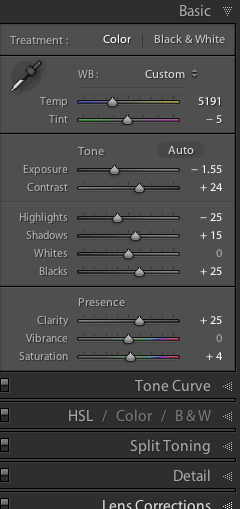
Basic panel in the develop module
3. Map
The map module might not be very useful for a local photographer, but for the person that does a lot of traveling and has a hard time keeping track of where images were taken, the map module fills in. Using GoogleMaps, you can place a pin where you took an image. If your camera has GPS technology enabled, the location information should fill in automatically.
4. Book
I have not personally tried the book module, as I use InDesign for book layouts, but it appears to be a very easy way to put a photo book together. This is an additional bonus for a cheap piece of software.
5. Slideshow
This module does exactly what it says: Allows you to create a quick slideshow from the photos in your catalog. You can also add borders, title screens and music to go along with your photos. This feature is very helpful if you want to put together a slideshow for clients on the fly.
6. Print
If you intend to print your images, the print module will get you started. You can choose the size of the paper you are using and how many images you want to print per page. In addition, you can include a logo on each page if you are creating contact sheets as well as apply sharpening specific to the image size, paper type and printing method.
7. Web
The web module makes it easy to create websites of your images, using Flash or HTML. You don’t have quite as many options as you would if you were using web development software, but it’s an easy way to start getting your photos online and into galleries.
[box type=”shadow”]
In case you missed it, be sure to check out our first installments of the editing series: part one, “Essential Editing I: The Basics of Using Photoshop” and part two, “Essential Editing II: More Must-Know Tips for Photoshop.”
But don’t stop there! Continue to learn inspiring editing skills in the Bluprint class 25 Innovative Photoshop Techniques for Photo & Video.
[/box]
Library and develop modules are the big ones, but do you use the others? Love them? Hate them?
16 Must-Have Lightroom® Shortcuts

Make your work in Adobe Lightroom more efficient than ever with simple keyboard shortcuts sure to cut down on time!
Share tips, start a discussion or ask one of our experts or other students a question.
No Responses to “Essential Editing III: Modules in Adobe Lightroom”