
Layer masks are a simple and non-destructive way to combine multiple photographs into a single image using Adobe Photoshop. Learn the basic steps for creating a composite image.

Photos via Boost Your Photography
Creating composite images
The first step is to open each of the files that you want to use within Photoshop. Then, select each image using the Rectangular Marquee Tool or the Lasso Tool and paste them all into the same file. Now you will have one file with multiple layers consisting of each image that you have pasted.
You may need to click and drag to change around the order of the layers: you want the background layer on the bottom and any layer that should appear on top of other layers at the top of the list. If you are working with more than a couple of layers, you may also want to double-click on the name of each layer and rename it to something identifiable.
The next step is to resize and reposition each layer so that the elements that you want in your final image appear as the correct size and in the correct location. Pay attention to how large your actual image is (number of pixels) if you are shrinking any of your elements significantly.
To resize, click on the layer that you want to resize and click Edit -> Transform -> Scale.
Holding down the shift key and dragging from a corner will allow you to resize your layer while maintaining the same aspect ratio. This will prevent you from distorting your image. If you are having trouble seeing where your element should go, you can click on the layer and change the opacity (at the top of the Layers window) to something like 50% so that you can easily see through to the layer below.
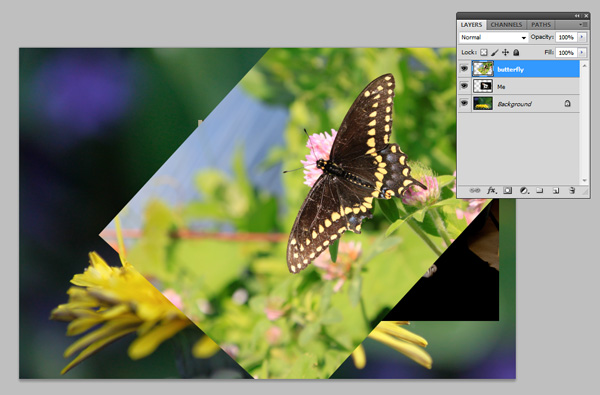
To rotate, click on the layer you want to rotate and click Edit -> Transform -> Rotate.
You can either click near a corner and drag around to rotate your image, or you can use the toolbar to adjust the rotation incrementally by degrees, down to hundredths of degrees. The butterfly was rotated by clicking and dragging around the corner of the selection until the angle matched the angle of my back. Once your layers are approximately positioned, you are ready for the layer masks.
How to use layer masks
Click to select the first layer above your background. If there are other layers above, click the eye symbols next to them first to hide them from view. Once you have the layer selected, click Layer -> Layer Mask -> Reveal All.
A white box will appear next to the image of your layer in the layers window. This is your layer mask. Anything that is painted white in your layer mask box will be visible in the final image, while anything painted black will not. Anything painted a shade of gray will appear partially visible.
The next step is to select anything that you want to hide from your final image. For my example, this would be the black background around the person. Use either the Quick Selection Tool or the Magic Wand Tool to make an initial selection. (The Magic Wand Tool works well if you are selecting only a single color, like the black here, while the Quick Selection Tool works better if you are selecting a more complicated area.) Do not worry if your initial selection is not perfect, as you can tweak the layer mask later.
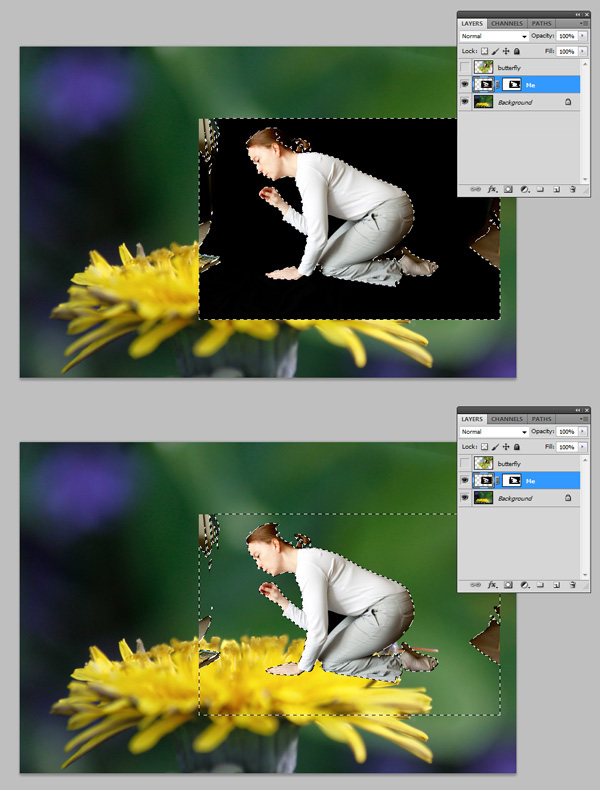
With the area you want to hide still selected, click on the white box next to your layer. Then, click to select the Paint Bucket Tool. Make sure that you have chosen black paint, and click within the selection to paint that part of the layer mask black. That section of your image should disappear from view. Continue this process of selecting and painting until you have eliminated the bigger sections of what you want to hide.
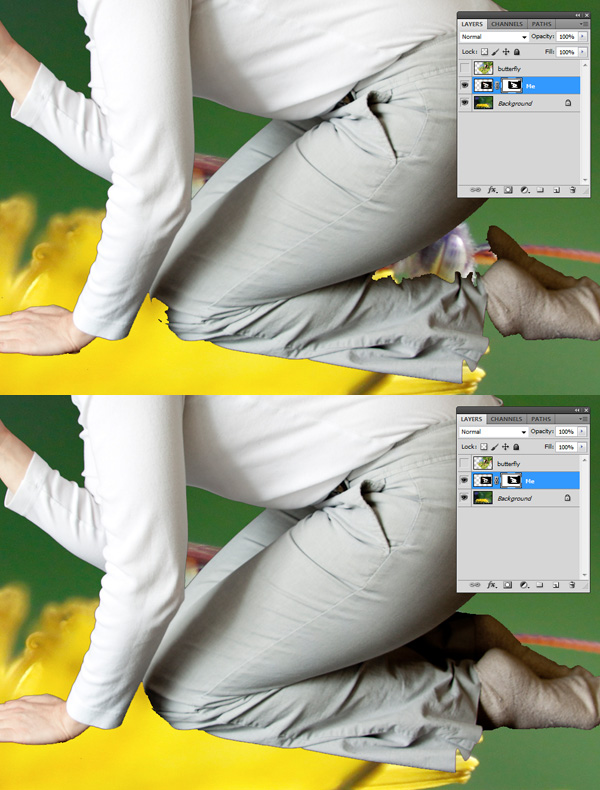
If you have not already, at this point I recommend zooming in to view your work at 100%. You may find that the selection tool missed some subtle areas or selected parts that you still want visible. You can refine your layer mask by using the Brush or Pencil tools to re-paint over an area (white to show, black to hide).
If you want to view the layer mask itself, you can click on the layer mask box while holding down Option (on a Mac) or Alt (on a PC). Clicking again will return the normal view. The comparison below shows the initial selection of the layer mask (top) and then the refined view after painting back in the missing sections of knee and sock.
Once you have one layer the way you want it, you can repeat the process and add layer masks to the remaining layers in your composite. Use the eye to turn layers on and off when working.
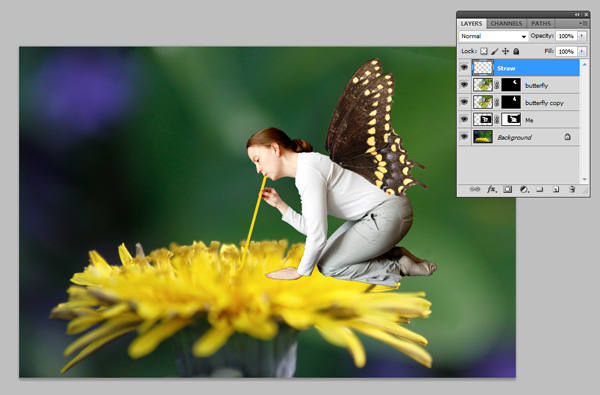
For the final version, I duplicated the butterfly layer after I had the layer mask the way that I wanted. A simple rotation to the second layer made the duplicate wing stand out. For the final step, I added a new layer and used the paintbrush tool to paint on the yellow straw for sipping nectar.
Once you have a final version, be sure to save your original PSD file as well as a full-size JPEG for viewing and printing. If you do not keep a copy of the PSD file, you will not be able to make any changes to the individual layers later, as a JPEG will only save a flattened version of the composite image.
What will you composite?
Layer masks and composite images have a wide range of uses and applications. You can create something new and unexpected, like my composite example, but you can also use layer masks for more realistic effects. Photographers commonly use layer masks to change the sky in an image or to apply an effect, like skin smoothing, to only part of an image.
[box type=”shadow”]
Unleash the creative power of Photoshop to dramatically improve and enhance your photos and videos in just a few clicks in Adobe Education Leader Nicole Dalesio’s Bluprint class Innovative Photoshop Techniques for Photo and Video.
[/box]
Share tips, start a discussion or ask one of our experts or other students a question.
No Responses to “How to Use Layer Masks to Create Composite Images in Photoshop”