
Want a quick and easy way to add some texture to your cards and paper crafts? Try embossing paste! There are so many different textures, colors and finishes available on the market now that you can use with your stencils (or without if you want to try some freehand applications), and they are quite easy to use. Read on to see how you can create cards with a “wow” factor simply by applying embossing paste over a stencil.
Here’s how to use embossing paste to create texture for your cards:

Supplies needed:
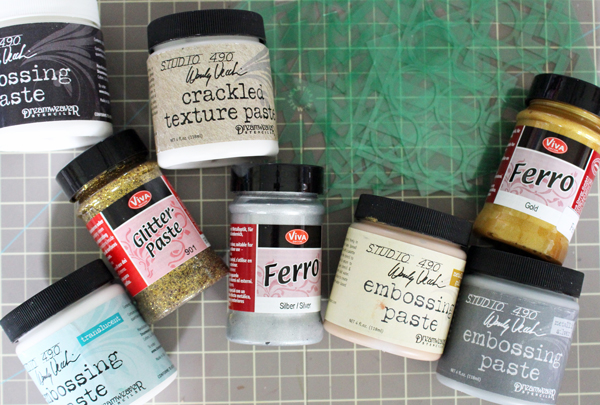
- Embossing paste of choice*
- Stencil
- Card stock
- Spatula (an old gift card or credit card will work as well)
- Painter’s tape
- Baby wipe or paper towel
*If you don’t own any to start off with, I recommend a white paste. You can tint it different colors with various mediums (more on that below) and add other elements, like glitter and embossing powder, to change things up. I personally prefer the brand Studio 490, as I find it works great and has a nice creamy texture to it.
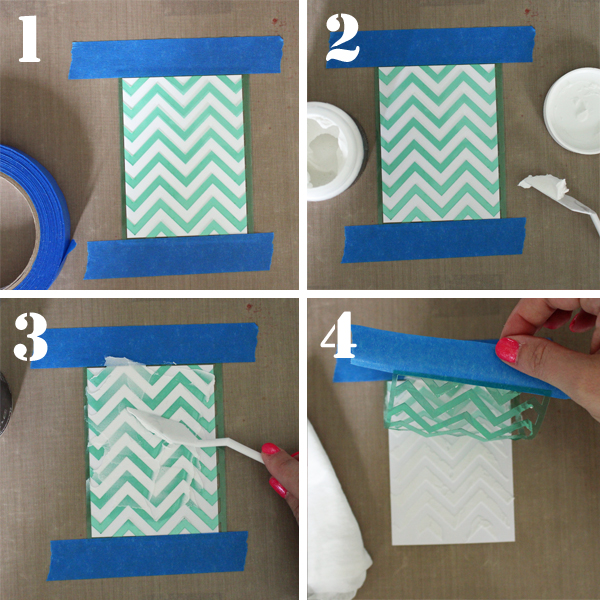
Step 1:
Tape your stencil over your card stock with painter’s tape. This prevents the stencil from shifting when applying the paste.
Step 2:
Pick up the desired amount of paste with your spatula. You’ll need less than you think. This particular paste has a consistency very similar to buttercream icing — and spreads like it too! I recommend putting the lid back on the container as embossing pastes can dry out quite quickly.
Step 3:
Apply the paste with the spatula over the stencil. It’s up to you how thickly and evenly you want to apply it. Experiment with it and see what looks you prefer!
Step 4:
Once you’re finished applying the paste, lift the stencil straight up off the card stock so as not to smear the stenciled texture you’ve created. Set aside your card stock to dry (dry time varies depending on the type of paste and how thick it was applied — it can be anywhere from several minutes to an hour to dry) and immediately clean off your spatula, stencil and work surface.
I prefer to clean my spatula with a baby wipe, and then run my stencil(s) under warm running water in the sink. If it’s a particularly stubborn paste, I’ll use a little dish soap to clean off the stencil and it’s as good as new.
Step 5:
Once your stenciled paste is dry you can create your card! Explore the inspiring examples below to find a project you’d like to try!
Creative ways to use embossing paste
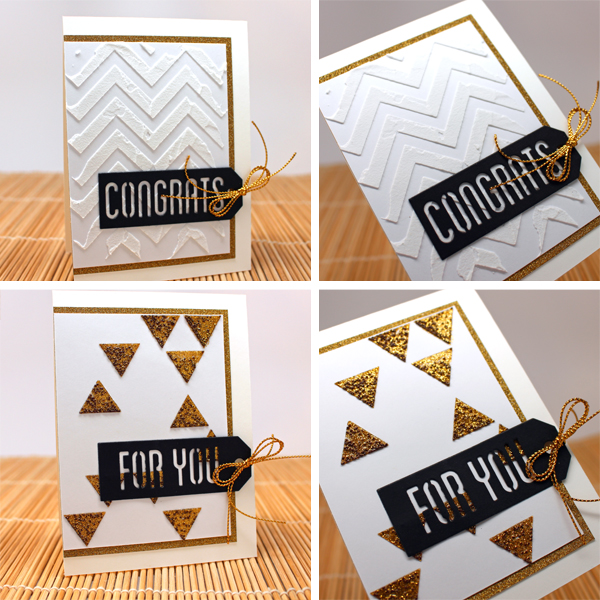
The second card used the same technique with a glitter embossing paste. You can try making your own with paste and loose glitter — but experiment with small amounts to see if you’re happy with how it looks when it’s dry.
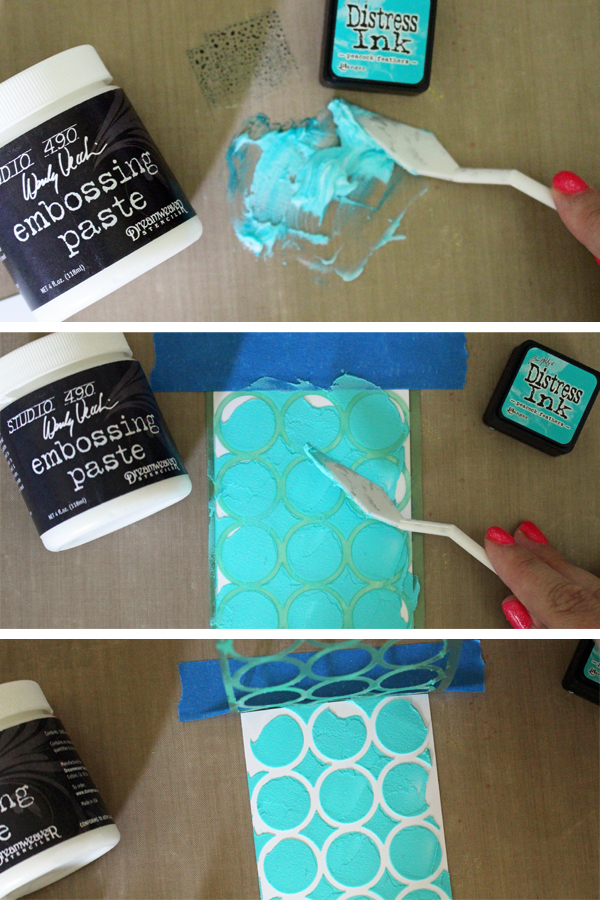
Another thing you can do is tint your embossing pastes with different mediums. Here I’m showing how you can do it with a dye ink pad by smushing the ink pad onto my non-porous work surface, then mixing a small amount of the white embossing paste with the ink to create this pretty teal color. You could also use markers, Gelatos, color sprays and more to tint your embossing pastes in any color you’d like!
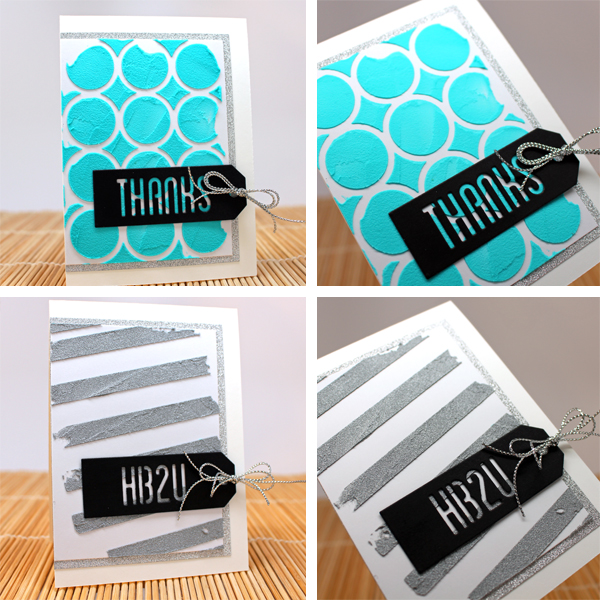
It’s fun to see how the finished cards look. Even though I used the same layouts and tags, by using different stencils and colors/textures of pastes, the finished cards all have a different look to them! Again in the picture above, I used a different paste on the second card — that was a silver Ferro paste that has a gritty, sand-like texture to it with a metallic sheen. Very fun!
I am really enjoying incorporating these different types of embossing and texture pastes into my paper crafts. I love that it never looks the same twice, and there are so very many ways to experiment to add color and texture by mixing other mediums with my pastes!
Now available: New paper craft classes from Cratsy!
Browse our growing selection of online paper craft classes today. If you’re new to Craftsy’s online learning platform, try it for FREE with one of our fun mini-classes: Spectacular Stamping with Joy Macdonell and Create Stunning Birthday Cards with Kimber McGray.
Share tips, start a discussion or ask one of our experts or other students a question.
No Responses to “Stencil DIY: How to Add Texture to Your Cards With Embossing Paste”