
Before you sew a bag, one essential technique you need is knowing how to give the bag a closure. Magnetic snaps are easy to use and an effective way to add top closures or flaps.
There are two different kinds of magnetic snaps: invisible and traditional. In this post, I’ll walk you through how to install both methods — you can adapt these into many different bags!
How to install an invisible magnetic snap
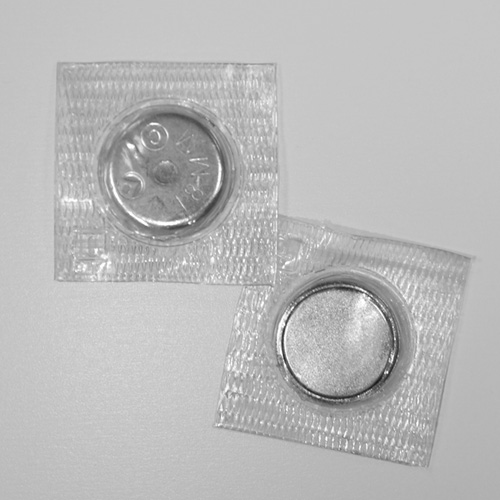
Invisible magnetic snaps come in several different sizes. I like to use the ¾” (or 18mm) size for bags. The round magnet is enclosed in a clear vinyl sleeve. The sleeve assists you in sewing the magnet directly to your fabric or interfacing (I prefer to sew mine to interfacing).
The most important thing to remember when working with invisible magnetic snaps is that one side of the magnet will repel against the other, and one side will attract.
Step 1:
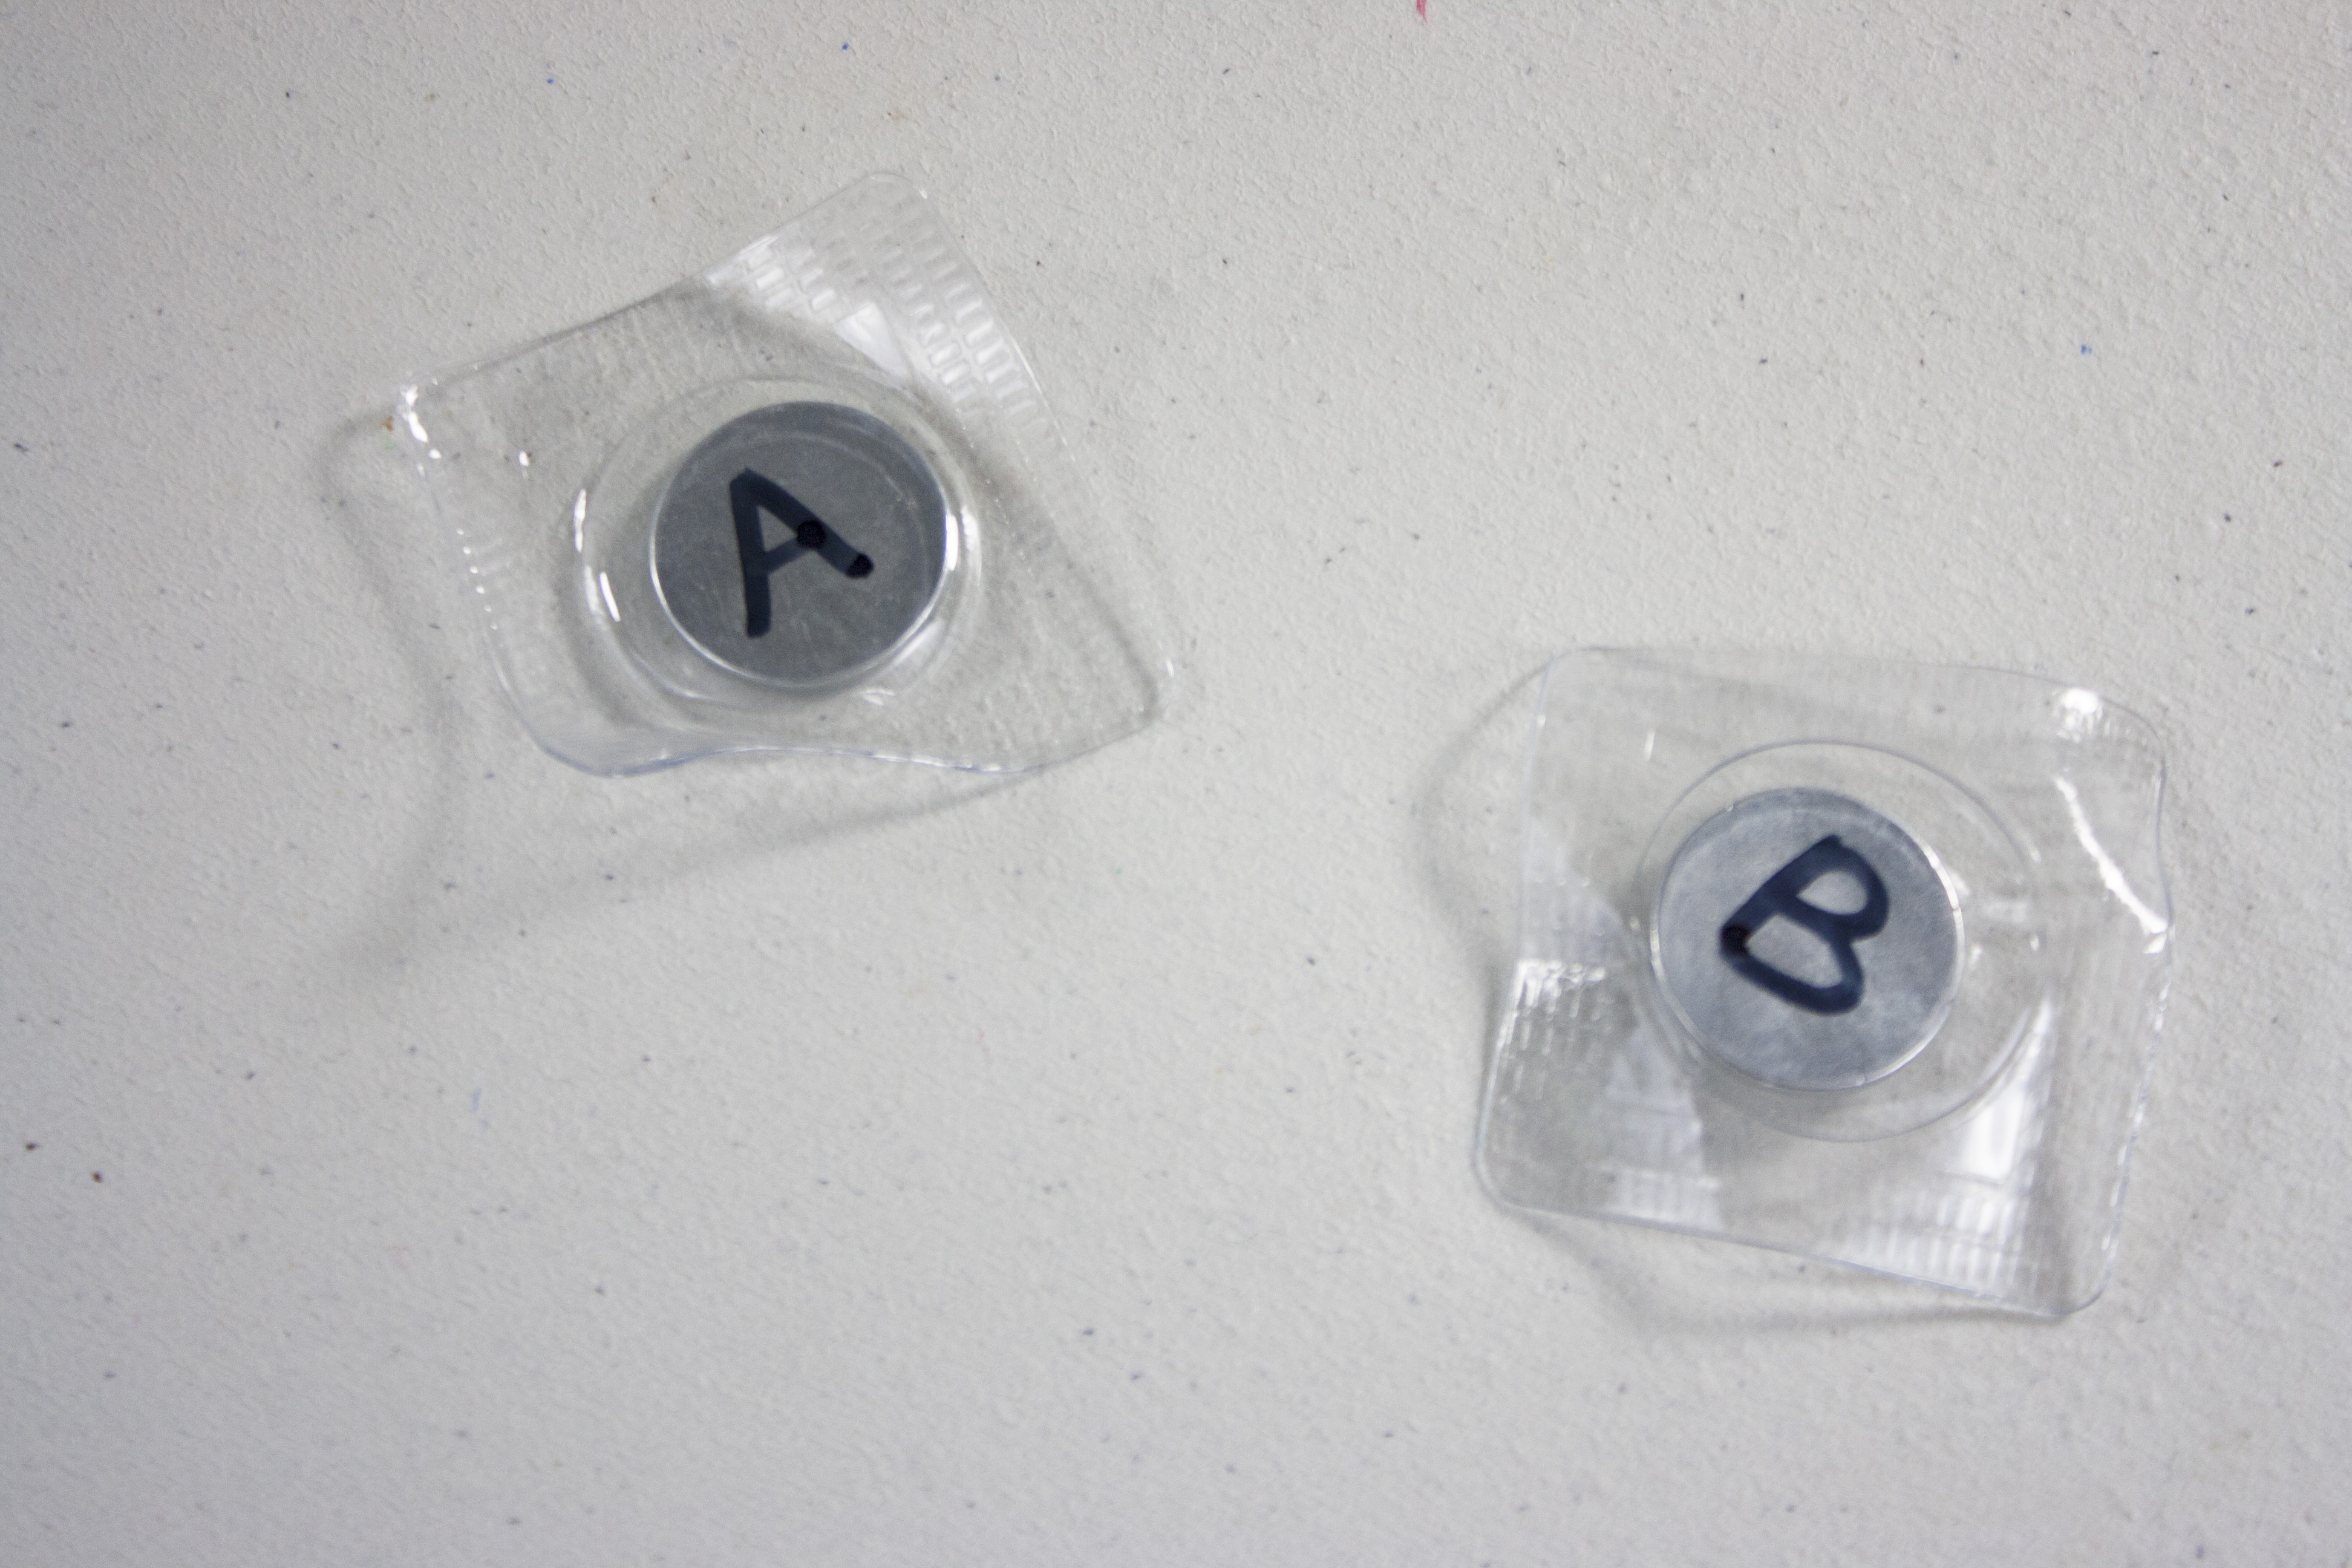
Before beginning, I like to mark with a pen or marker which side of the magnets will repel. I’m in the habit of using the letters ‘A’ and ‘B’ to mark the attracting side of the magnets because I often need more than one pair of magnets to make a bag, and this way I can keep track of my pairs.
Step 2:
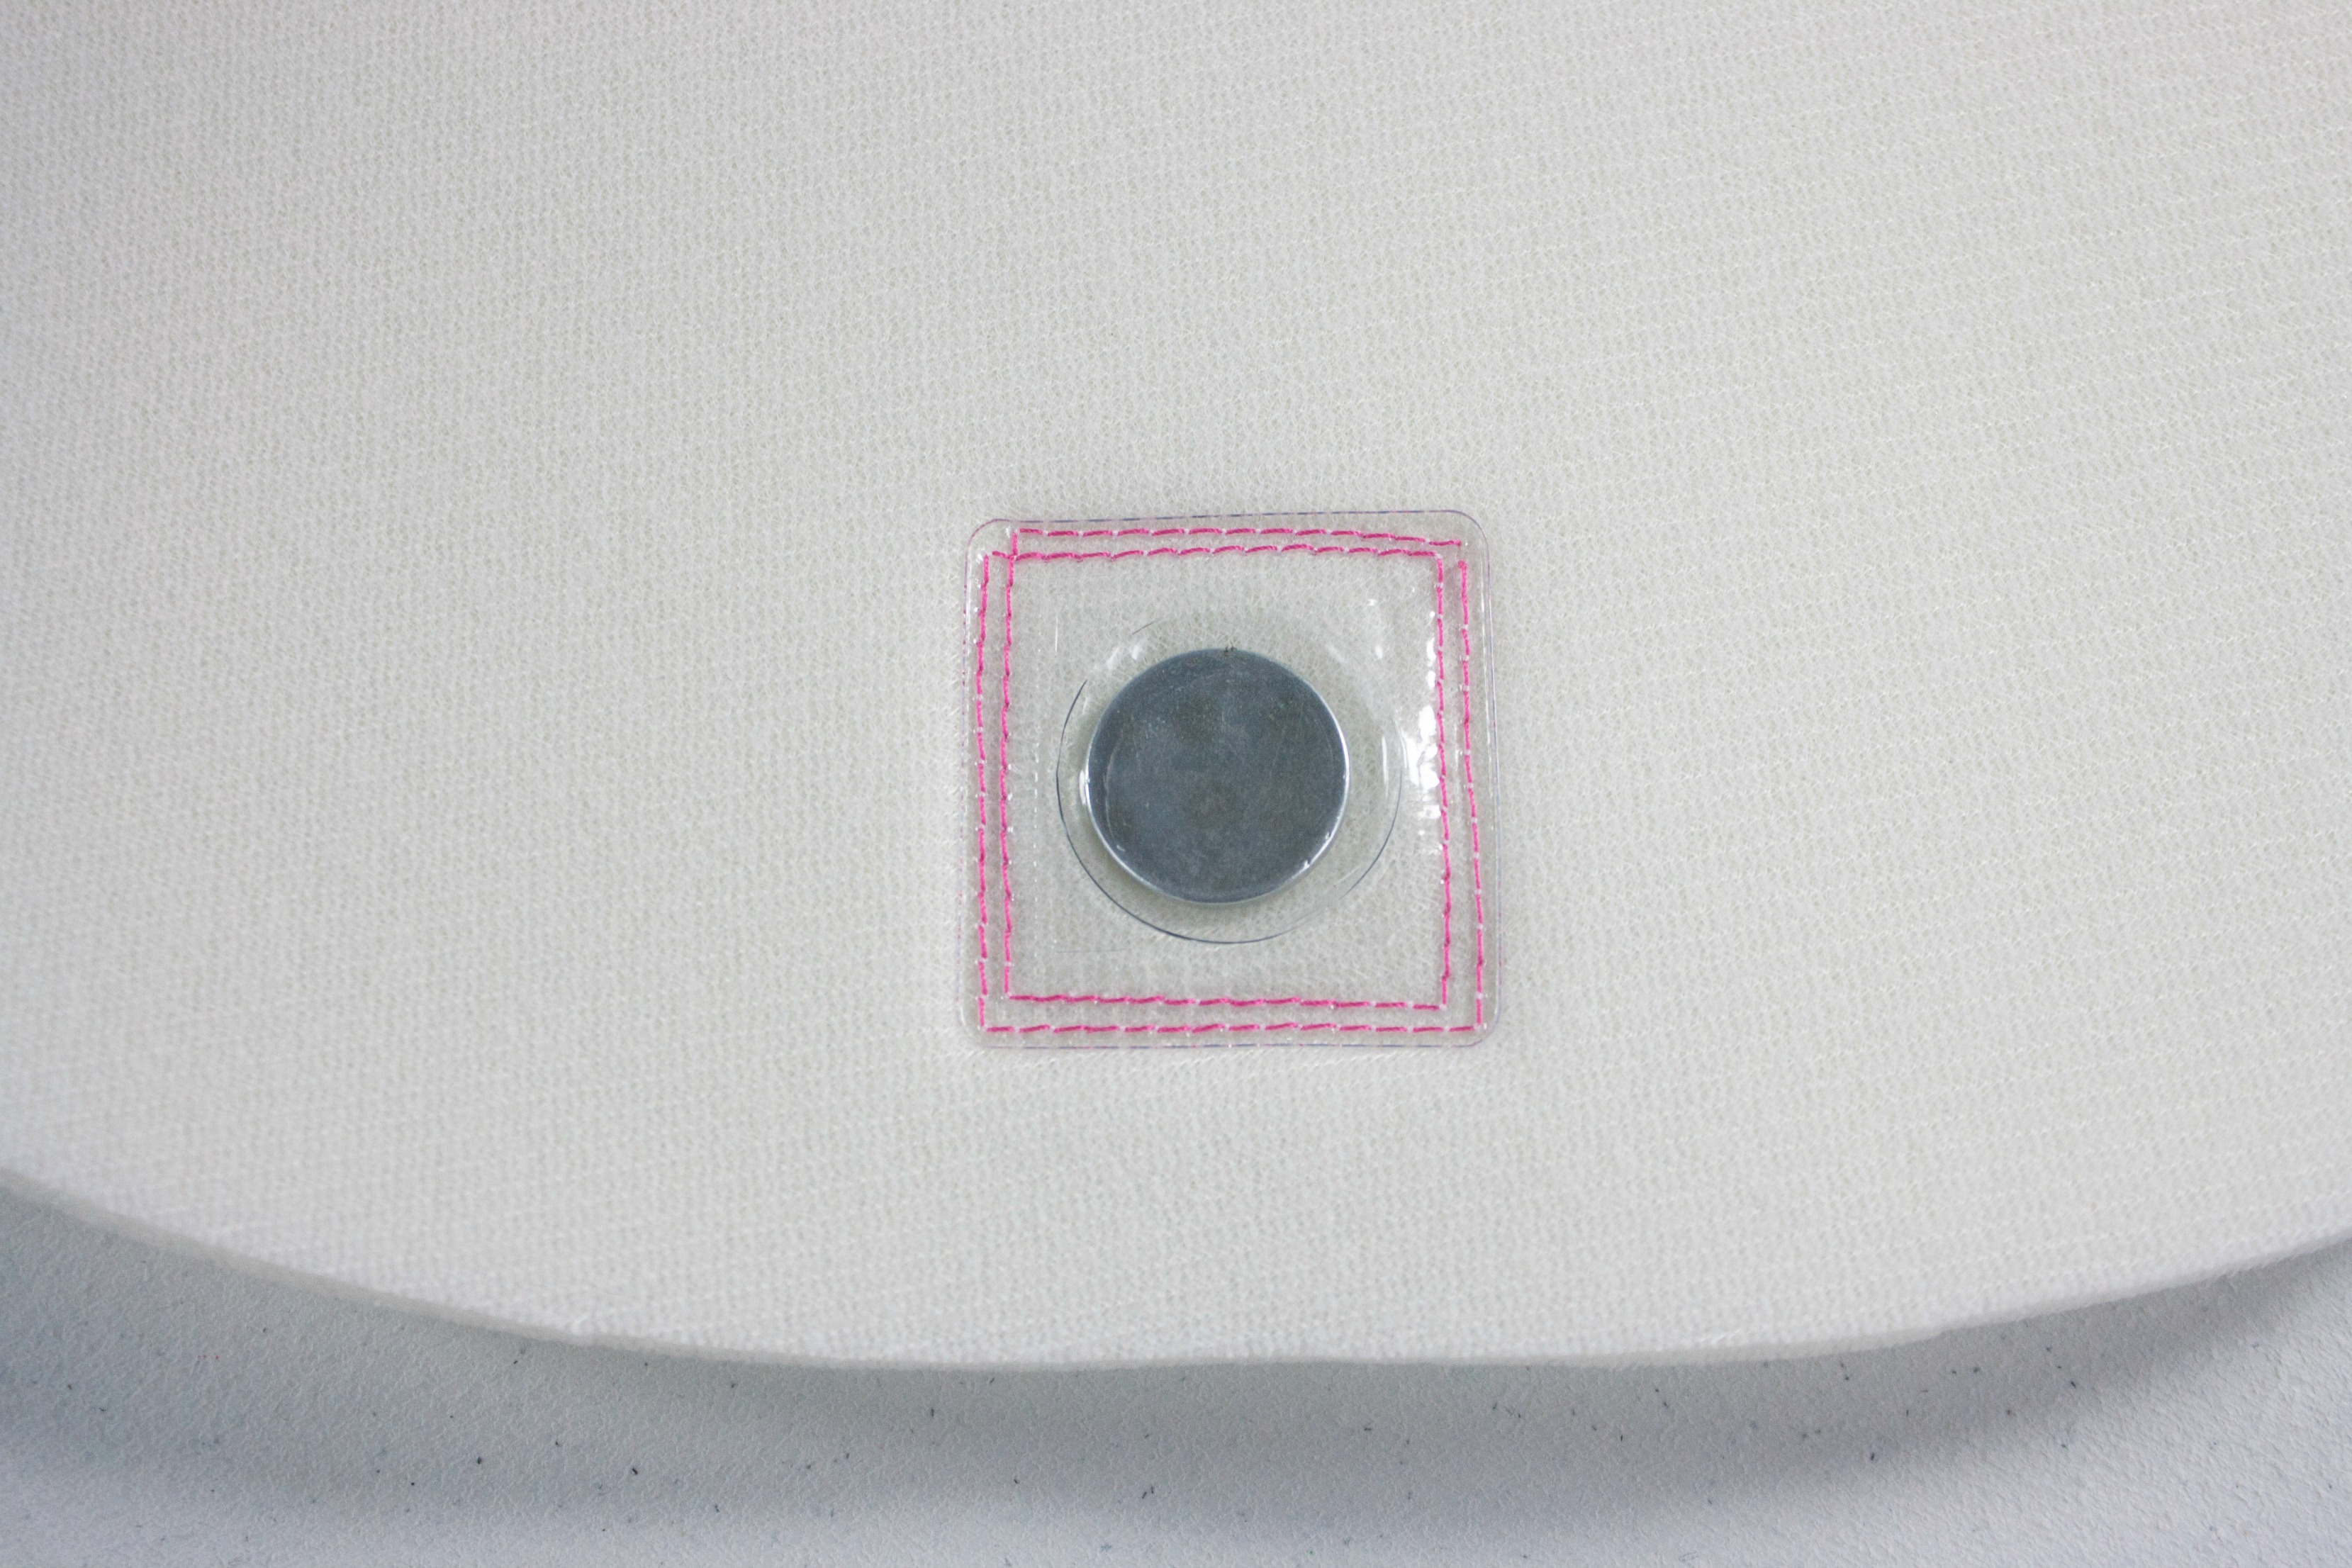
I like to attach my invisible magnetic snap to the respective interfacing before I fuse or baste the interfacing to the fabric. In my example, I am using ByAnnie’s Soft and Stable interfacing for a flap piece.
- First, with an invisible fabric marker, mark the snap placement on the flap according to the pattern you’re working with. I often place my snaps centered, and up 1½” from the bottom edge of the flap, as I’ve done in the example here.
- Place the snap directly on top of the mark that you made. For my flap example, I placed the marked magnetic side face down.
Step 3:
Next sew along the outer edge of the vinyl sleeve with a 1/8″ seam allowance. Use either a tight zigzag stitch or two rows of double stitches — since opening and closing the snap puts stress on that vinyl sleeve, you want to make sure that the snap is attached well.
Step 4:
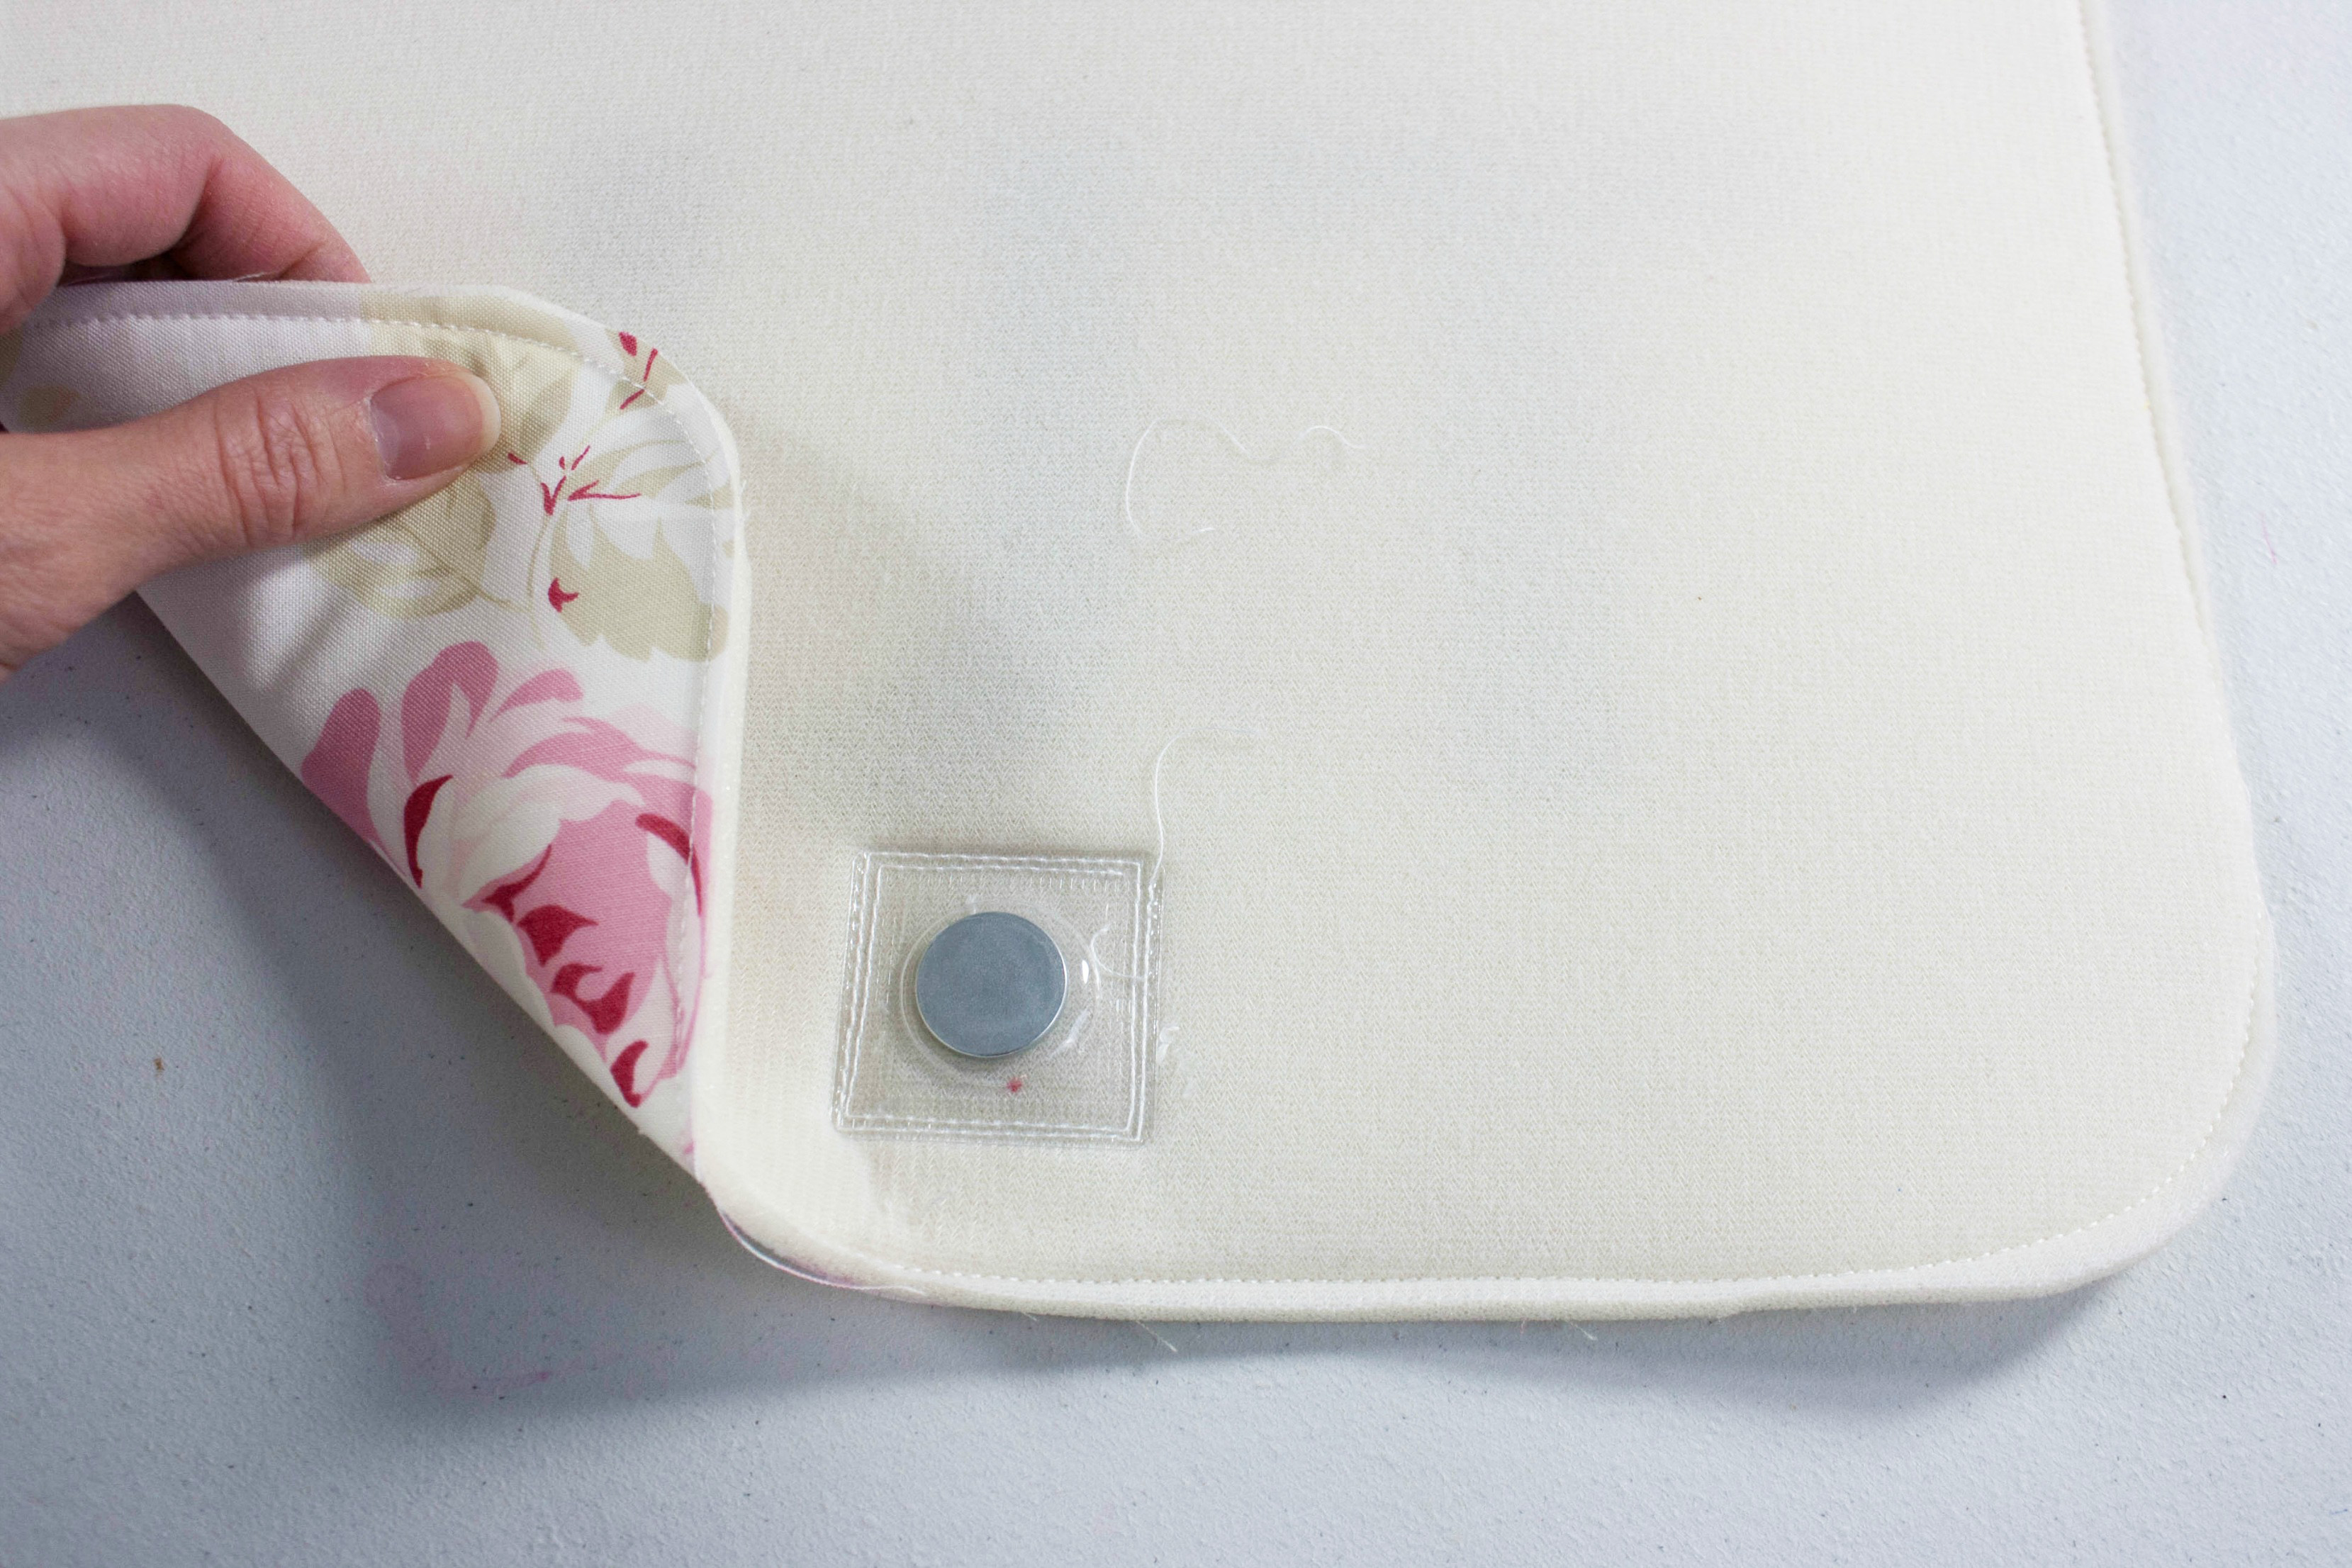
Now you just need to fuse or baste your fabric to the interfacing. Since I used a sew-in interfacing, I basted the fabric to the outer edge of my fabric using a 1/8″ seam allowance.
In my example, I basted the fabric to the opposite side that I have attached my snap, as I want the magnet to go through that layer of interfacing before it touches the other magnet. I use really strong magnets!
Invisible magnetic snaps are that easy to attach! Now you just repeat the process to install the other half of the magnetic snap. If your pattern doesn’t call for invisible magnetic snaps, you can substitute them in — just be mindful of which side of the fabric or interfacing that the magnetized side of the snap needs to be facing.
Traditional magnetic snap
Parts of a traditional magnetic snap
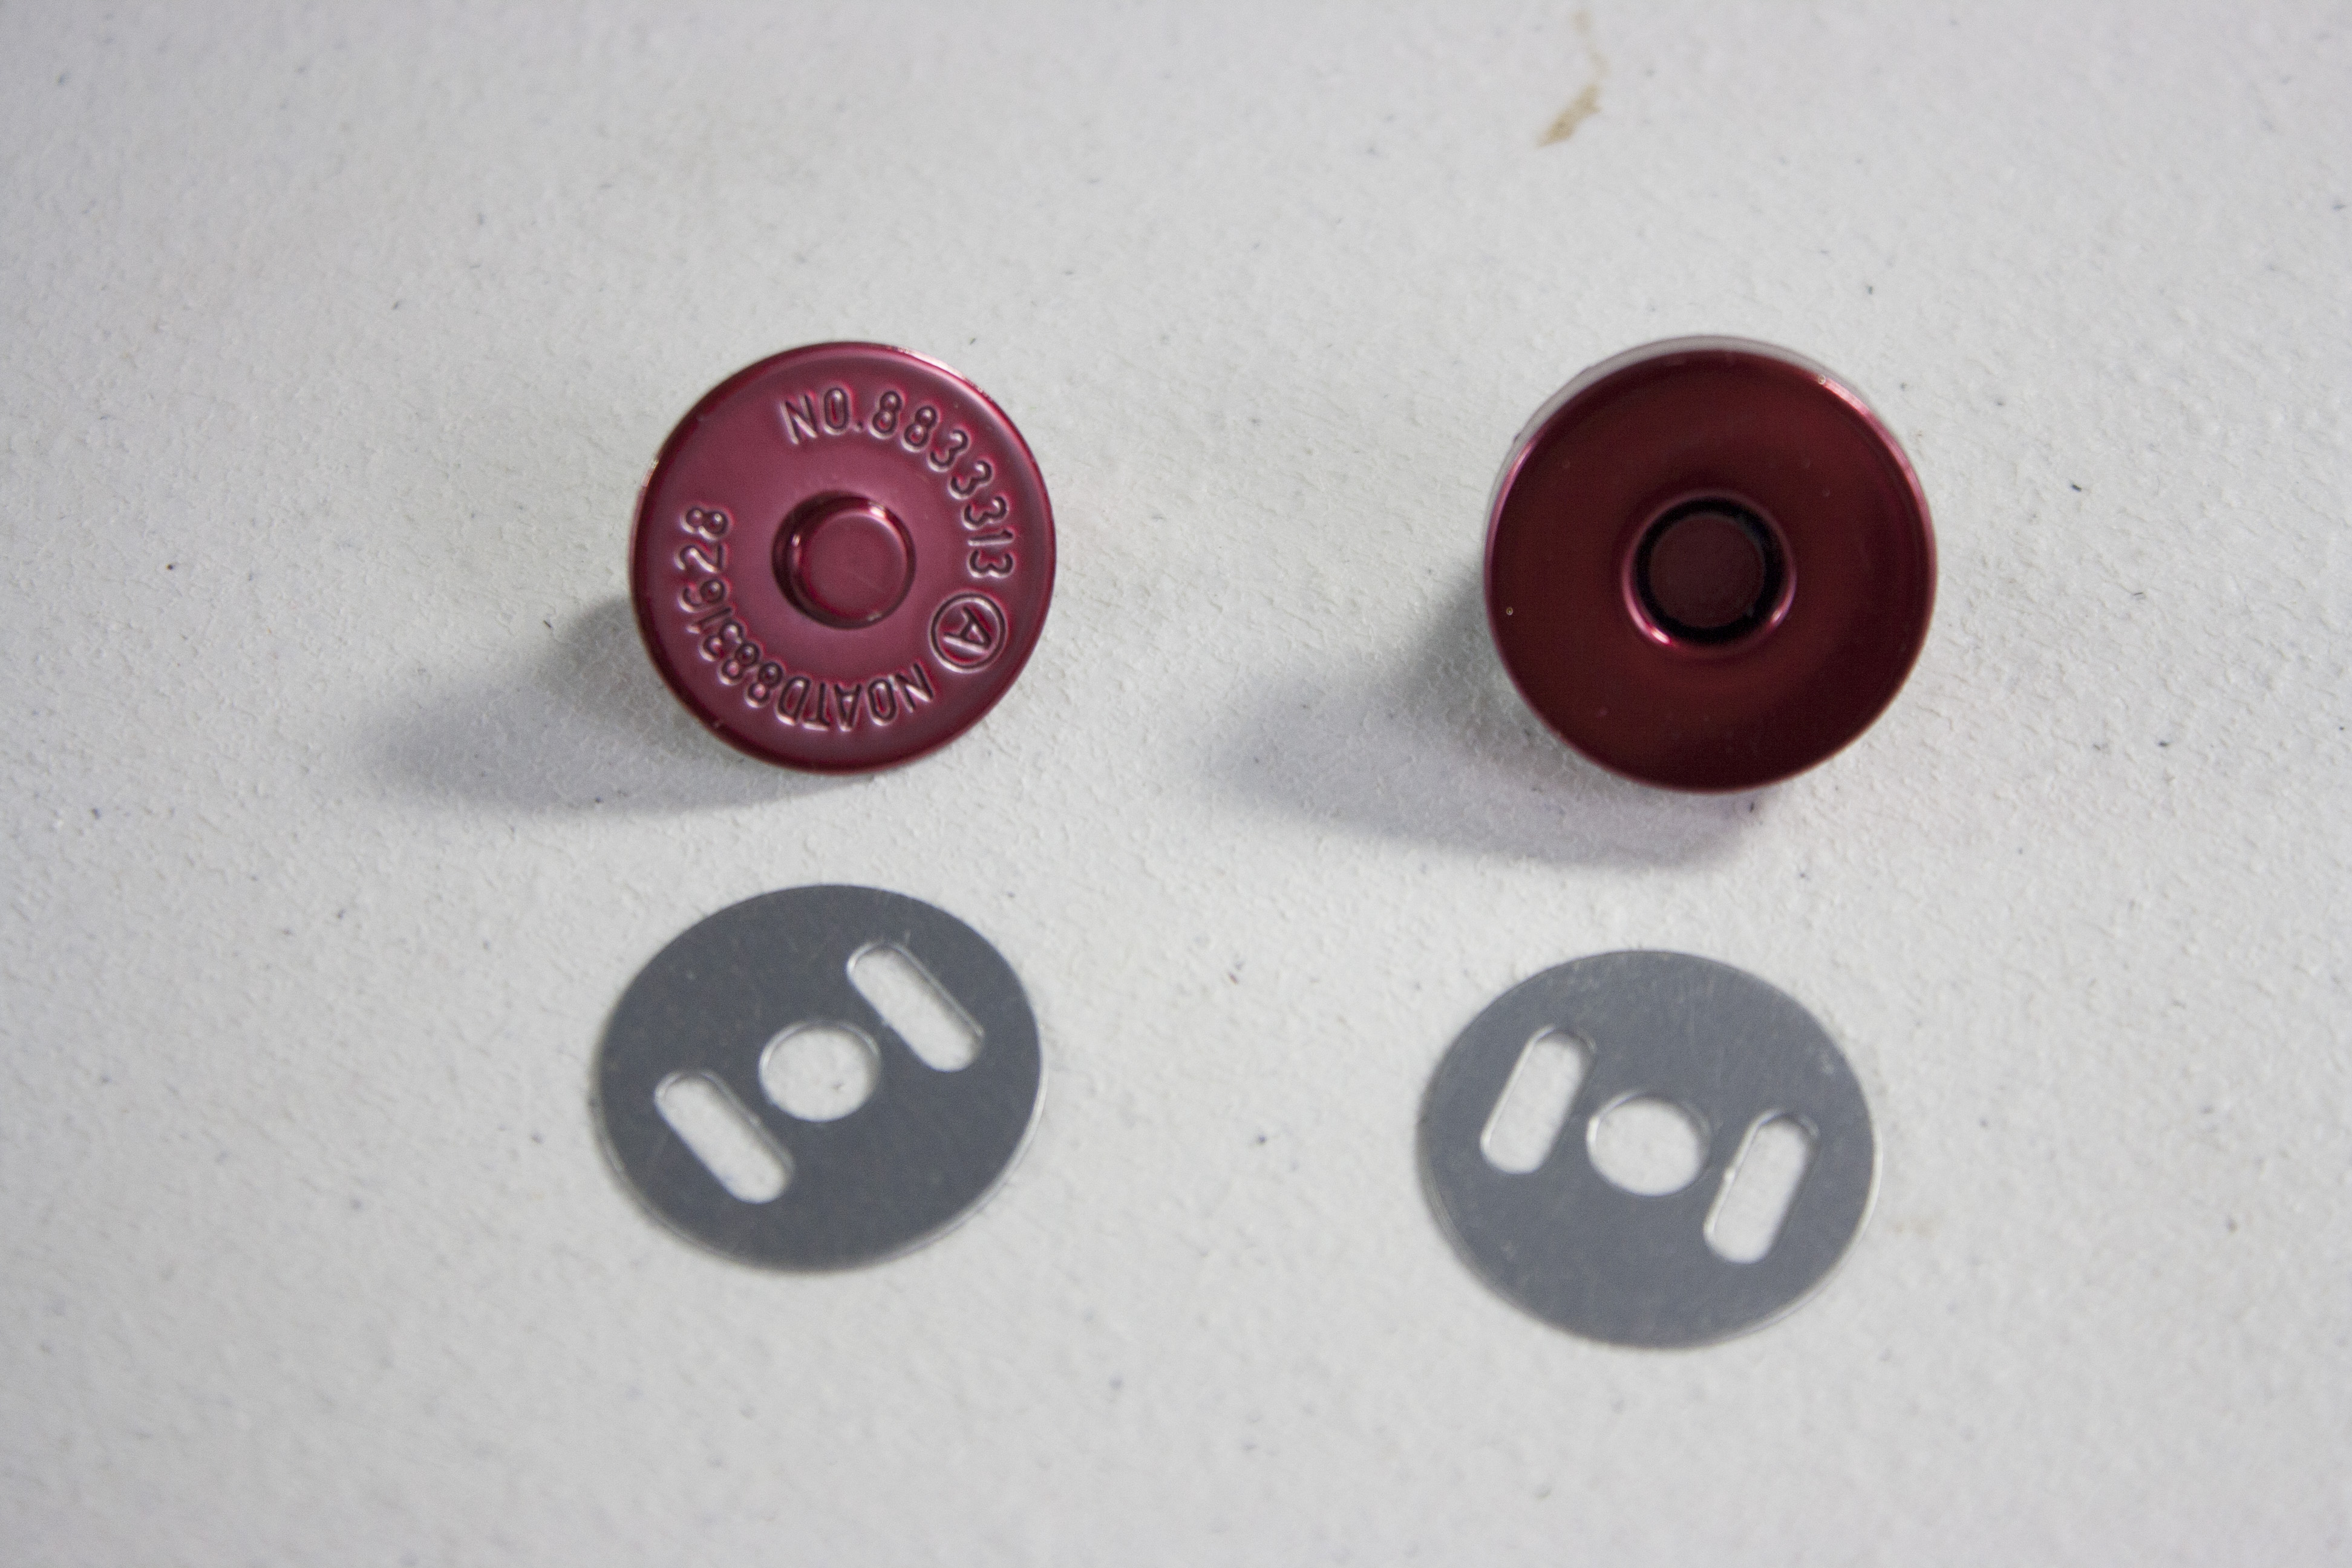
Traditional magnetic snaps are the most widely available. These magnetic snaps have what’s referred to as a “male” and “female” half. You can probably guess which is which!
I like to use the male portion on the flap of the bag, as the flap is usually smaller than the body of the bag and I think this pairs nicely with the smaller half of the magnetic snap.
Besides the two halves, traditional magnetic snaps sometimes come with two metal washers. The washers have a circle cut-out in the center and rectangular cut-outs on either side. If your magnetic snaps do not have these washers, don’t stress — these are not necessary, but they are nice to have.
Step 1:
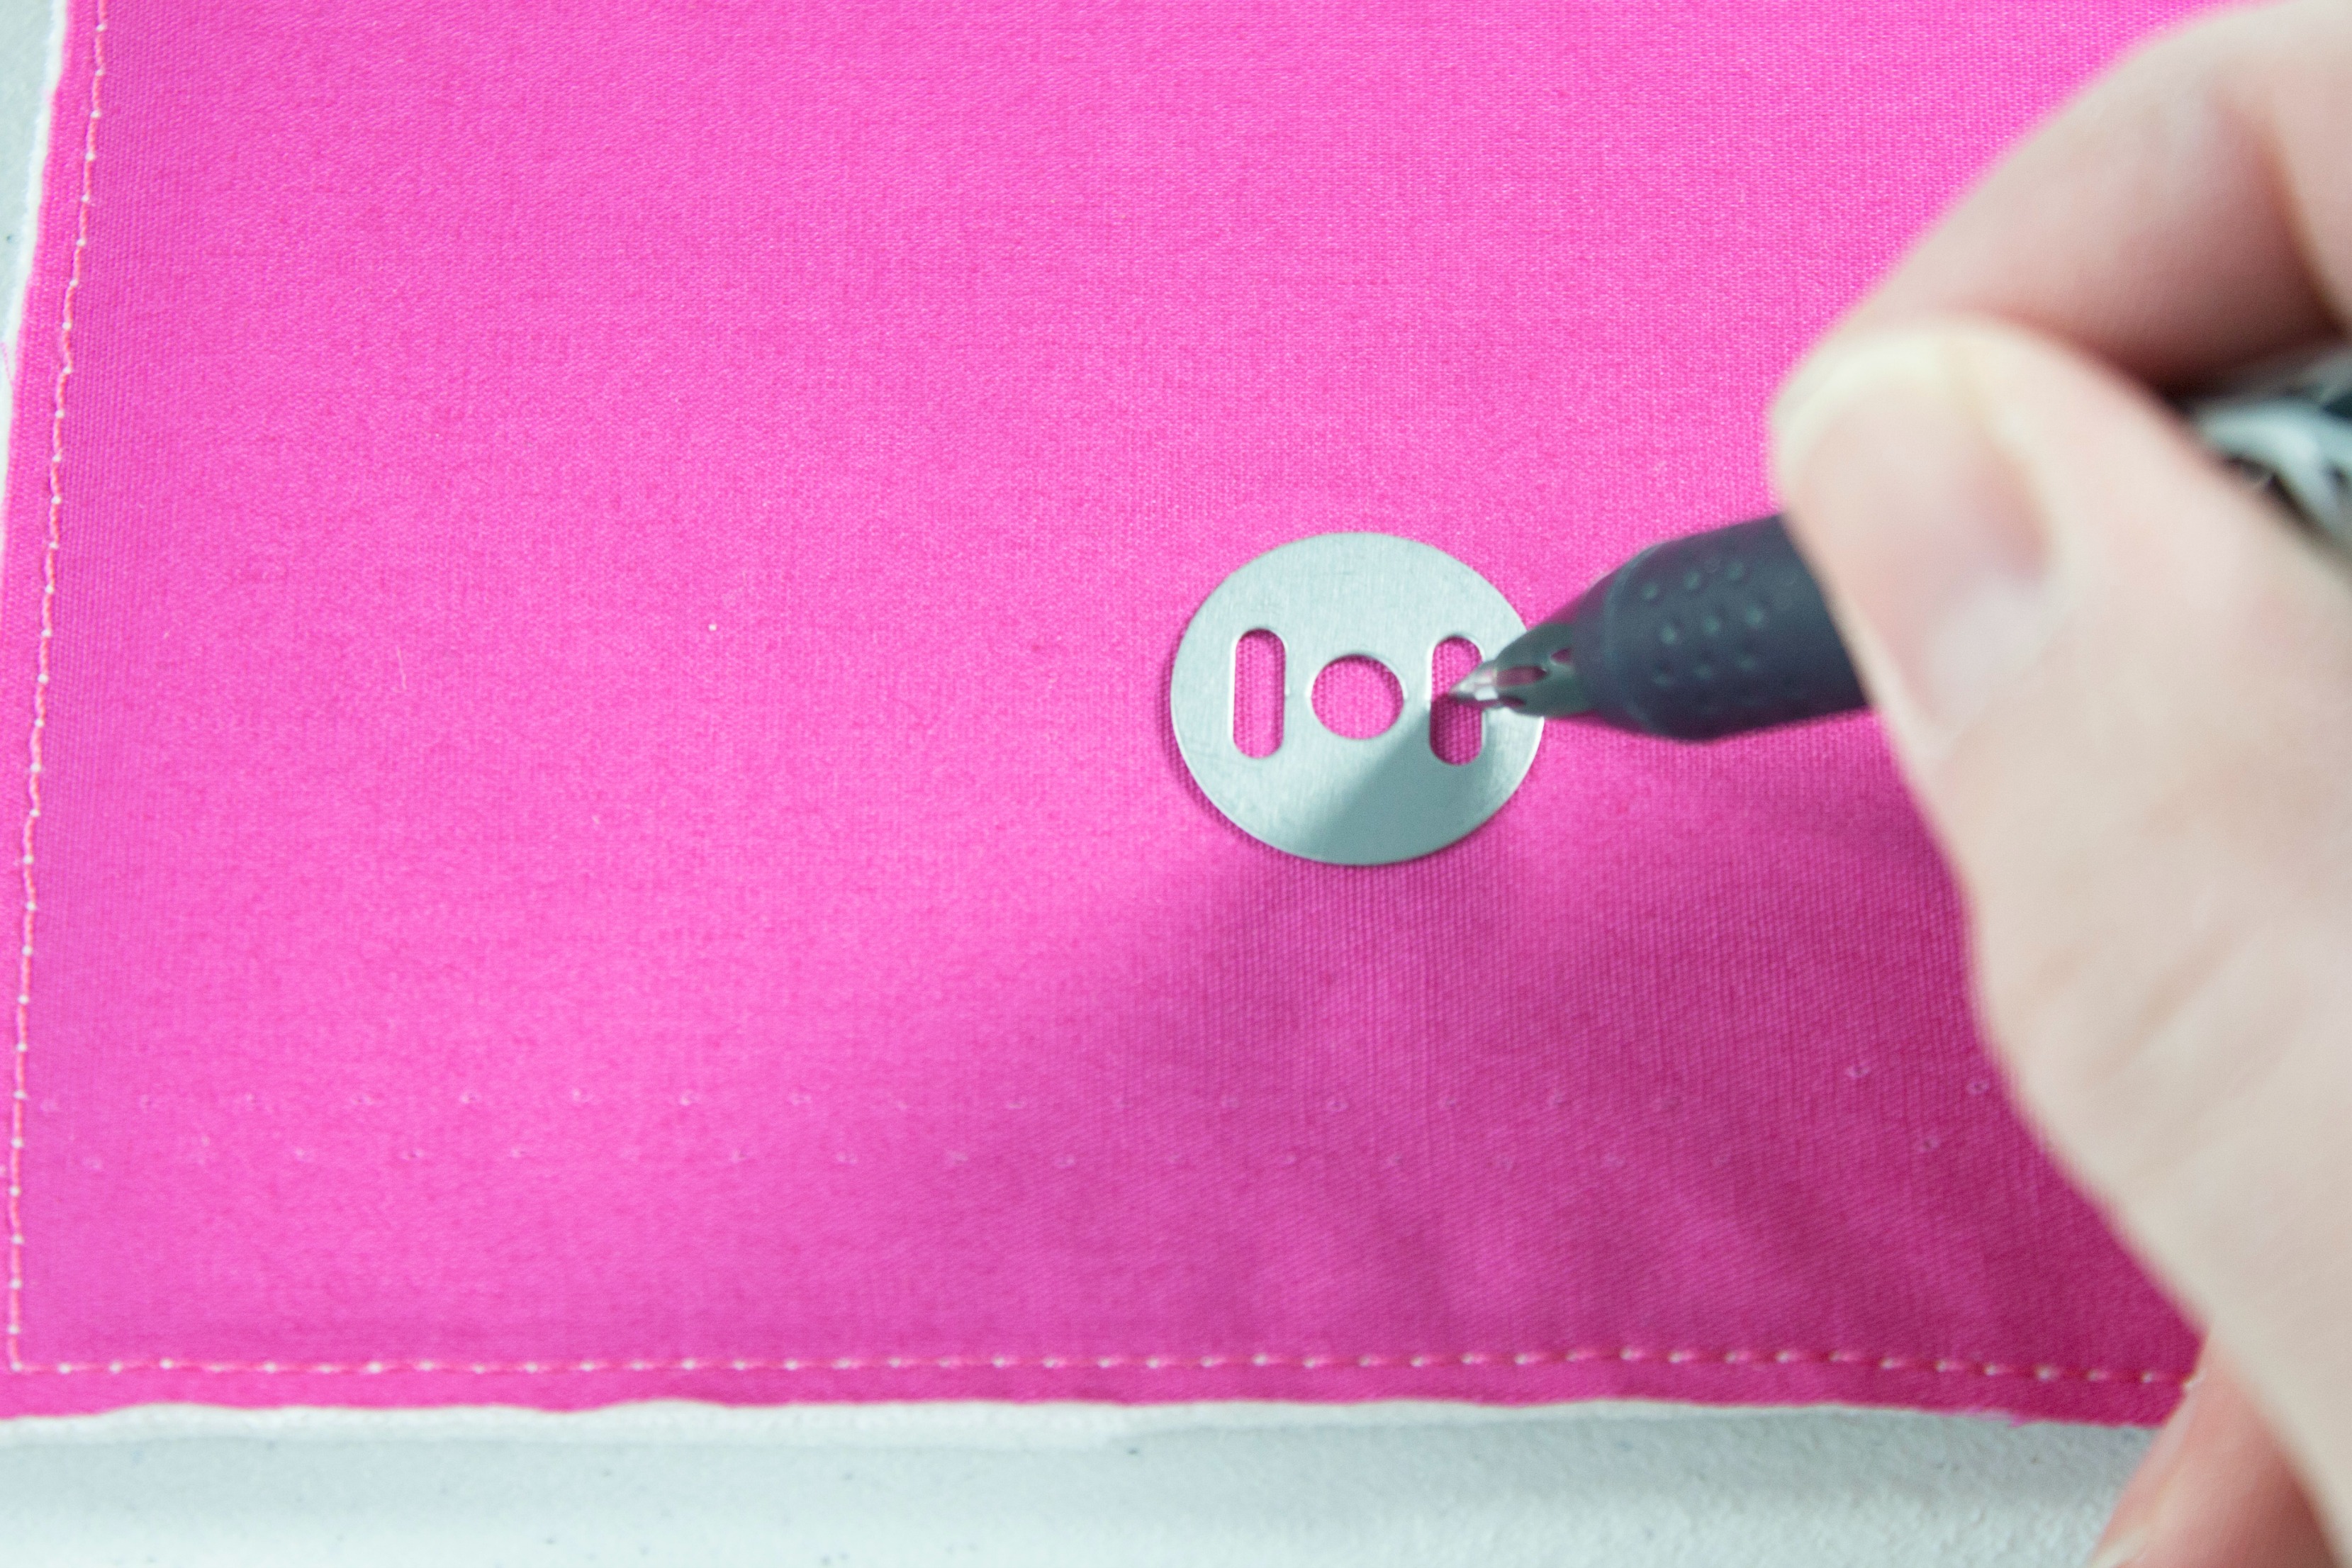
I use my invisible fabric marker to mark the prong placement for the snaps. You can either use the prongs themselves to mark placement, or you can use that handy washer if it came with your snaps.
Snaps are often installed either 1″ or 1½” above the bottom edge of a flap, or down 1½” from the top edge of a lining.
Step 2:
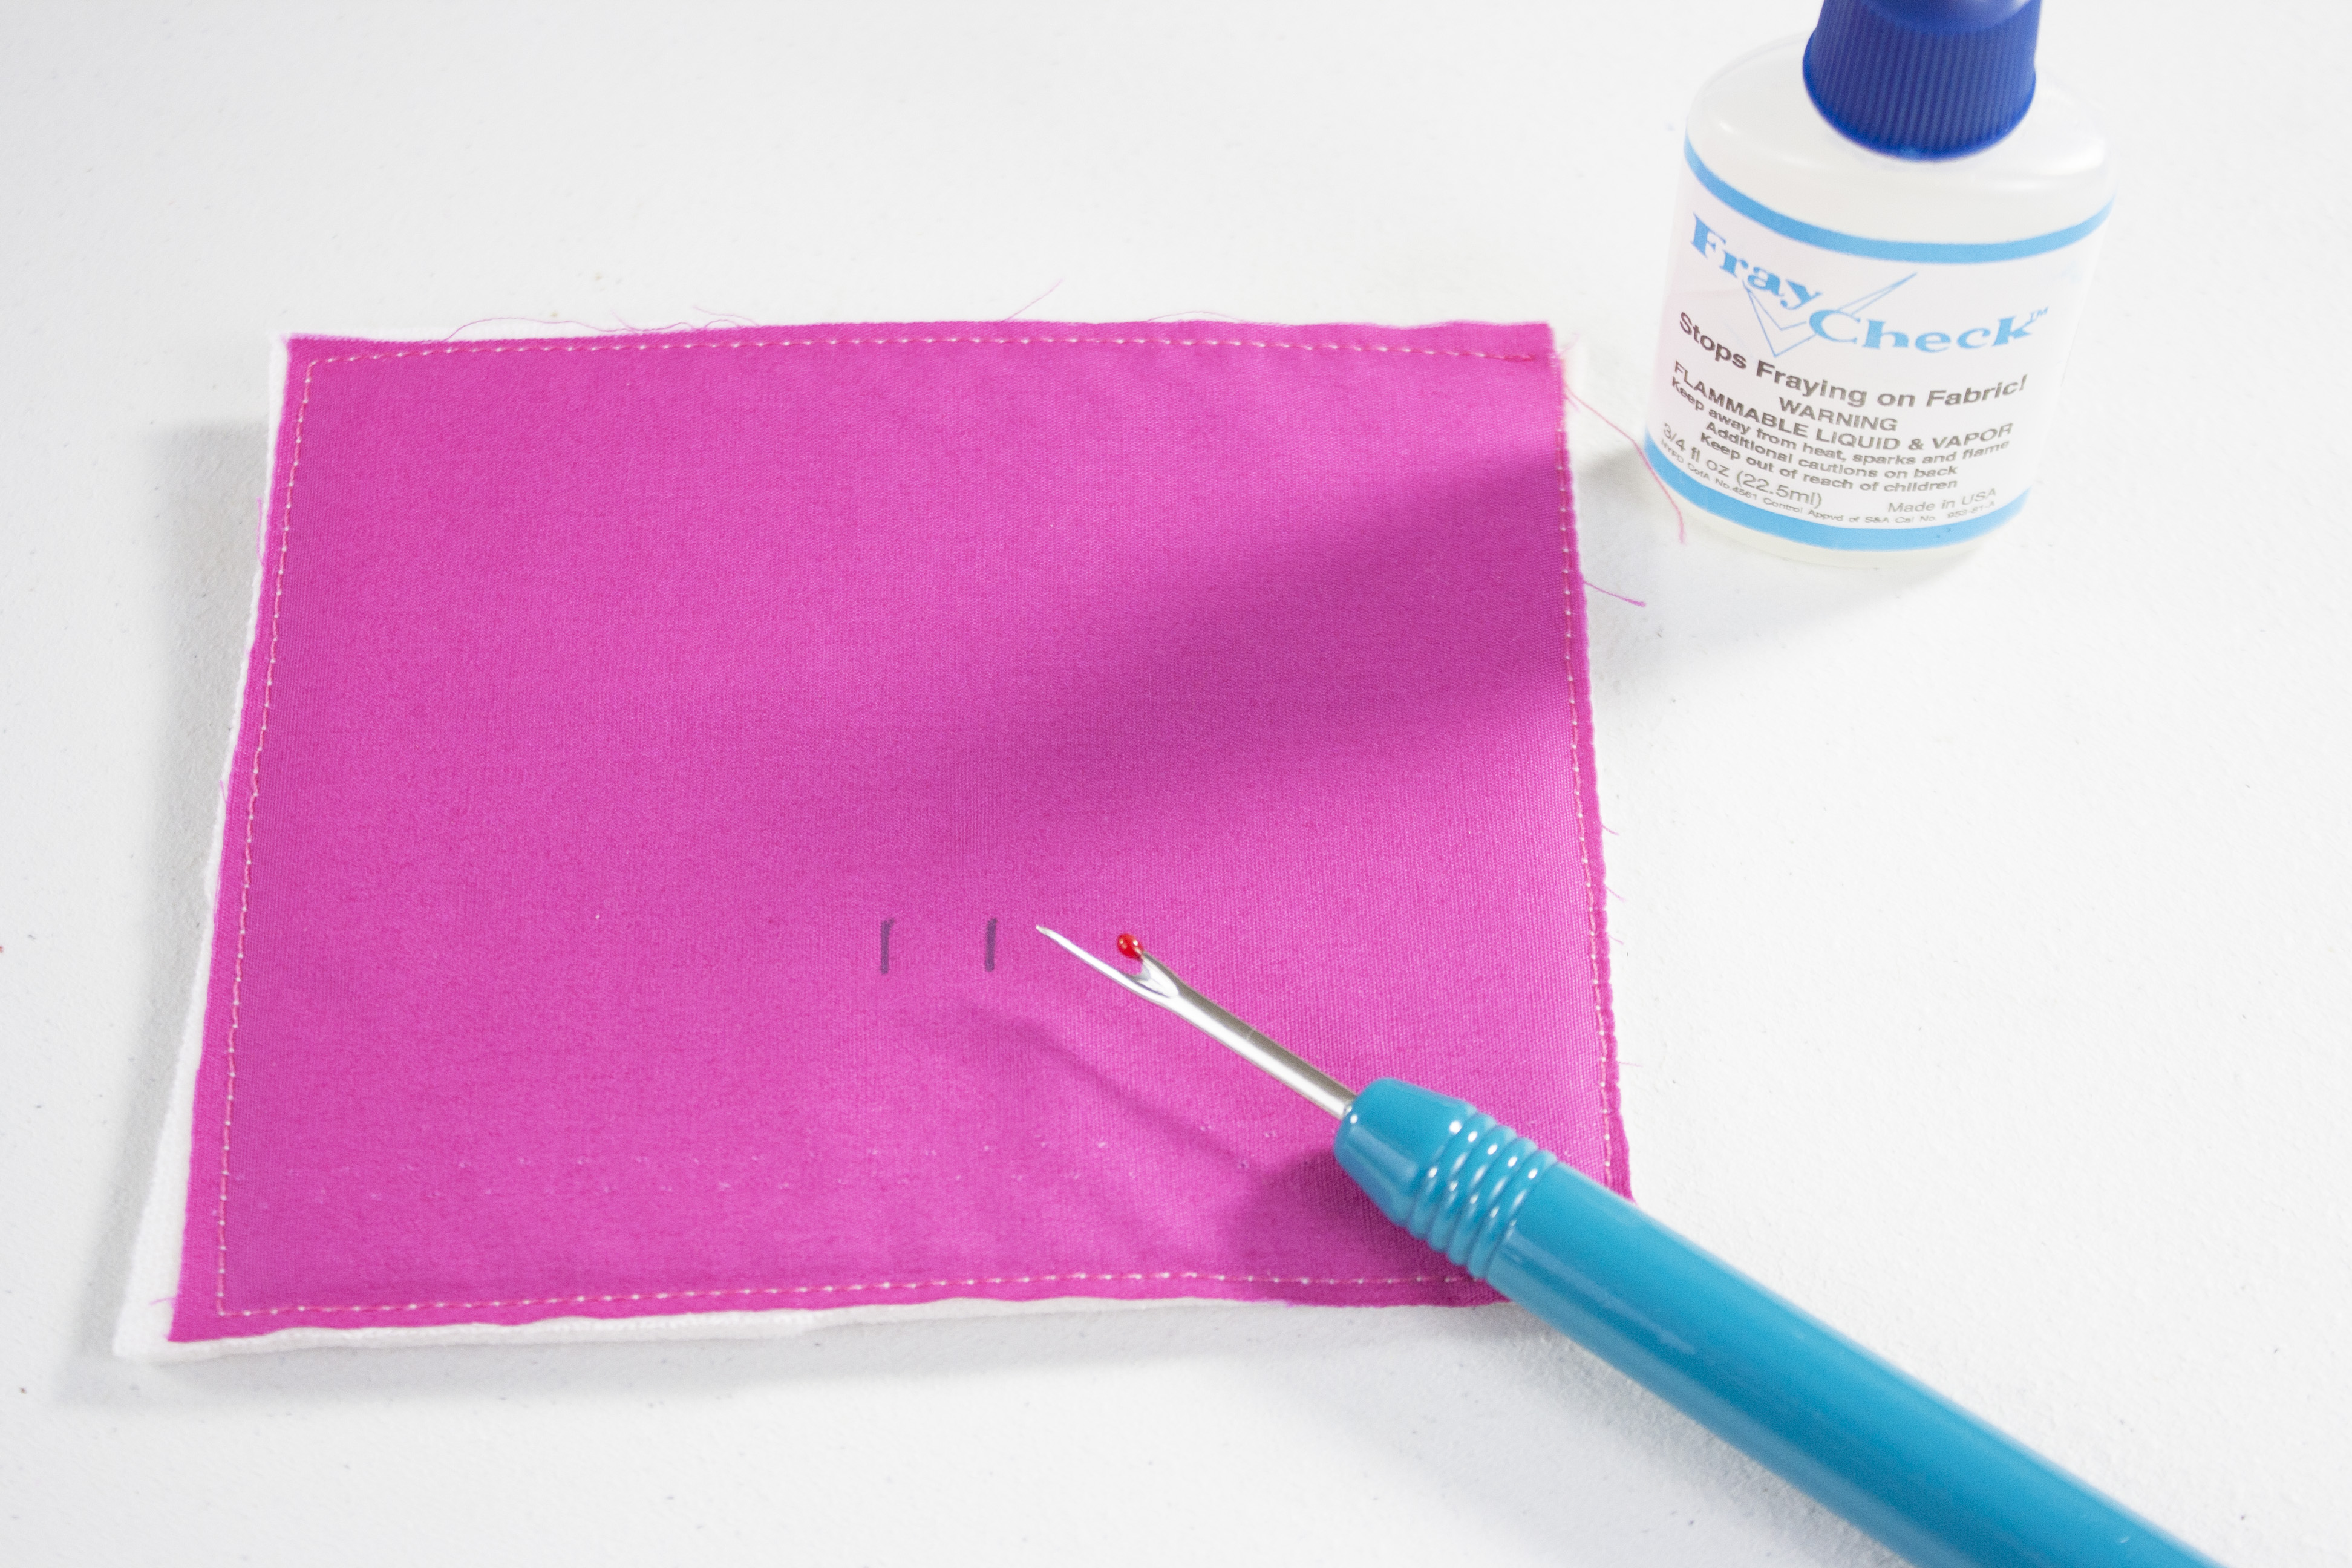
Use your seam ripper to make tiny slits the length of the marks that you made. Start small, as you can always make the hole bigger.
I like to follow up the slits that I’ve made with a dab of seam sealant, which helps stabilize the fabric against the snap.
Next, insert the snap through the right side of the fabric.
Step 3:
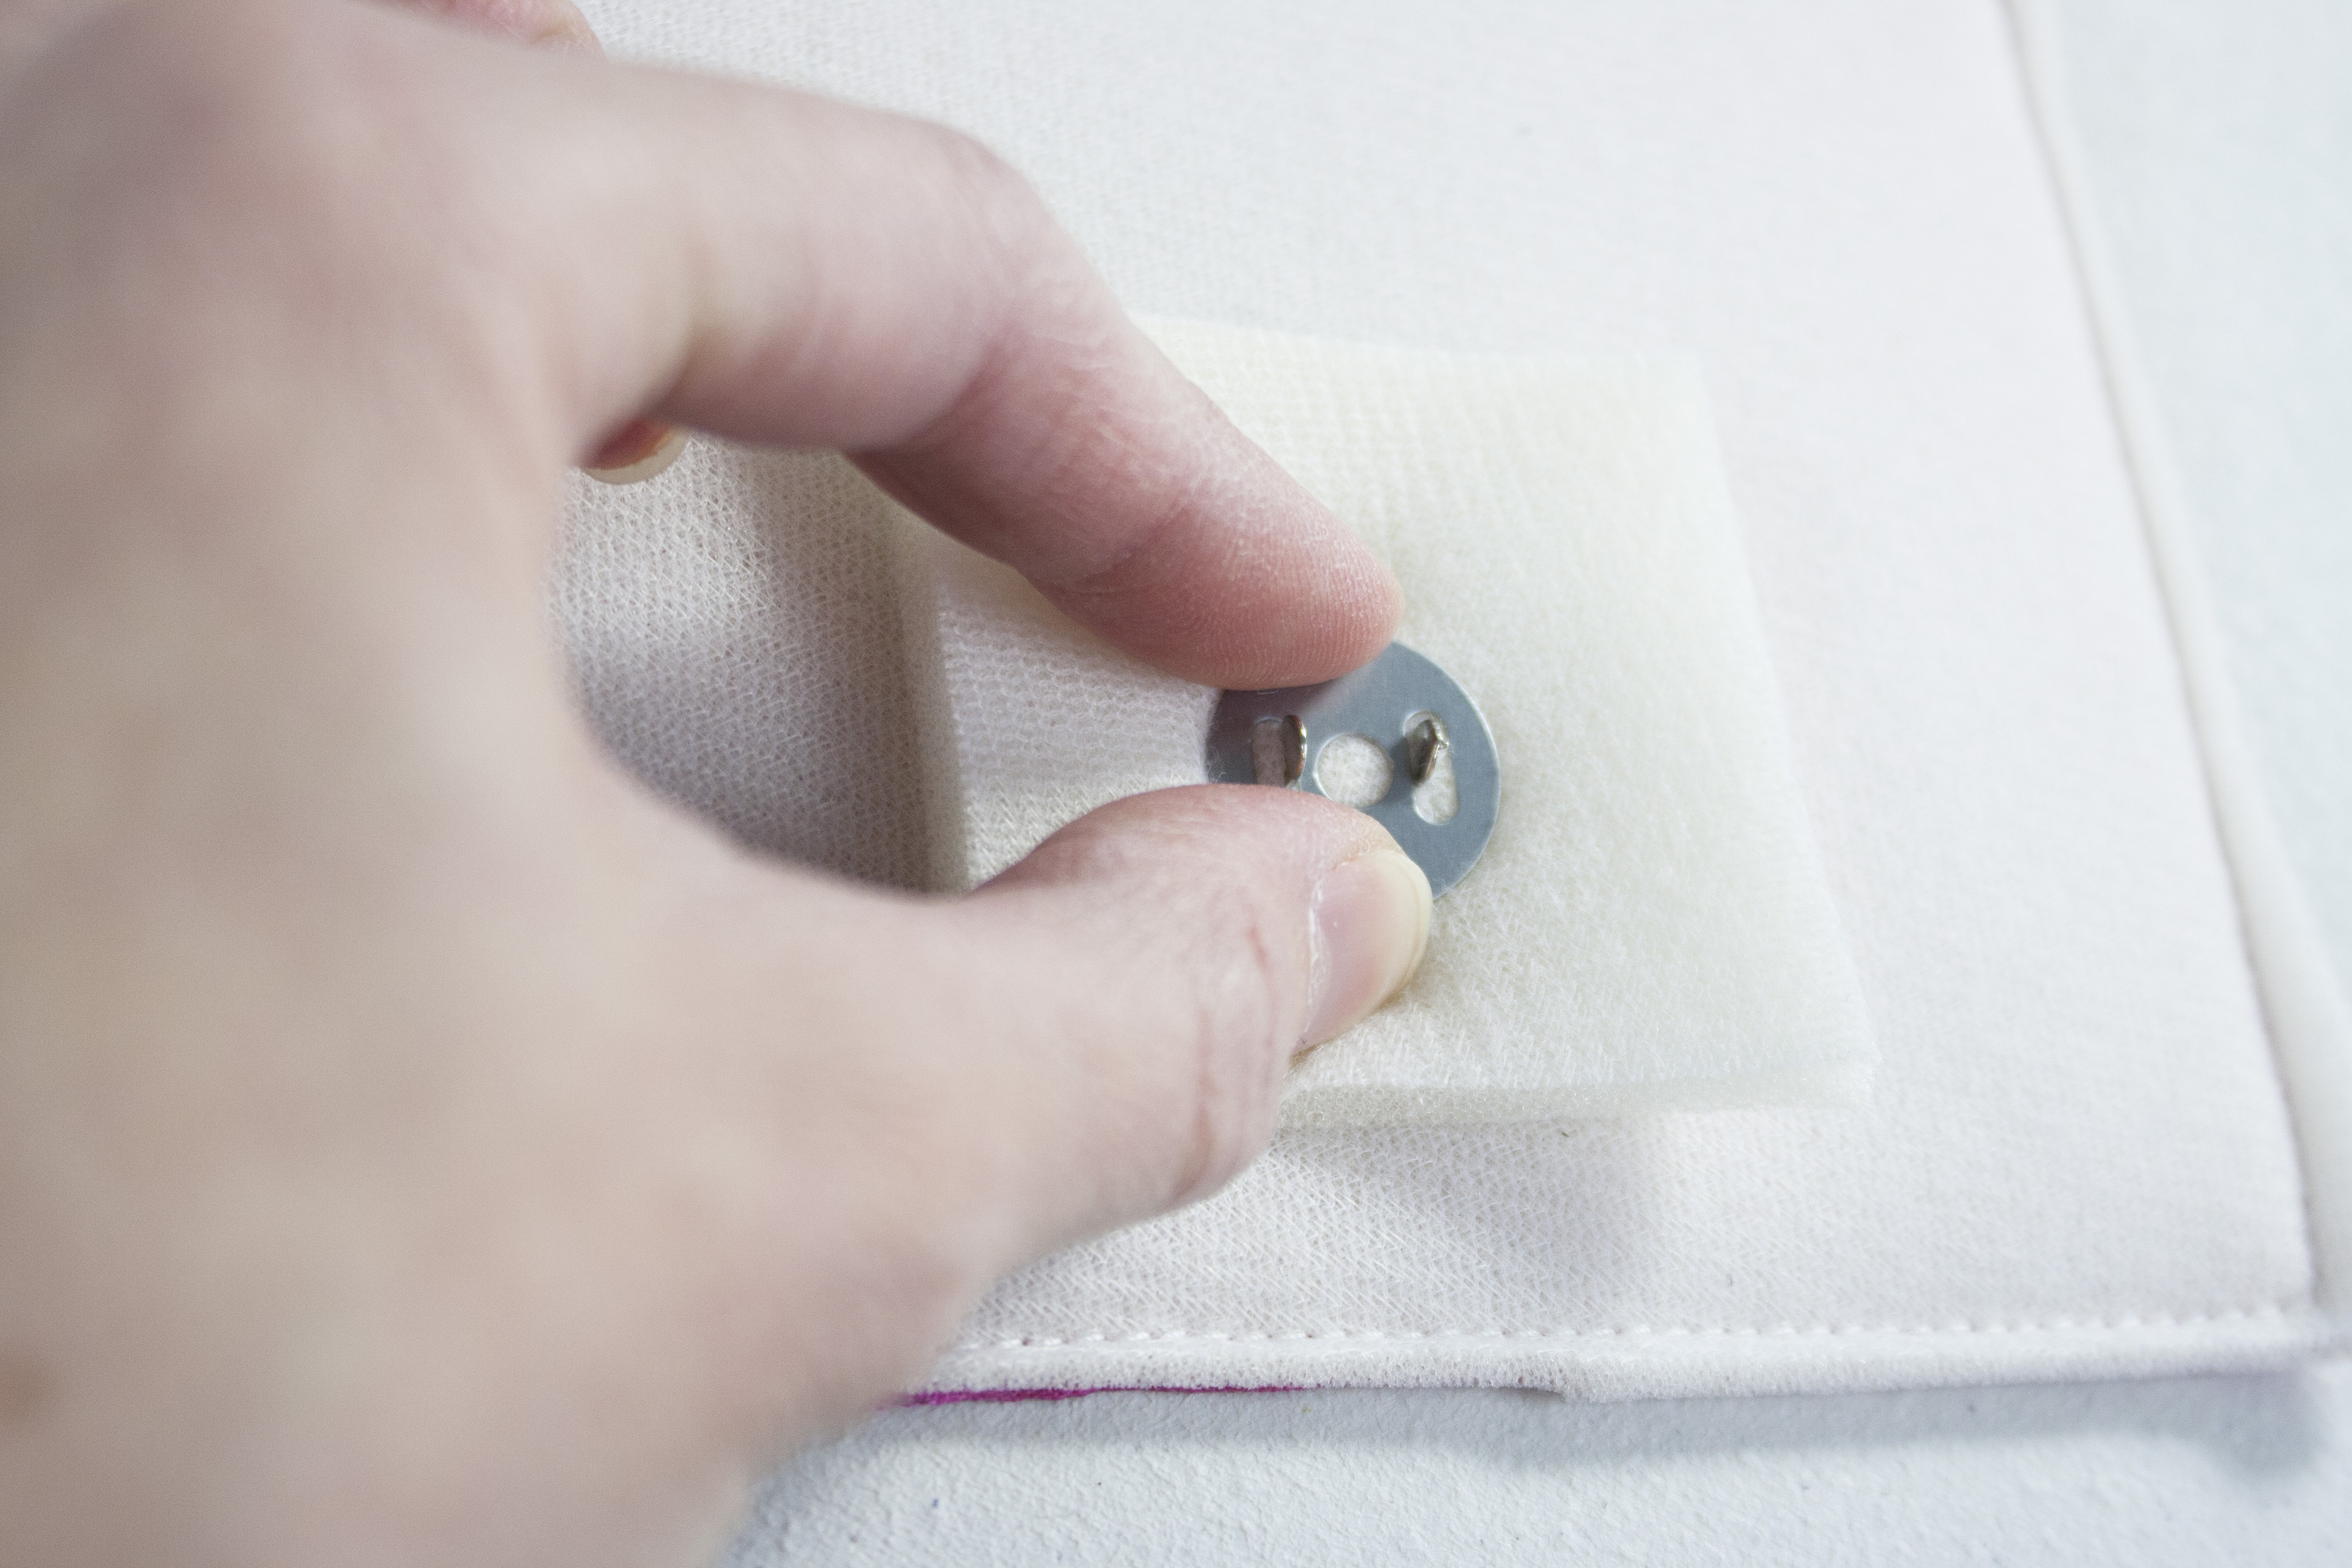
Flip to the wrong side of the fabric (the interfaced side). If you have a washer, slide that onto the snap next.
When working with thin interfacing, I find it helpful to also slide a 1½” square scrap of batting or interfacing onto the prongs on the wrong side of the fabric before inserting the washer. This helps avoid the snap tearing through the fabric eventually.
Step 4:
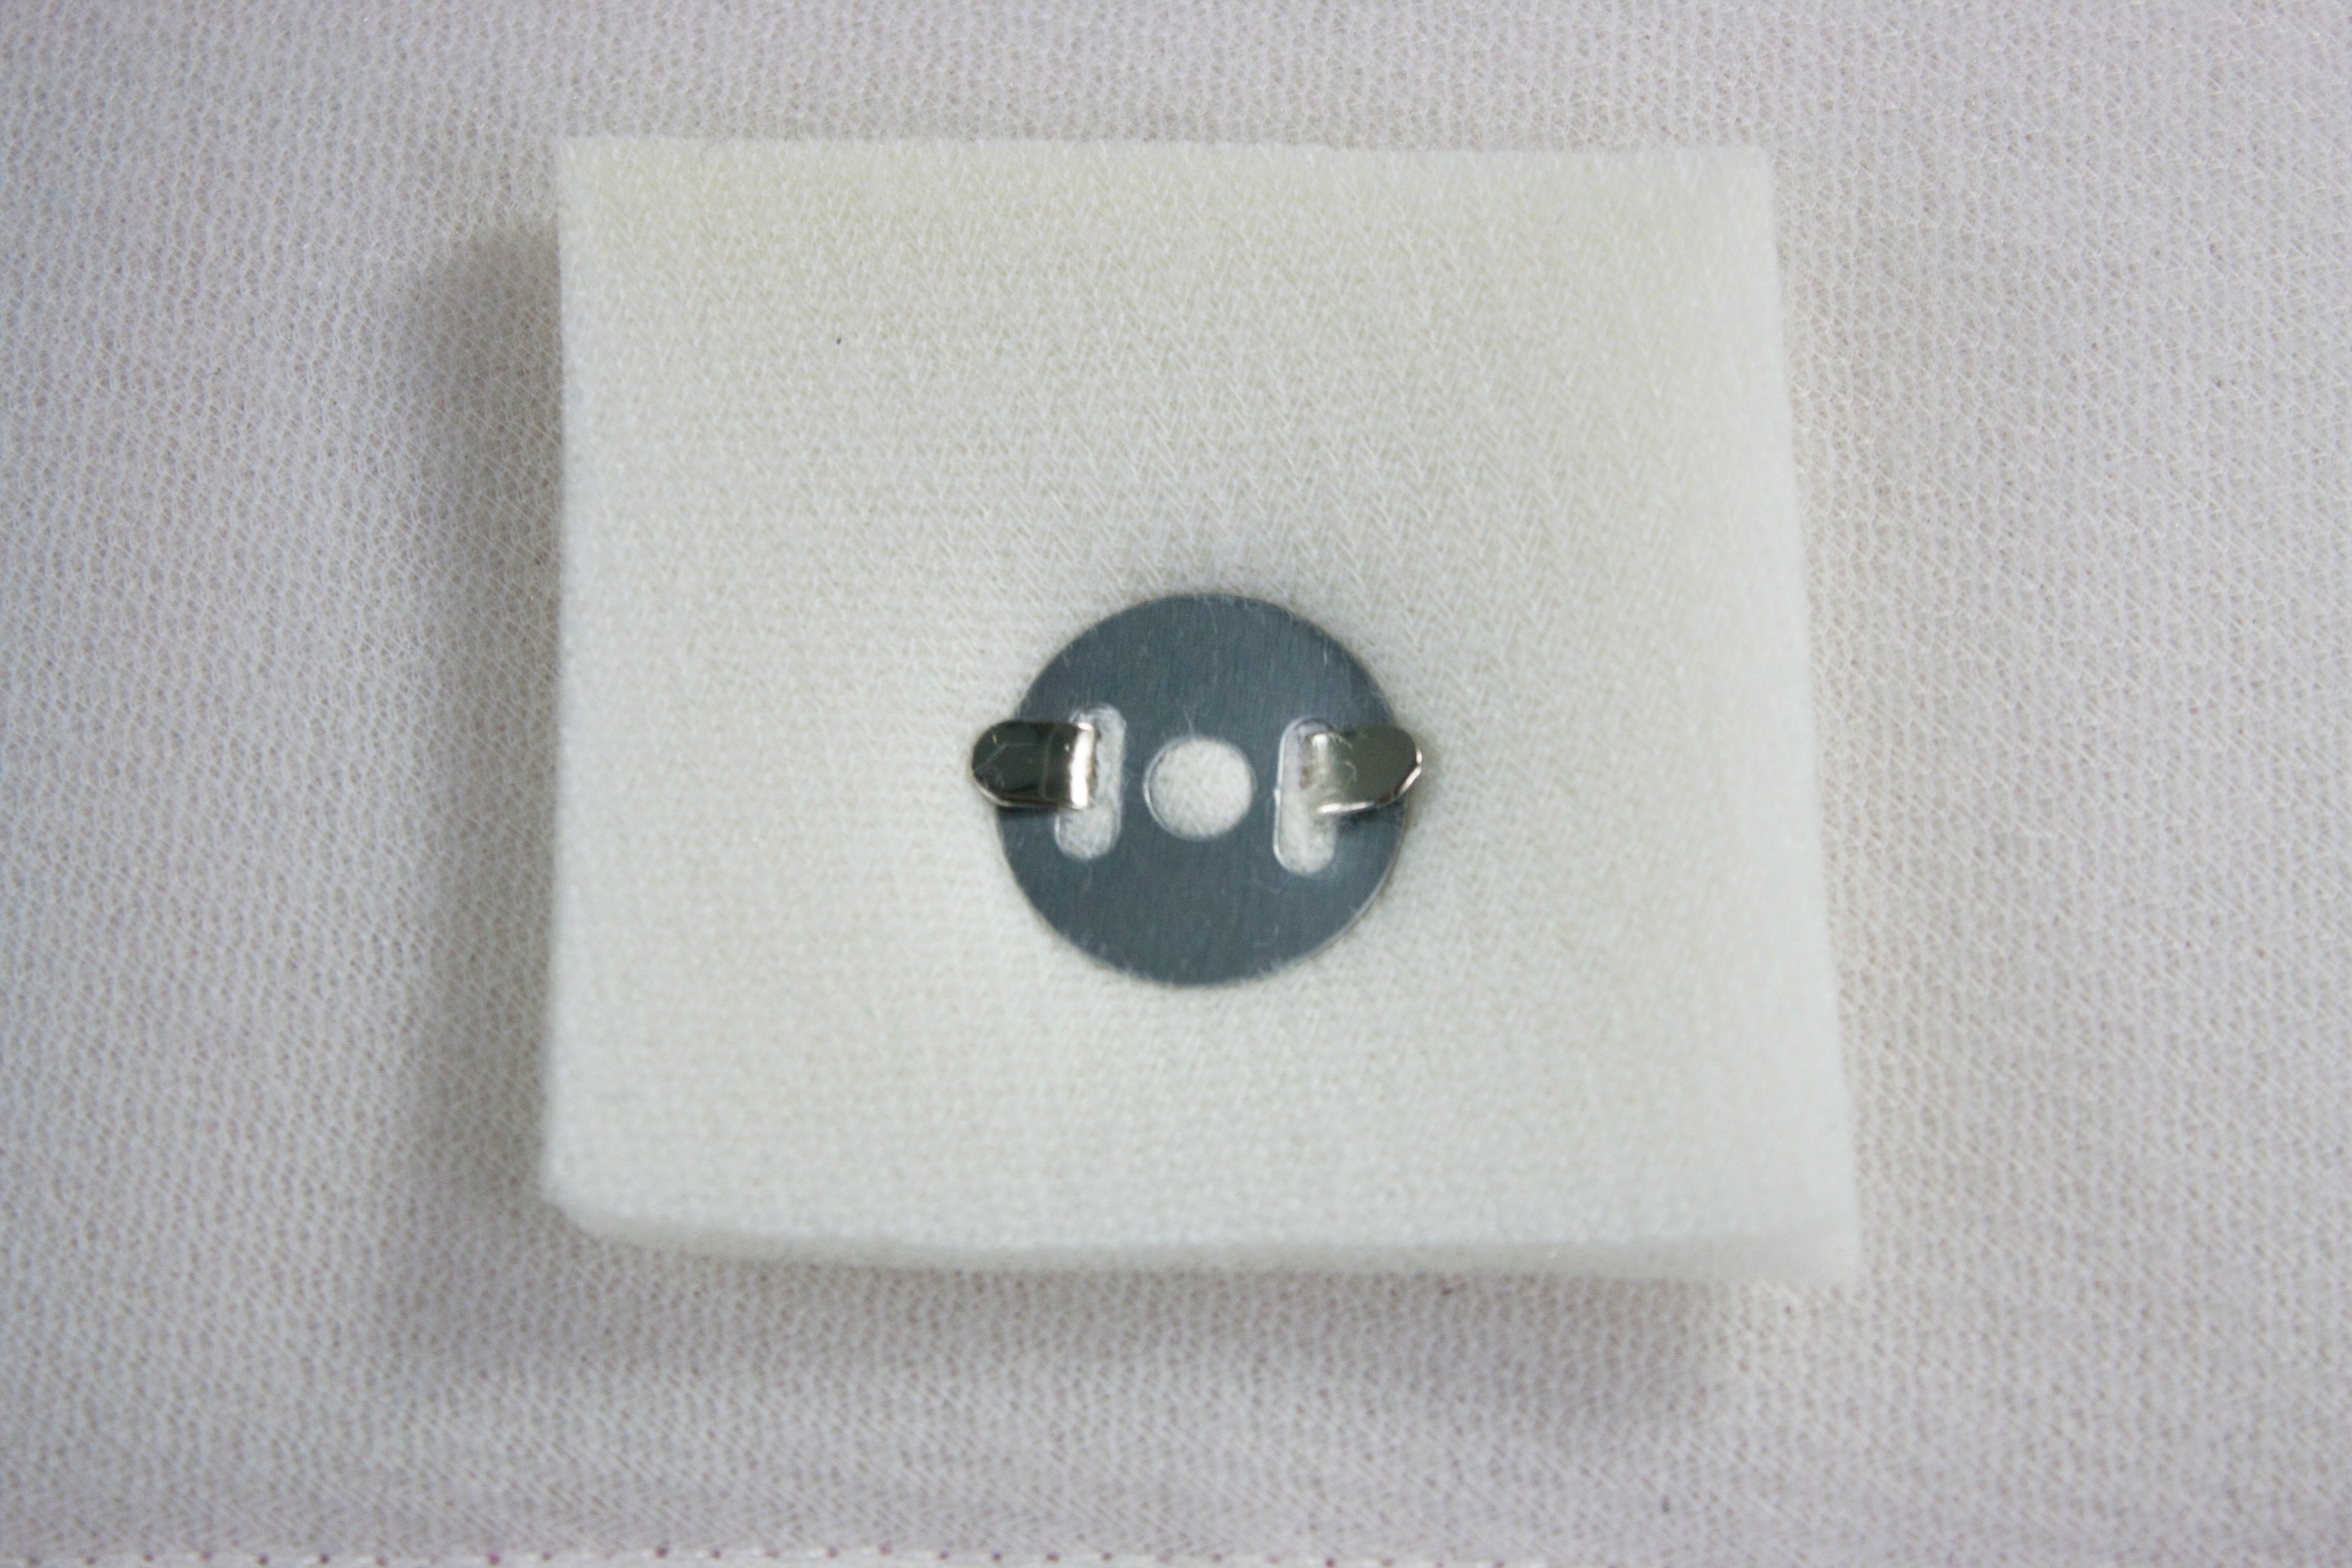
The last step is to open the prongs of the snap outward. You can do this with snap pliers or by leaning some other heavy object against the prong of the snap. I have a plastic sewing table, and I like to lean my prongs against the table to quickly open them.
 This is what the snap should look like when finished.
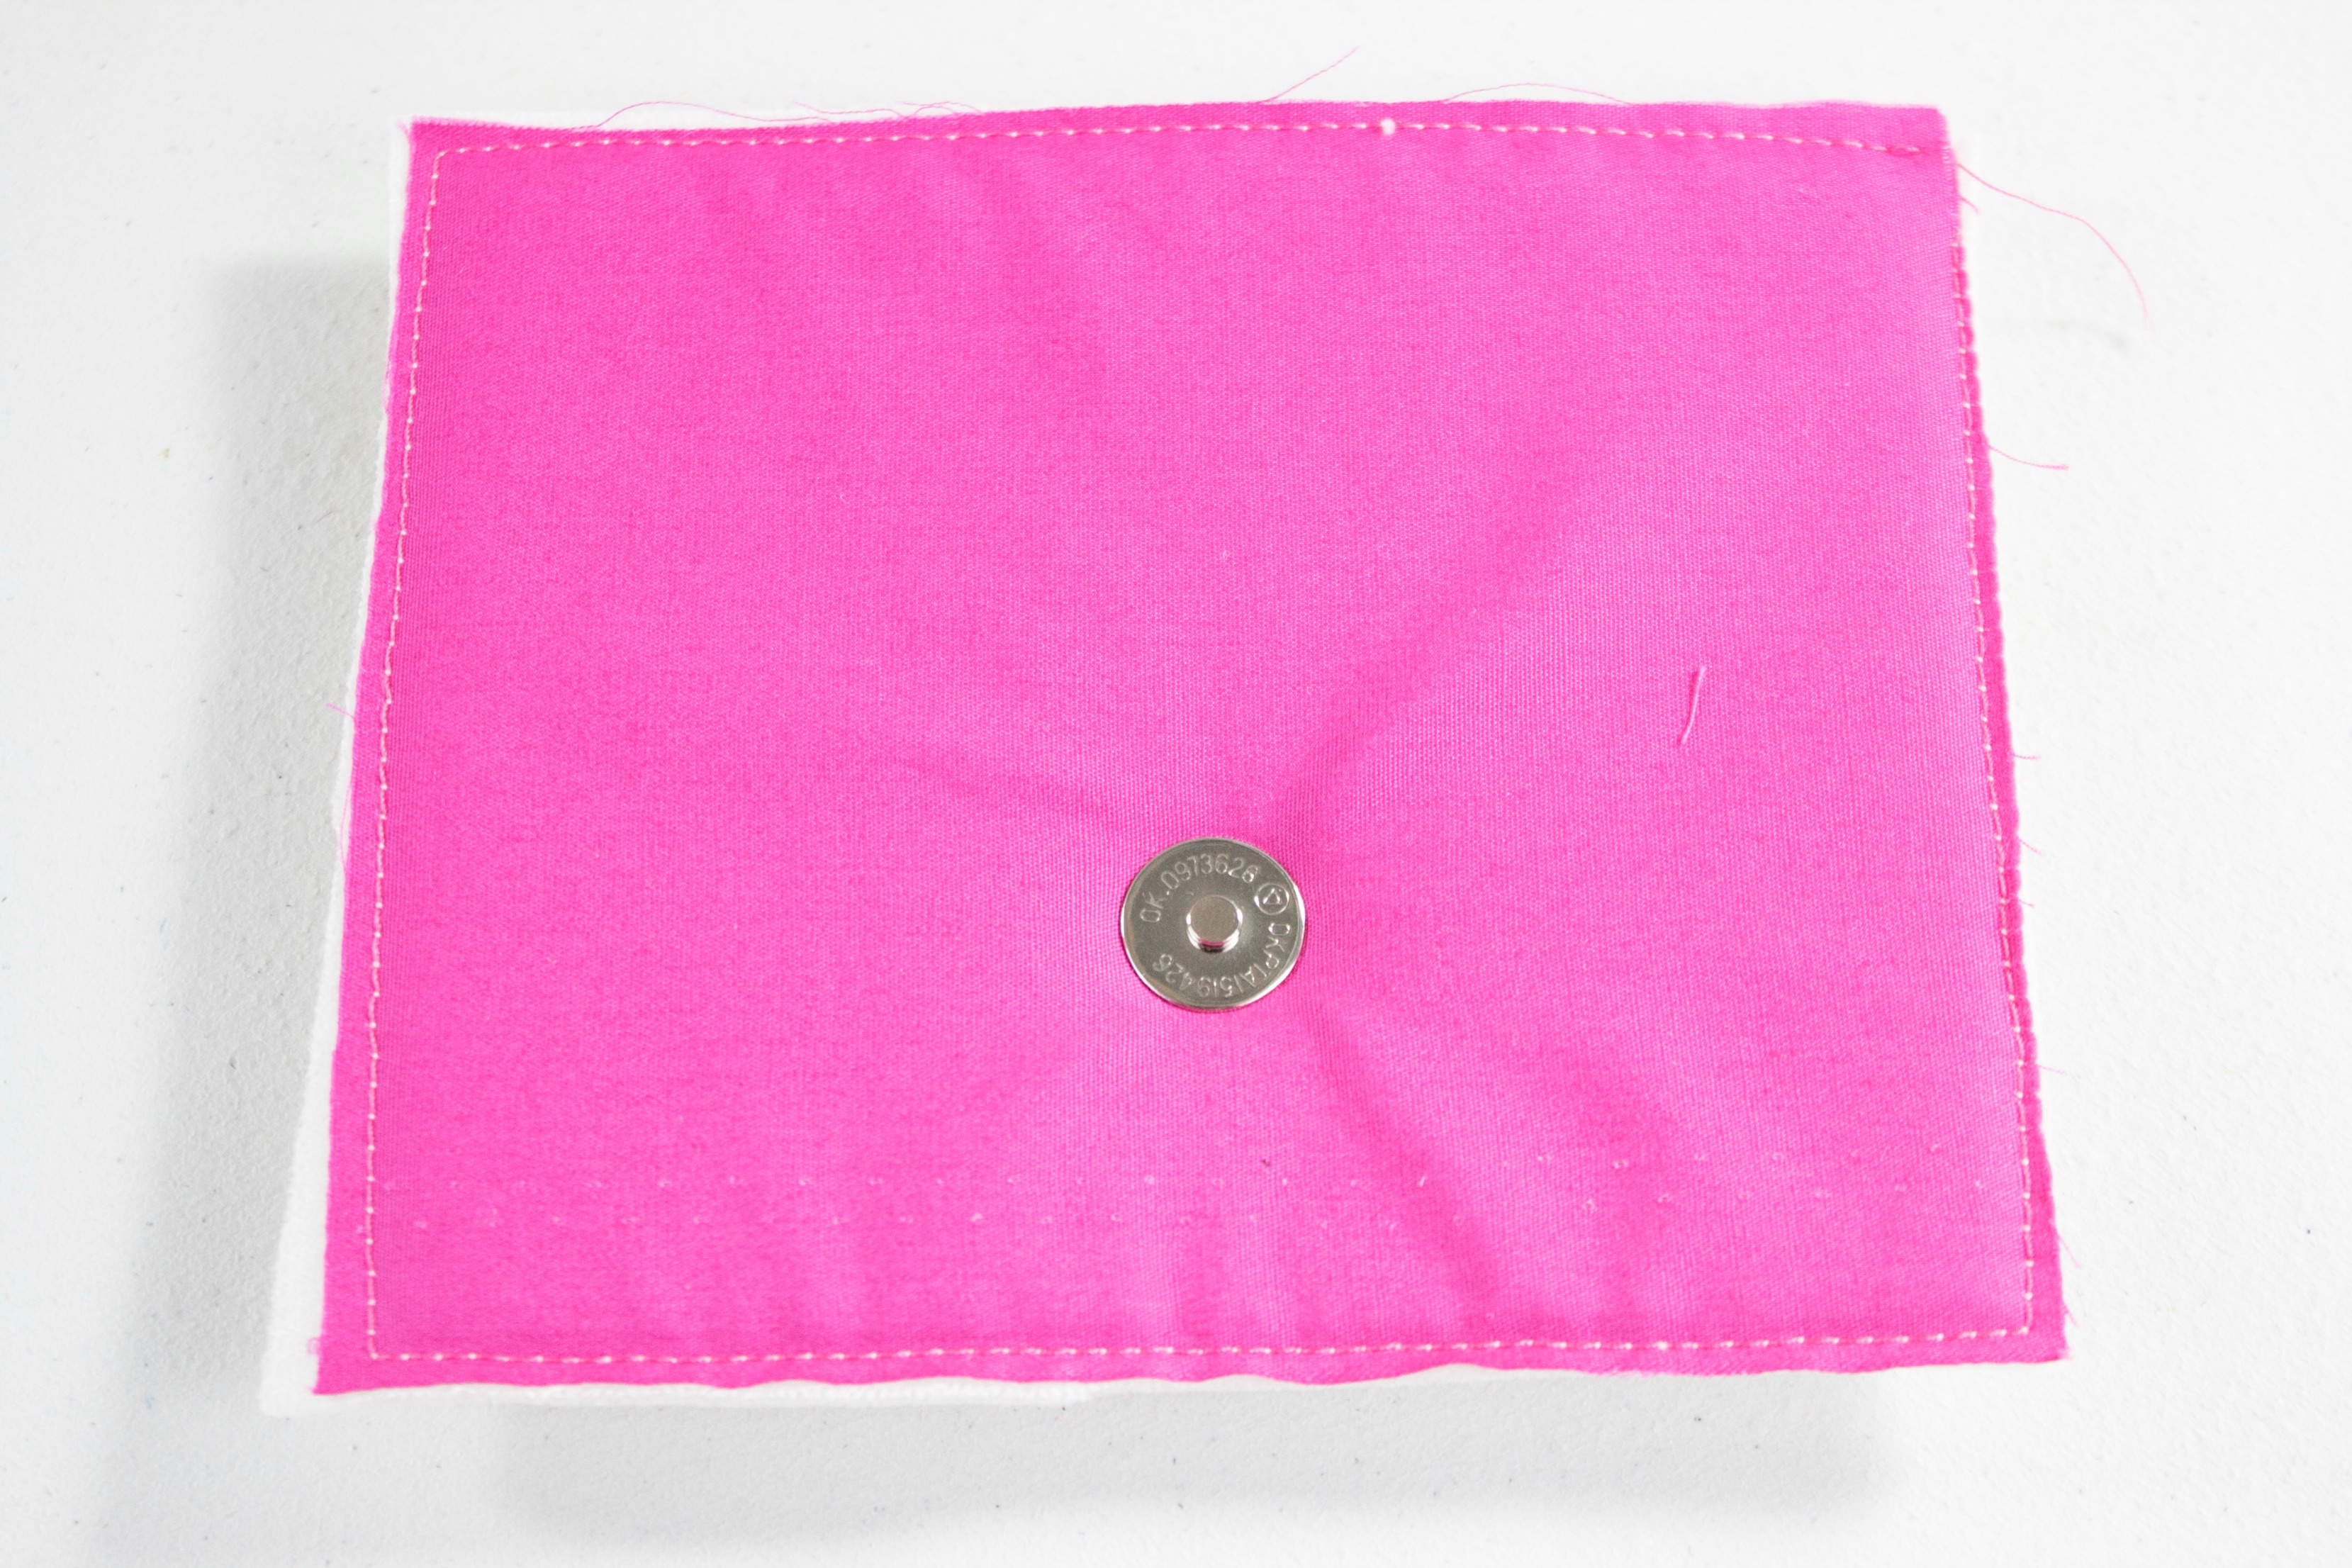
All that’s left is to insert the remaining half of the traditional magnetic snap.
Share tips, start a discussion or ask one of our experts or other students a question.
No Responses to “Sewing Magnetic Snaps for Perfect Bag Closures”