
What do you do when you’ve fallen in love with a pattern, except that you wish that the skirt was at a slightly different length than the pattern is designed for? We’ve all had this problem, but luckily, it’s a super easy fix!
The midi length is the most vintage looking length, as it lands between your knees and your ankles, mid-length along your calves. Which is exactly why it’s called a midi! It’s mid-way between two lengths. Have you seen the skirt on Laura Nash’s class, Sewing Vintage: The Flirty Day Dress? That is the perfect midi length; super sweet and feminine.
The trick with the midi is that this spot is different on everyone’s body, as we all have different length legs! So my midi spot will be different than someone who’s shorter or taller than me, and a pattern adjustment will need to be made to hit that sweet spot on my body. Follow these steps below to learn how to lengthen or shorten your pattern to the length of your choice! And you can follow these easy steps to make your next project any length you desire, midi or otherwise! Let’s get started!
How to lengthen your pattern
Step 1:
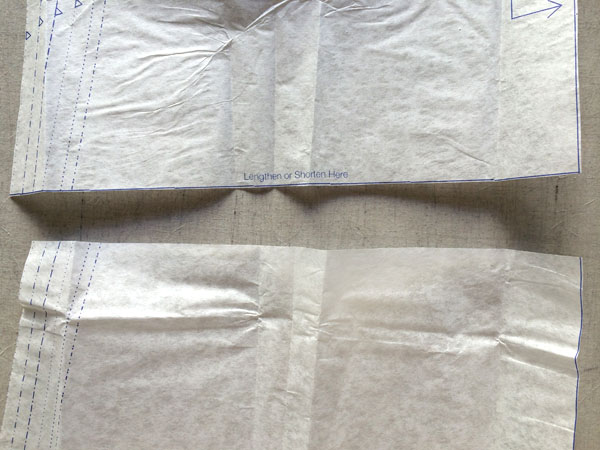
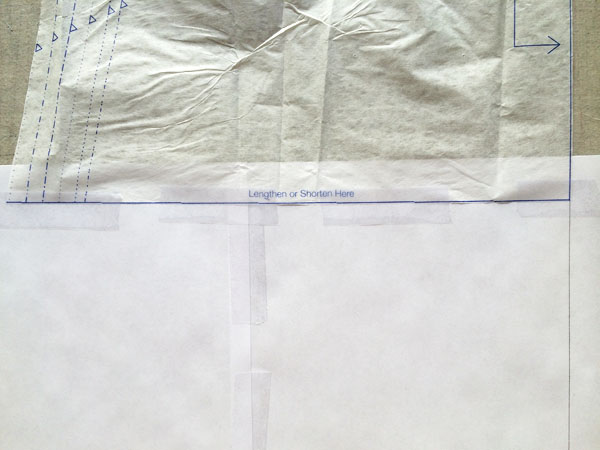
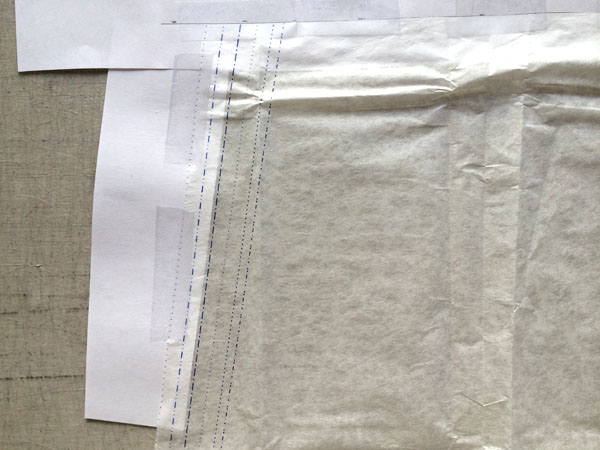
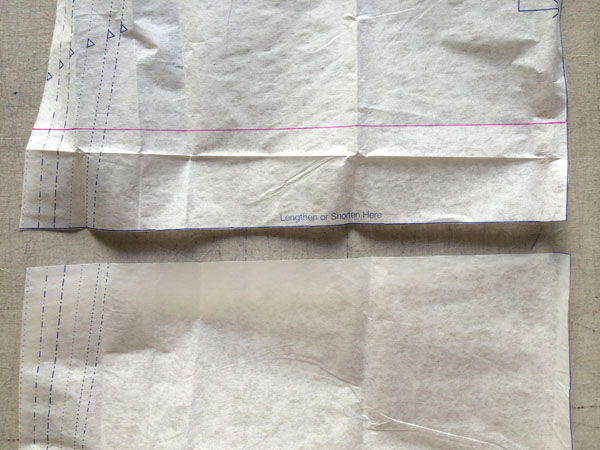
Cut out your pattern to your size as marked on the pattern. The pattern I’m using is to be placed on the fold, so I have the straight edge of the right side to work with, but if your pattern has a grainline on it, make sure that it spans above and below the spot where you are going to cut.
If it doesn’t, draw the line using a ruler so it extends onto both pieces prior to cutting. Find the “lengthen or shorten” line on the pattern and cut along that line.
Step 2:
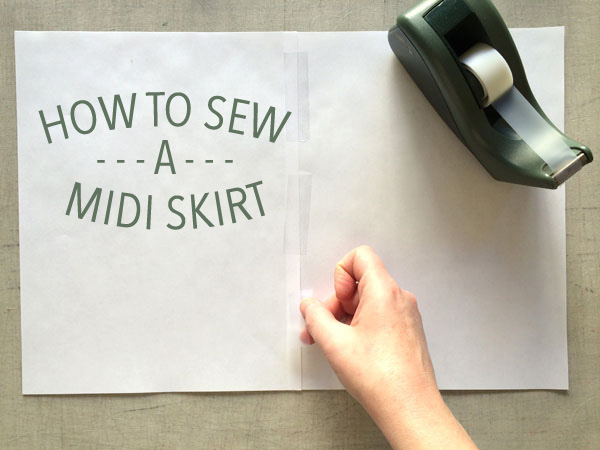
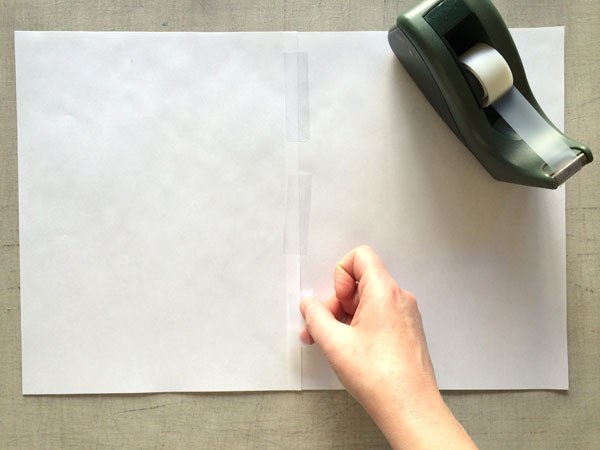
Using regular paper, tape together pieces to accommodate the width and length that you will need for your pattern. We want this paper to be wider and longer than the opening we are creating.
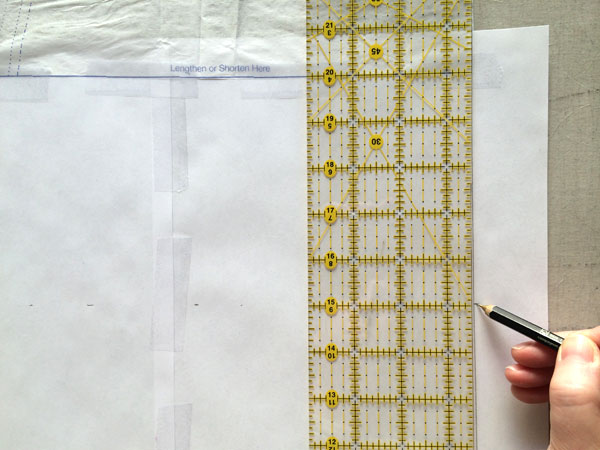
Step 3:
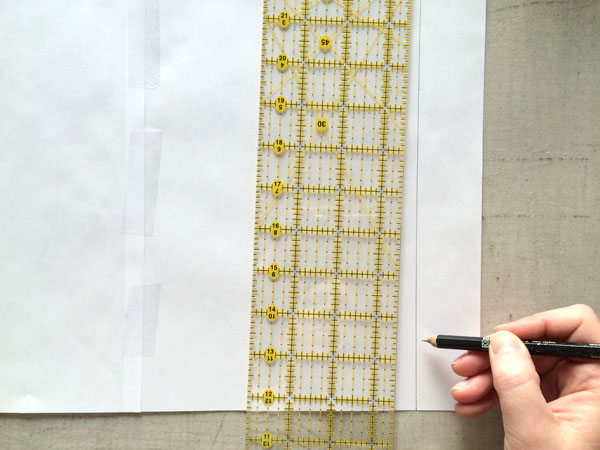
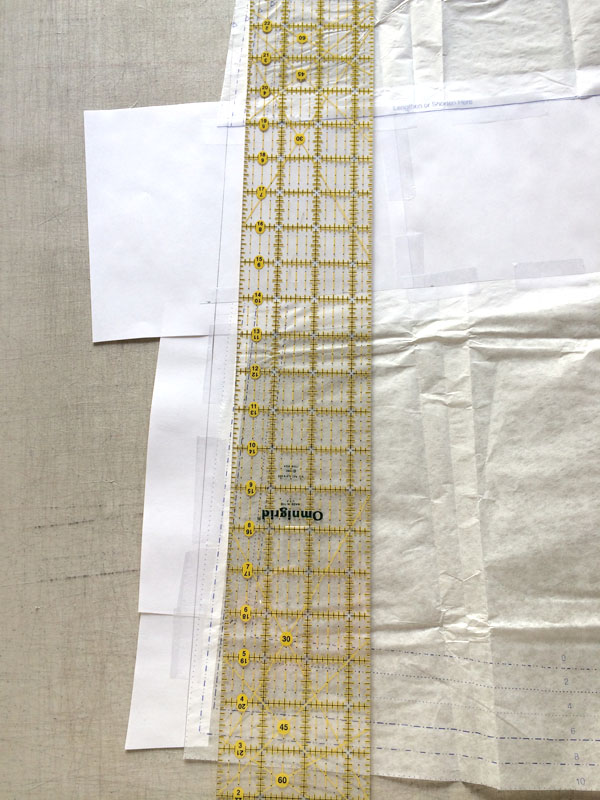
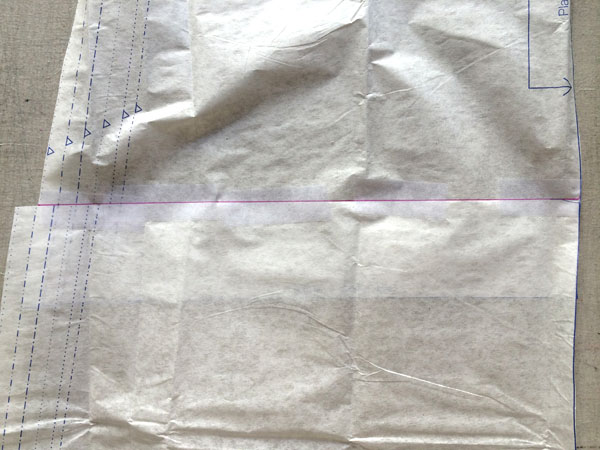
Draw a straight line on the paper using ruler and a fine point pencil. For my pattern, I wanted this to be far to the right so it will line up with the place on fold line. If you have a grainline , make your mark in the general area of where it will be on your pattern. It doesn’t have to be exact, as we will line it up later, but making it too far to the right or left will just mean having to add on paper to one side or the other to span the width of the pattern.
Step 4:
Line up the pattern piece on the paper, matching up the line you drew on the paper in step 3 with the place on fold or grainline of the top half of the pattern. The pattern paper will overlap the white paper a bit. Tape the pattern paper in place on the white paper.
Step 5:
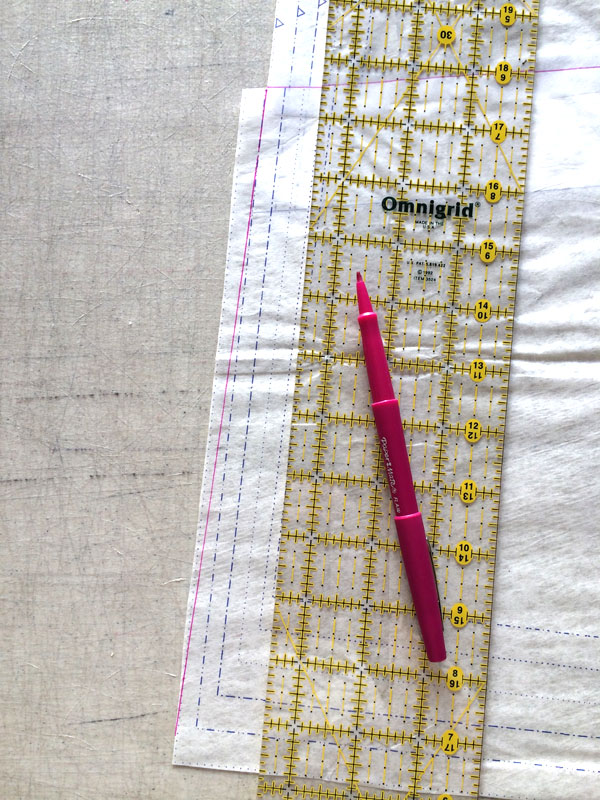
Measure down from the “lengthen or shorten” line on the pattern how many inches you want to lengthen the skirt. Start at the grainline or the place on fold line so you are square. From there measure down and make a small mark. Continue by marking down across the width of the pattern piece.

Step 6:
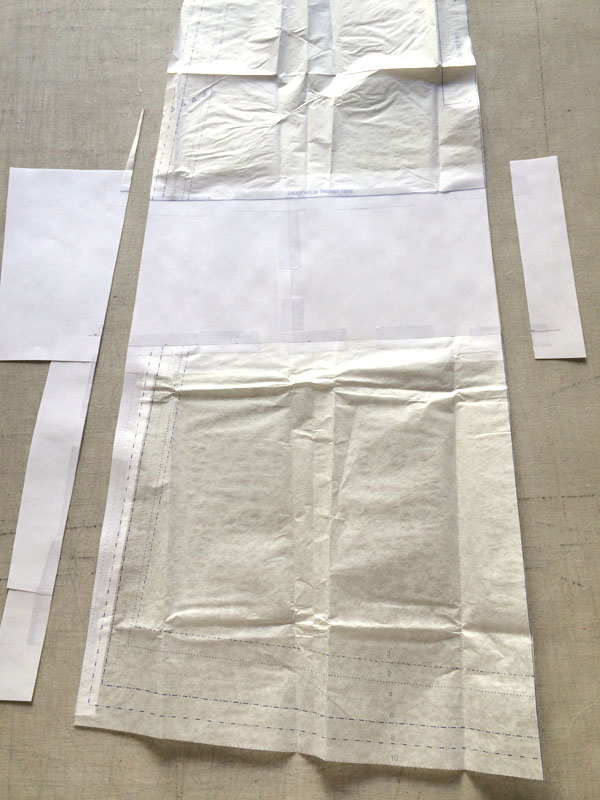
Connect the marks made in step 5 to draw the spot where the lower part of the pattern will be attached.
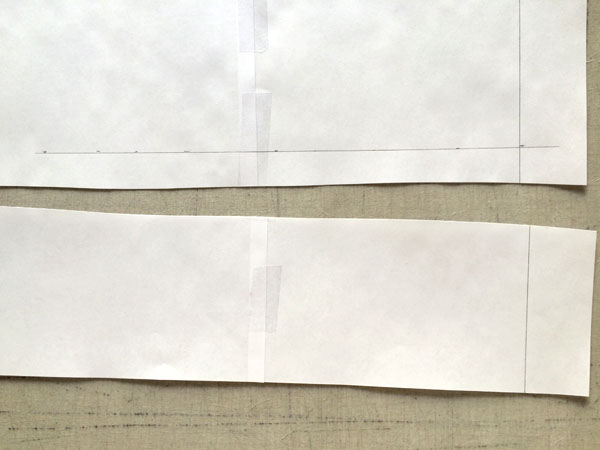
Step 7:
Cut the paper just below the line you drew in step 6. Leave about 1-2″ of paper so the pattern can overlap at this spot.
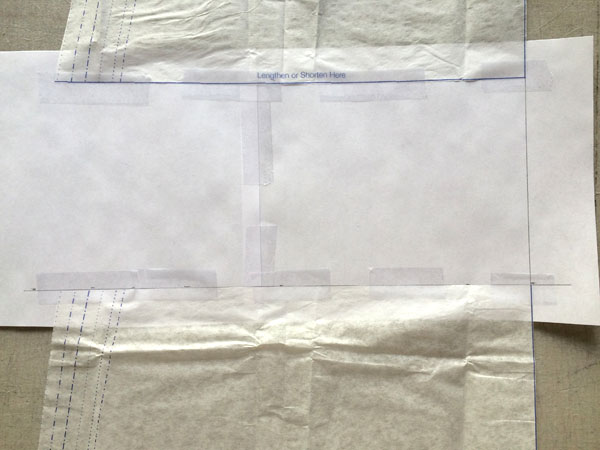
Step 8:
Just as you did with the top half, tape the lower part of the skirt to the line you drew in step 6. Start with the place on fold line or the grainline and work from that anchor point.
Step 9:
In order to connect along the side seam, you will likely need a little extra paper below the expanded section for the angle of the original pattern. Tape it from the hem to the extension.
Step 10:
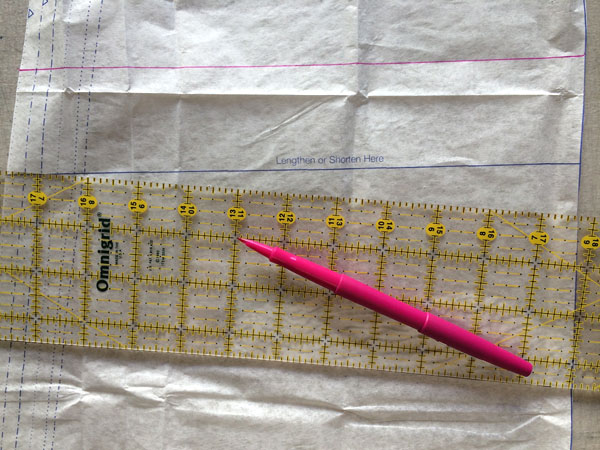
Use your ruler and draw a line from the hem to the upper half of the skirt where the angles meet. You will be removing a bit of width from the top half and adding it onto the lower half. The reason to extend it this way is so that the proportions remain the same as the original pattern.
Step 11:
After drawing the line in step 10, cut along that line, creating your new side seam. Trim off the extra on the right side as well. Remember to remark any important pattern markings, like notches, zipper placement, and pocket markings.
How to shorten your pattern
Step 1:
Cut out your pattern to your size as marked on the pattern. Just like in step 1 above, make sure that your grainline or place on fold line spans above and below the spot where you are going to cut along the “lengthen or shorten” line.
If it doesn’t, draw the line using a ruler so it extends onto both pieces prior to cutting. Above the “lengthen or shorten” line on the pattern, use your ruler to mark how many inches you want to shorten the skirt.
Step 2:
Cut along the “lengthen or shorten” line.
Step 3:
Starting at the grainline or the place on fold line, overlap the lower half of the skirt onto the top part of the skirt and tape the pattern in place. Flip over and tape the backside as well. The side seams will likely not line up, so do not follow that line, only follow the grainline or fold line as well as the line you drew in step 1.
Step 4:
Use your ruler and draw a line from the hem to the top of the spot where the lower part of the skirt overlaps with the top part.

Step 5:
Trim along this line for your new side seam. As I wrote above, remember to remark any important pattern markings you might be trimming off the pattern so you can still construct the pattern as written.
All of the above instruction can also be used for shortening or lengthening any part of your pattern, so if you need to make this adjustment to a bodice, pajama pants, or some other project, these simple steps can be followed as well!
Share tips, start a discussion or ask one of our experts or other students a question.
No Responses to “Learn to Lengthen & Shorten a Pattern for an Adorable Midi Skirt”