
There are lots of options for purchasing wipeable or waterproof tablecloths. I want to have pretty things, but with young children I just can’t have nice things — or tablecloths. If you have children or grandchildren who are the messiest of all, they will definitely be tugging the tablecloth and maybe even pulling it off of the table.
So I needed a wipeable option that couldn’t be pulled down by little hands. I mean, my son spilled his water twice during dinner last night. Luckily, I came up with this simple DIY version and am excited to share it with you today!
Read on to learn how to sew a fitted tablecloth!
Photos via Feathers Flights
How to sew a fitted tablecloth
Before we begin, consider these tips for sewing with waterproof fabric:
- Use a teflon sewing machine foot or put tape on the bottom of your regular sewing machine foot. This makes the fabric glide instead of stick to the foot.
- Once you make a hole in the fabric, it’ll stay forever, so be careful as you sew.
- Try not to backstitch — it’ll put too many holes in the fabric.
- Use a longer stitch while sewing.
- Pinning can leave holes so use clips instead.
- Don’t iron with a hot, steamy iron. Try just finger pressing, or iron with low heat and use a press cloth.
Supplies you’ll need:
- About 2 yards waterproof fabric, such as oilcloth, vinyl, PVC fabric, laminated cotton or PUL)
- Sewing supplies
- Table measurements
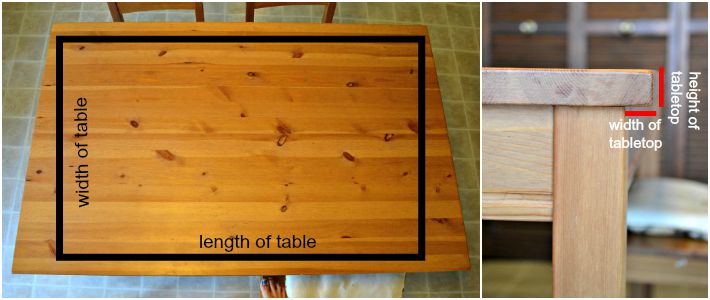
Step 1:
Measure the width and the length of the table top. Then measure the height of the tabletop and the width of the tabletop.
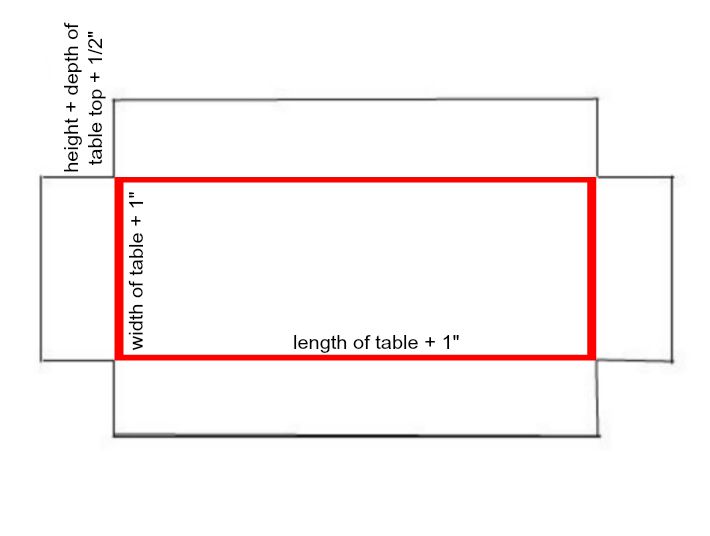
Plug the measurements into this diagram to get the right size for your tablecloth. Then, cut out your fabric piece.
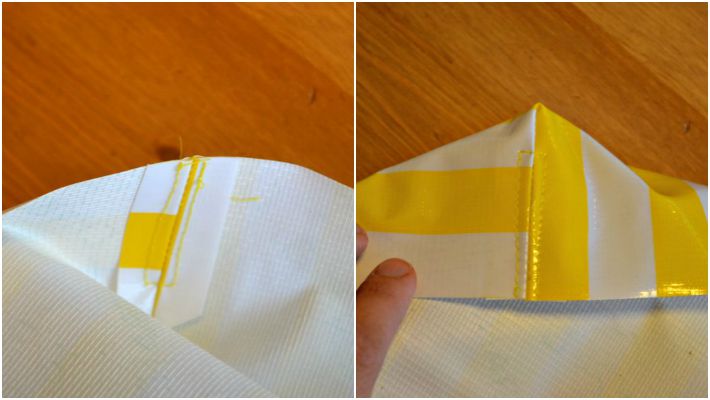
 Step 2:
Sew corners together with a straight stitch at 1/2″.
Step 3:
Cut the seam allowance open at the corner and stitch the seam allowance open.
Step 4:
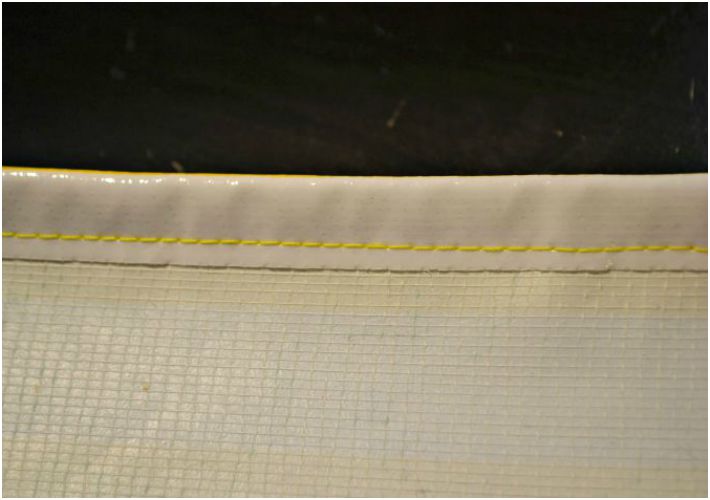
Fold the edges over 1/2″ and stitch with a straight stitch at about 3/8″. Leave a hole in the casing to insert the elastic.
Note: I found it was easier to leave two holes open, one on each long side, to pull the elastic through. I started pulling half of the elastic from one hole to the other, and then I pulled the other half through the other side to the hole where the other elastic ended.
Step 5:
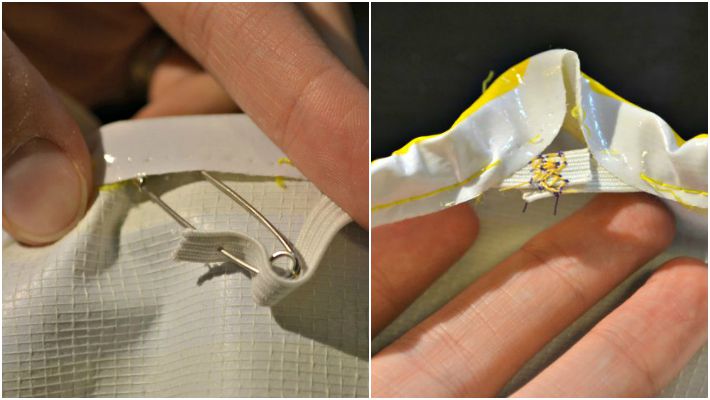
Insert 1/4″ elastic using a big safety pin or bodkin. Cut the elastic length about 60 percent smaller than the total measurement of the top of the table. Sew the ends together with a very sturdy stitch. I like to sew a zigzag stitch back and forth multiple times to ensure the ends won’t come apart.
Step 6:
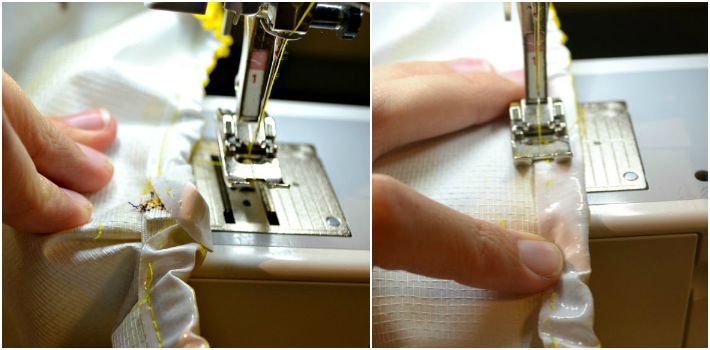
Close the hole (or holes) in the casing by sewing a straight stitch across the hole. Since the elastic is tight it bunches a bit at the hole. Pull the excess gathers around the casing on the tablecloth to leave the hole area straighter. Then stretch the elastic as you sew so you don’t sew any pleats into the casing. I like to place my left hand behind the sewing machine foot and my right hand in front of the foot. Then I can stretch the casing as I sew. Do not catch the elastic in the stitches.
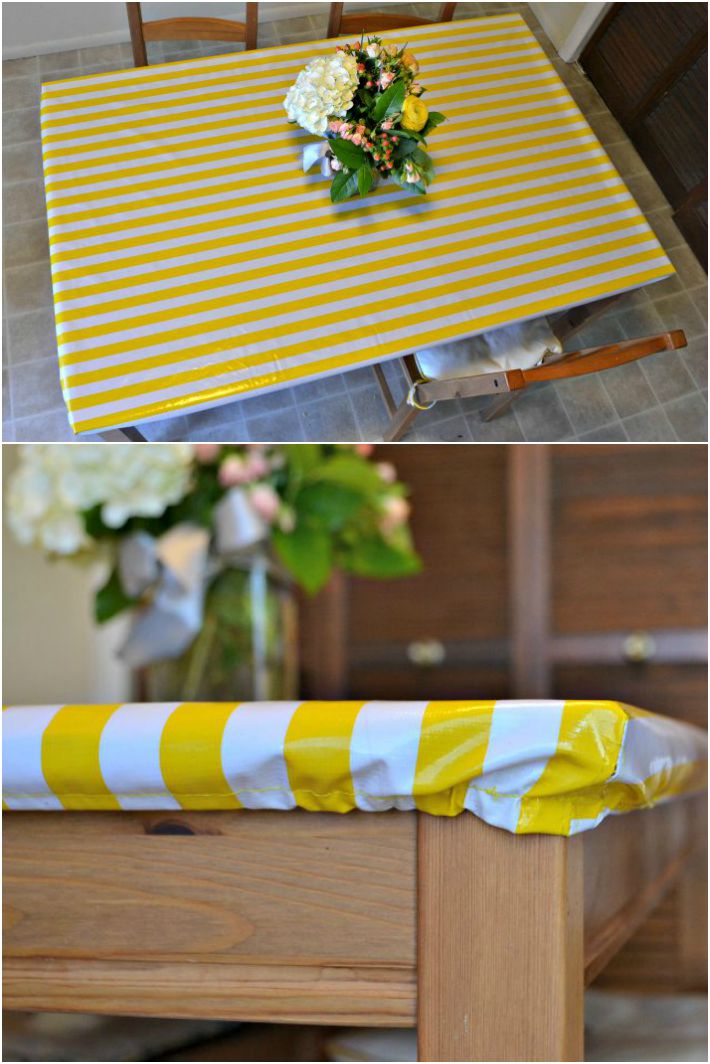
Put tablecloth on table and enjoy your work!
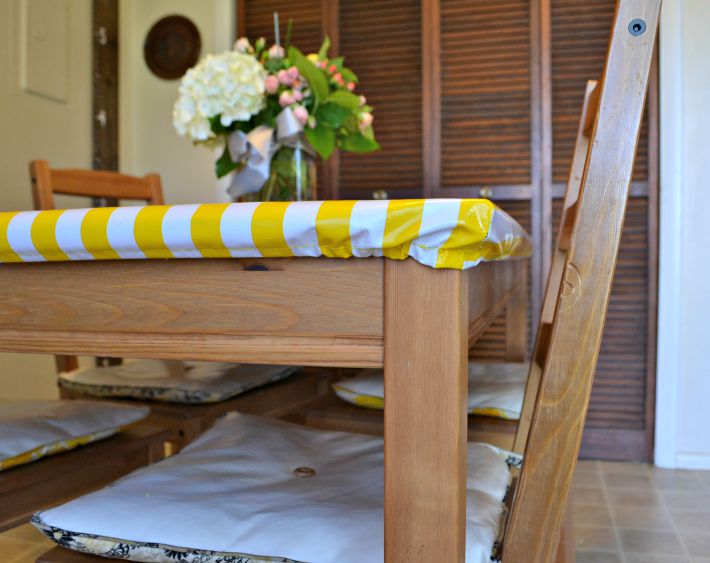
I love this fitted tablecloth, and it’s been great at our house. The hardest part was that the tablecloth fabric is stiff and was somewhat hard to maneuver in my machine. It would’ve been easier to move my machine to the kitchen table with lots of space for maneuvering.
I really love the look of the stripes and yellow makes me so happy. I’ve always wanted a sunshiny, yellow kitchen, but there are so many prints and colors of waterproof fabric to brighten any kitchen or dining room.
Share tips, start a discussion or ask one of our experts or other students a question.
No Responses to “How to Sew A Wipeable, Kid-Friendly Fitted Tablecloth: FREE Tutorial”