
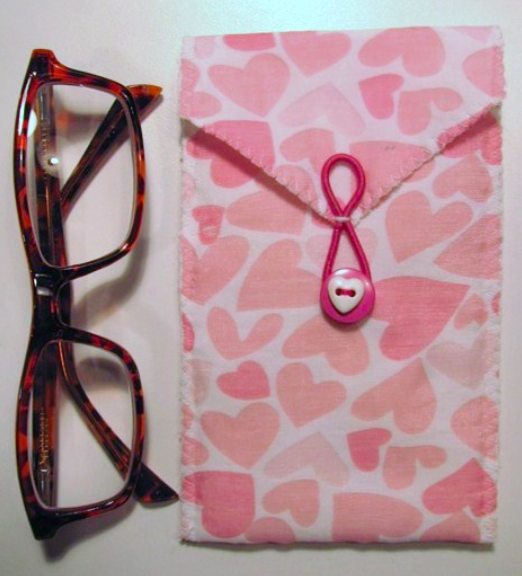
 The design of the pouch is so simple dozens can be made in no time at all. With a change of fabric, its dimensions, and embellishments, it can be as elaborate, funky, functional or elegant as one wishes. While mine serves as a pouch to store my jewelry, it has many other practical uses. Like a pouch to hold a lost tooth that sits under the pillow waiting for the tooth fairy to come, or as a business cards holder, an iPad cover, a cosmetic bag or coin purse. See, I told you it has lots of uses! You are only limited by your imagination.
Here is how you can make your own jewelry pouch quickly and easily:
Once you find out, you can let your creative juices flow and style it anyway you’d like!1. Cut out the pattern in the dimensions shown in the illustration.
A stable piece of fabric works best, like cotton flannel, quilted fabric, home dec fabrics, felt, fleece, corduroy, leather — faux or real — vinyl and oilcloth.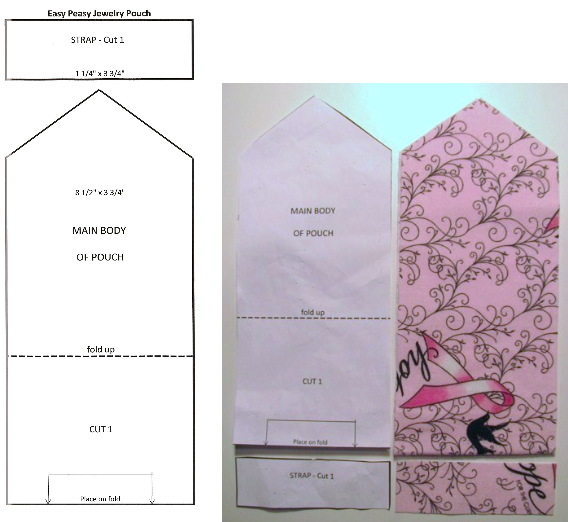
2. Cut a piece of fusible interfacing for only one half of the pouch base.
Adhere it to one side of the pouch base. You will not need any interfacing for the strap.3. Make the strap.
Fold the strap piece lengthwise into thirds. Now stitch down the center of the folded strap with a zigzag stitch – – 4mm for stitch width, 2mm for stitch length. Set aside.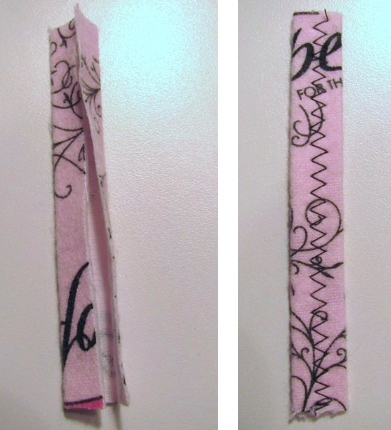
4. Fold.
Fold the pouch base in half with wrong sides together.5. Fold again.
Fold up using the pattern as your guide and pin in place.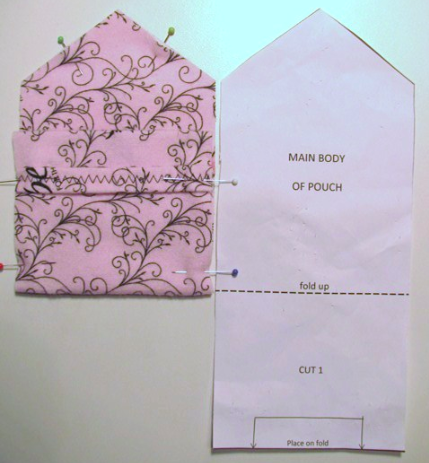
6. Place the strap, raw edge side down, over the pouch as shown.
Pin in place. The pouch is now ready for the final stitching.7. Complete the final stitching.
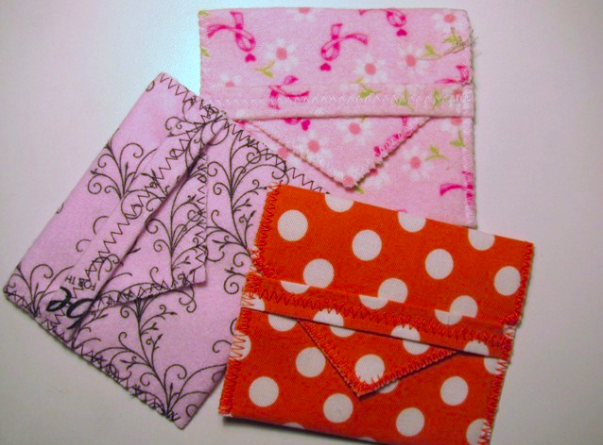
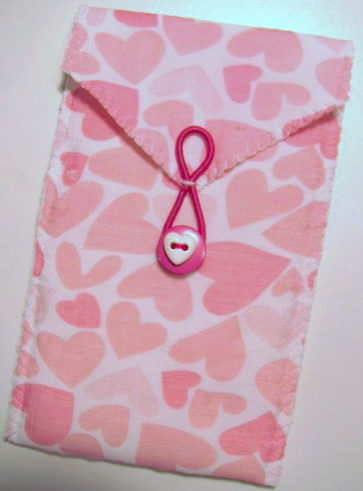
Starting at the bottom edge of the pouch and using a zigzag stitch set at 3mm for width, 1.5 for length stitch all the way around the pouch, making sure to pivot appropriately at the corners and to keep the strap lined up horizontally on the pouch. Easy peasy, it’s done! Don’t forget the creative possibilities are endless! Here’s another example I made using the same steps but with different measurements and fabrics.
Share tips, start a discussion or ask one of our experts or other students a question.
No Responses to “The Most Versatile Jewelry Pouch: Fun Tutorial”