
What’s black and white and pairs well with milk? Homemade Oreos! These sweet chocolate sandwich cookies are inspired by the commercial classic, but can be made right in your home kitchen.
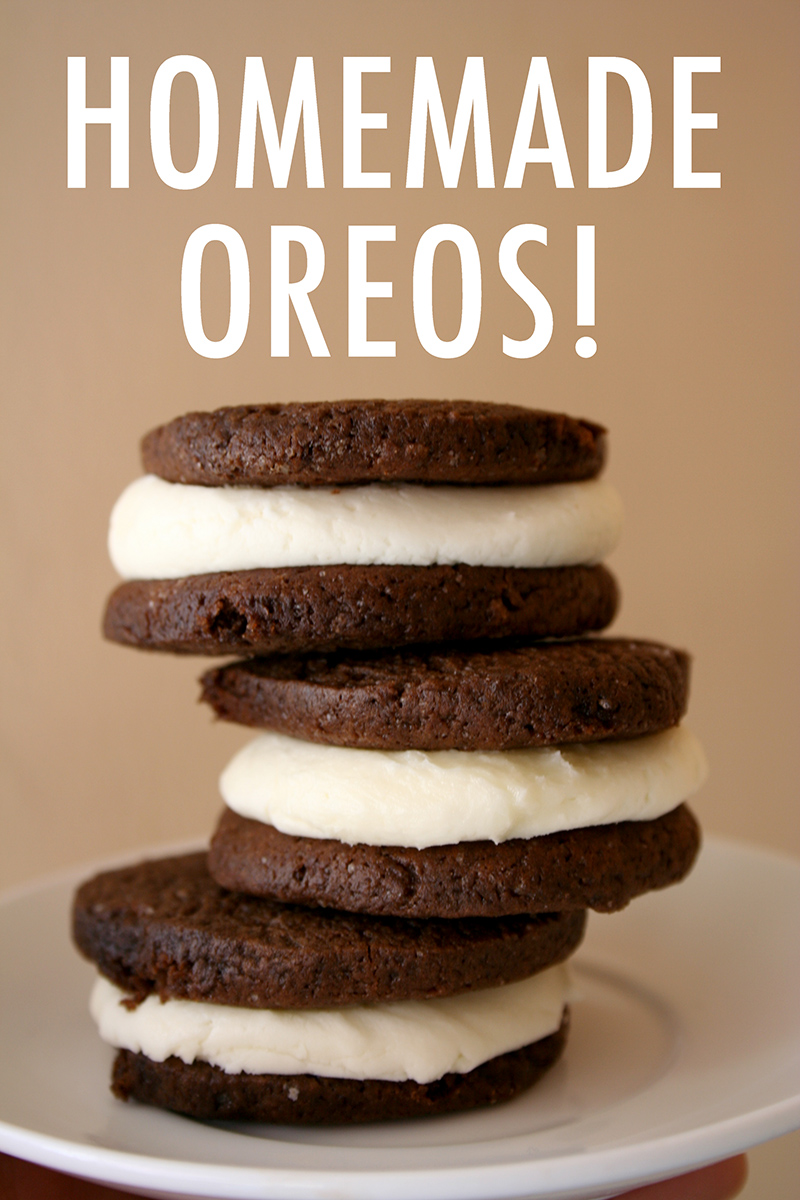
These homemade Oreos are inspired by the commercial classic cookie!
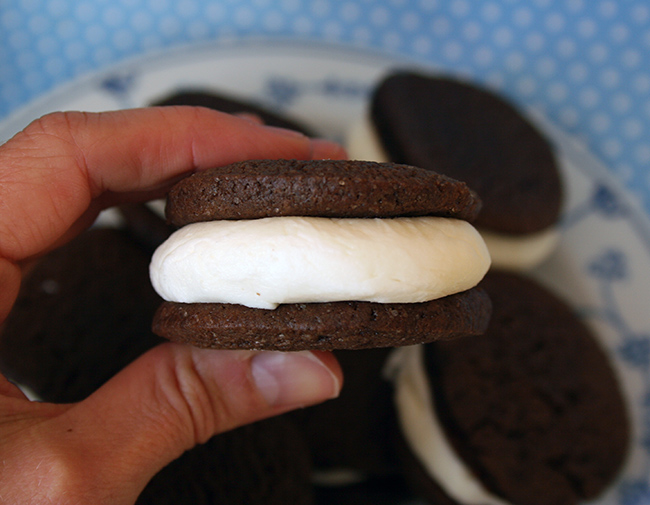
These homespun treats are a perfect snacking cookie: crispy-edged, cocoa-scented refrigerator cookies held together with a healthy dollop of “creme” filling. Enjoy a sweet stack of these with a tall glass of milk, and you’ll be transported back to childhood for a few sweet minutes!
Photos via CakeSpy
Homemade Oreos Recipe
Makes 24 sandwich cookies
For the cookies:
- 1 tablespoon vinegar
- ¼ cup milk
- 2 cups all-purpose flour
- ½ cup unsweetened cocoa
- ½ teaspoon baking soda
- ½ teaspoon salt
- ½ cup (1 stick) unsalted butter
- 1 cup granulated sugar
- 1 egg, at room temperature
- ½ teaspoon vanilla extract
For the creme filling:
- 1 cup (2 sticks) unsalted butter
- 1 teaspoon vanilla
- 5 cups powdered sugar
- Milk or cream to thin, if needed
Step 1:
Combine the milk and vinegar in a small bowl and set to the side for the moment. It will curdle; don’t panic.
In another bowl, sift together the flour, cocoa, baking soda, and salt. Set to the side.
Step 2:
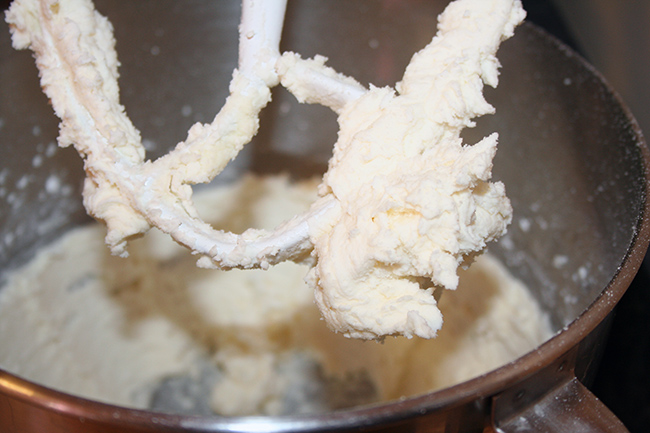
Cream the butter and sugar until light and fluffy. Add the egg, vanilla, and milk-vinegar mixture. Mix until incorporated.
Step 3:
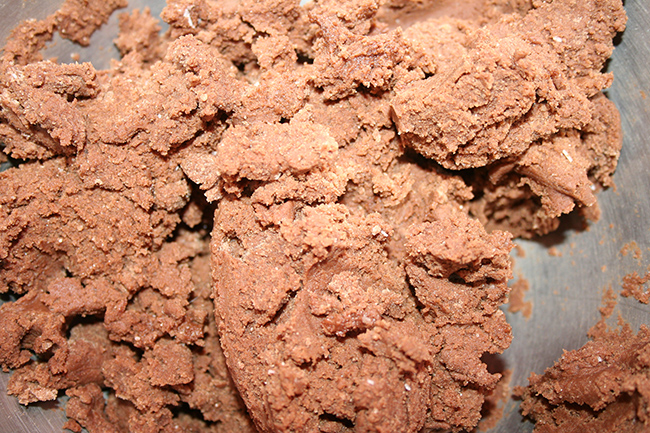
Add the dry mixture to the wet, and mix until combined into a thick dough.
Step 4:
Divide the dough in two equal parts and roll each into a long log, about 2″ in diameter.
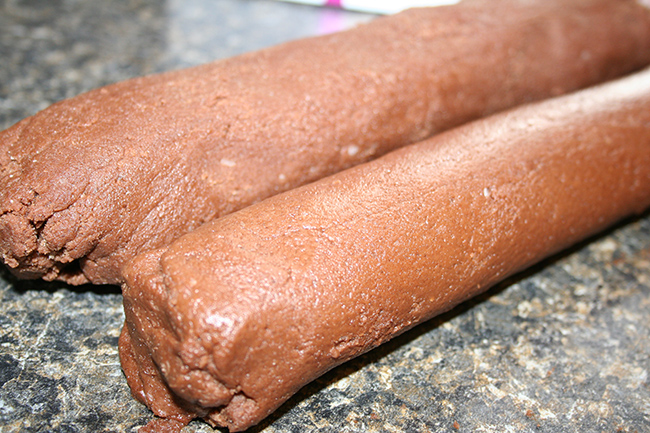
Wrap the dough in plastic or waxed paper and refrigerate for at least 2 hours, or overnight.
Step 5:
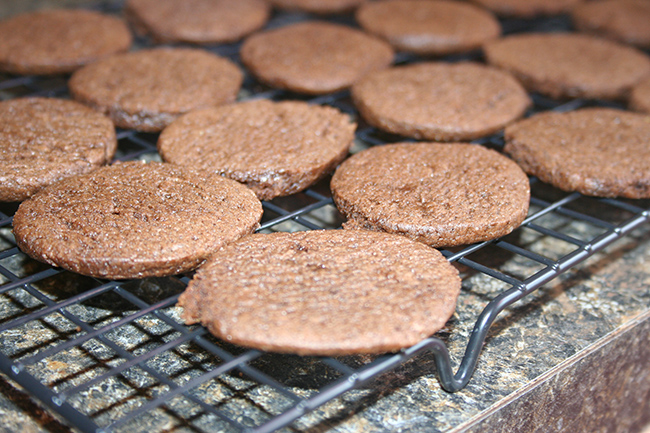
Near the end of your chilling period, preheat the oven to 350 F and line two baking sheets with parchment paper. Remove the dough from the refrigerator, and remove the plastic or waxed paper. Slice into thin (between 1/8″ and 1/4″) “coins” and place on parchment-lined baking sheets.
Step 6:
Bake for 6-8 minutes; rotate the pans halfway through baking.
Note: If you prefer softer cookies (more Oreo Cakester style, say), err on the shorter end of the baking time, waiting for the cookies to appear barely “set” in the centers. Bake slightly longer for crispier cookies.
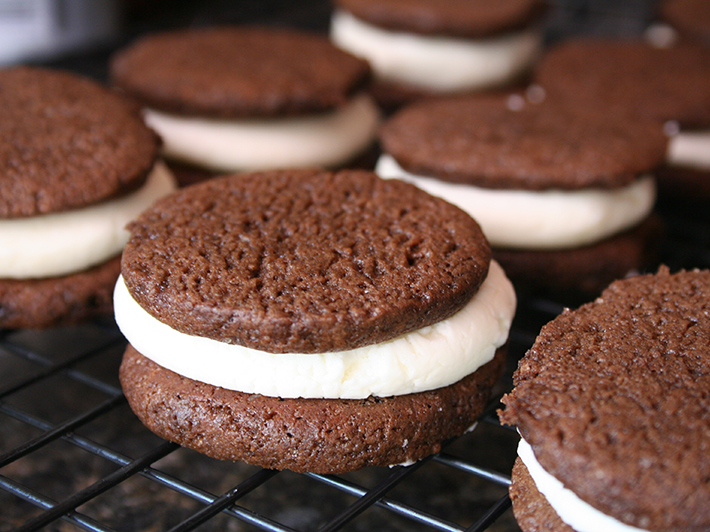
Step 7:
Remove from the oven and let cool on the sheets for a few minutes before transferring to a wire rack to cool completely. Once fully cooled, pair up the cookies so that you have pairs of similarly sized cookies to make sandwiches.
Note: If you want very flat cookies, you can gently flatten them with the bottom of a flat metal spatula while still warm on the sheets.
Step 8:
Make the creme filling. In the bowl of a stand mixer fitted with the paddle attachment, combine the butter, vanilla and 2 cups of the powdered sugar. Mix until creamy and combined. Add the remaining sugar, 1 cup at a time, until the mixture becomes quite thick — thicker than a typical buttercream, and more like dough in consistency. If at any point it feels too thick, you can thin with a small amount of milk or cream.
Step 9:
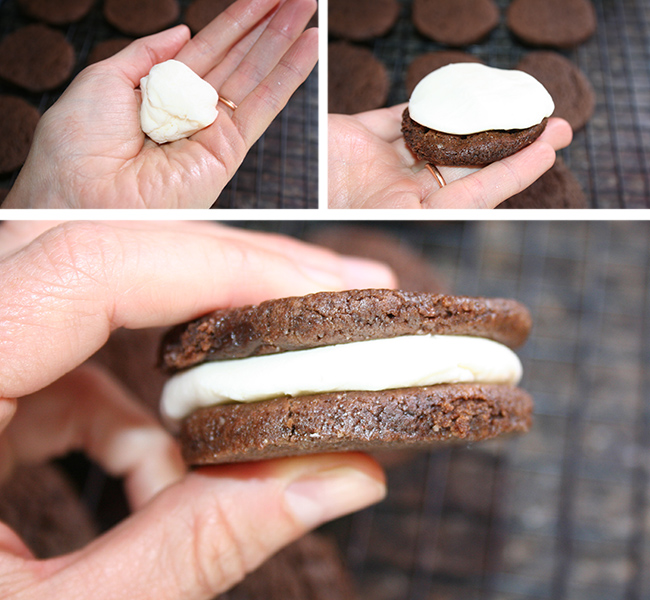
Assemble the cookies! Have two cookies at the ready: one right-side up, and one with the bottom-side up.
I came up with a nifty trick to ensure that the filling has smooth edges like store-bought Oreos. Scoop a spoonful of the buttercream mixture out of the bowl. Using your hands, roll it into a little ball. Place the ball on top of the cookie with its bottom side up. Gently flatten the filling so that it fills out the area of the cookie. Press the second cookie on top, with the bottom facing the creme filling.
Voila! You’ve got your sandwich cookie.
Note: If it seems strange to form the filling by hand, you can simply spoon or spread some of the filling on top of the first cookie and sandwich the second on top. The edges of the filling will be a little bit more free-form, but it still tastes great.
Store these cookies, well wrapped, in a single layer at room temperature for 3-5 days, or freeze for up to 1 month.
Recipe variations
Get creative with your homemade Oreos! Here are just a few ideas:
Make ’em extra-thick!
If during your childhood, you always thought that even Double Stuf Oreos didn’t contain enough filling, you have full permission to fill at least a few of these sandwiches with a double serving. It’s like a childhood dream, realized.
Add sprinkles!
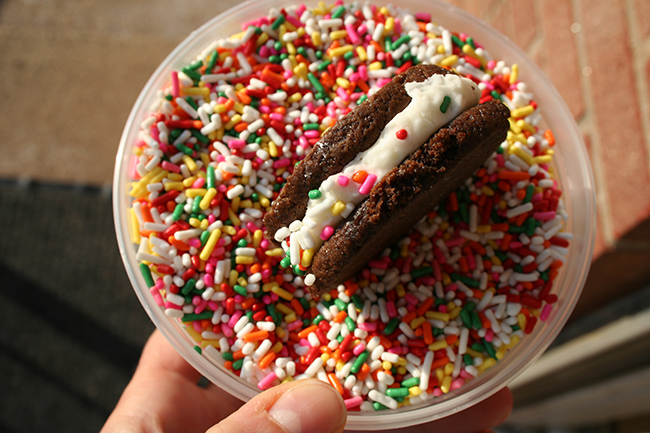
Right after assembling your cookies, roll the exposed filling in a bowl of sprinkles. You’ll be rewarded with a colorful, festive snack.
Add food coloring or flavoring extracts
Instead of the vanilla extract in the filling, go ahead and substitute another extract of your choosing, such as peppermint, almond or coconut extract. If desired, you can tint the filling, too!
Looking for more homemade versions of classic snacks? You’ll love our recipes for homemade Twinkies, DIY Ding Dongs, and Girl Scout-inspired
Share tips, start a discussion or ask one of our experts or other students a question.
No Responses to “Got Milk? Learn How to Make Homemade Oreos”