
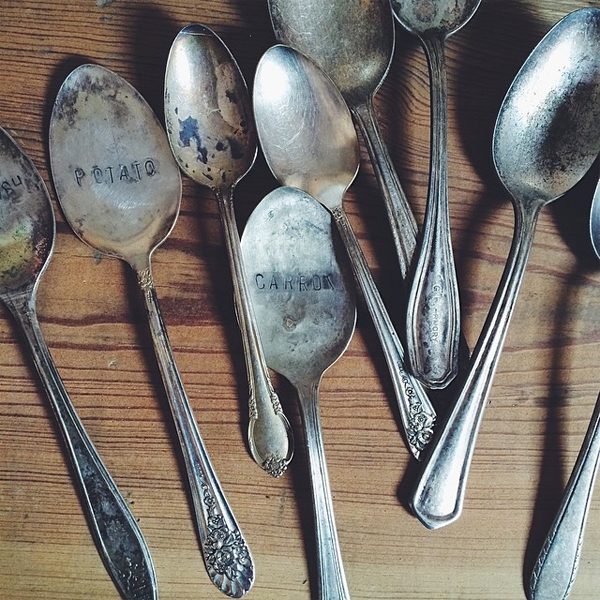
Recently I was looking for a unique way to mark the veggie rows in my garden, and came across these beautiful vintage spoons at a garage sale. The idea was born: make silverware garden markers! This easy project comes together in only a few minutes. Follow along with this step-by-step tutorial to make your own homemade garden markers!
How to make homemade garden markers with repurposed silverware
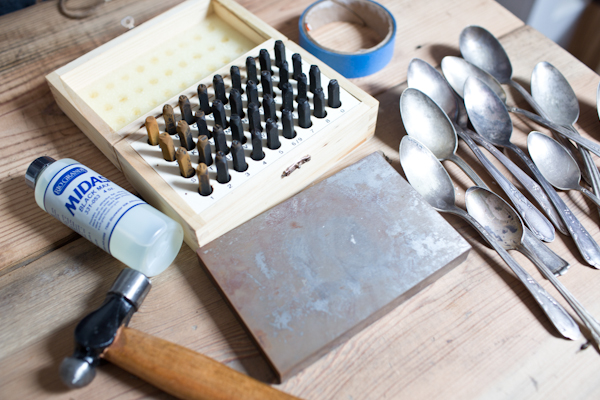
You will need:
- Vintage silver spoons (not steel)
- Metal hammer
- Metal letter punch set
- Steel bench block
- Midas Black Max
- Sanding pad or paper
- Small paintbrush
- Tape


Step 1:
Take your spoon and turn it over onto the steel bench block. Hammer away! It may take quite a few good hits, but you want your spoon to be mostly flat. Turn the spoon back over and hit it some more until both sides are flat. 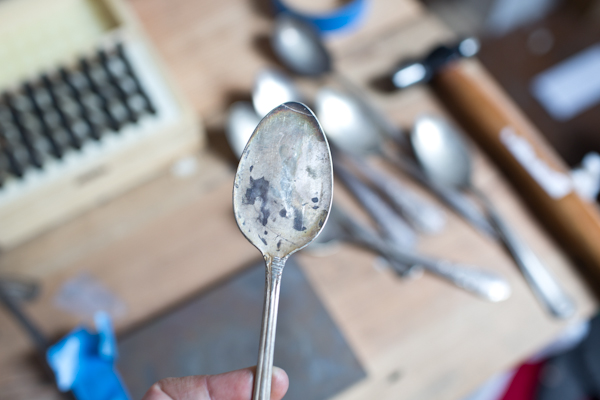
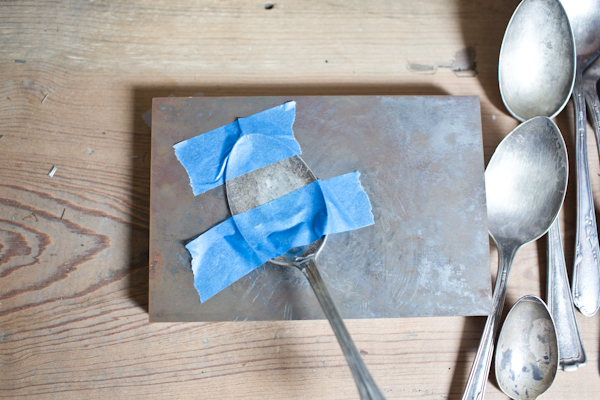
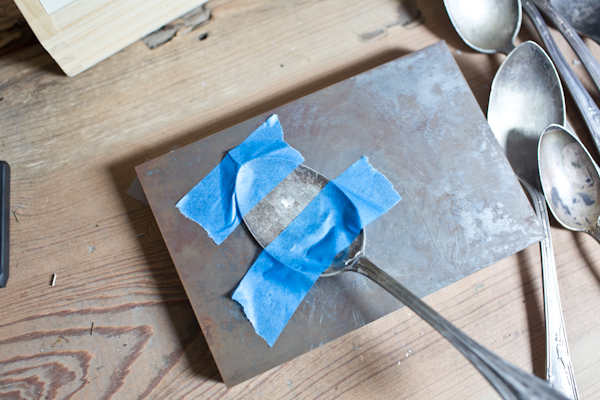
Step 2:
Next take two pieces of tape (I used painter’s tape because it was the closest thing to me), and tape your spoon down onto your block. This is so that when you hammer the letters into the spoon, it stays put. It also helps create a straight line for your word.
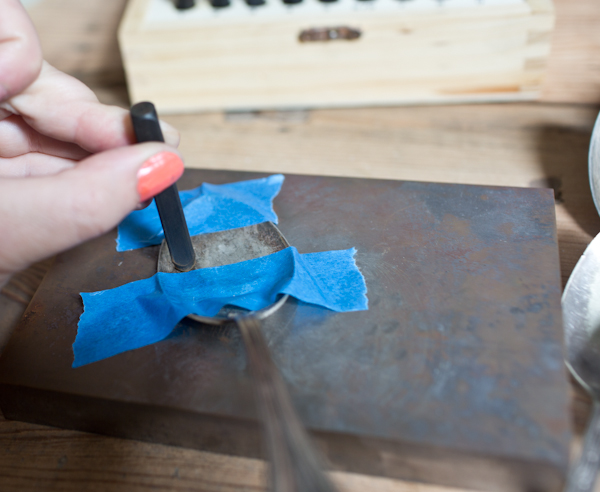
Step 3:
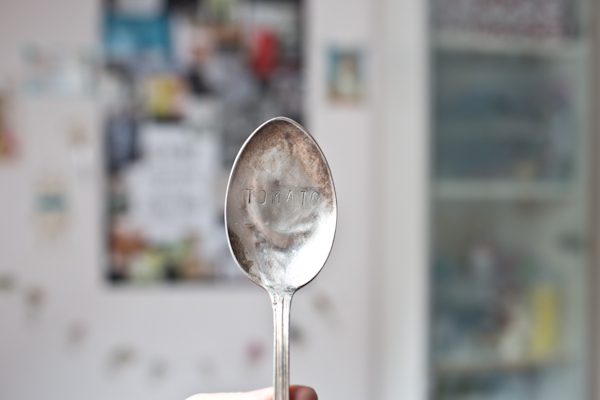
Take your letter and place each onto the spoon, one at at time. Hammer hard, but make sure to hold your punch tight. Watch out for your hands, and give it 5-10 strong hits.
Step 4:
Now we are going to darken up the letters so that you can see them better. 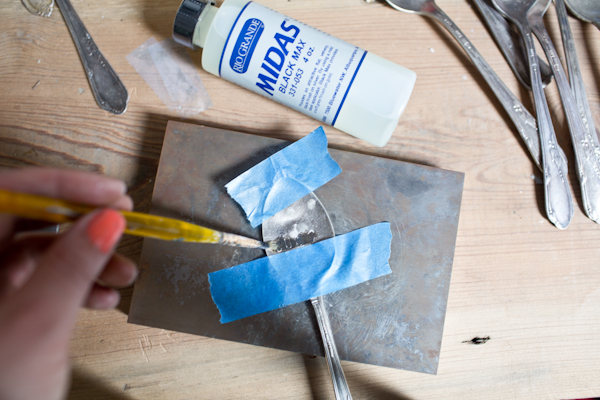
Dip a paintbrush into your Midas Black Max. Make sure you use a cheap paintbrush because you won’t be able to use it for anything else after this.
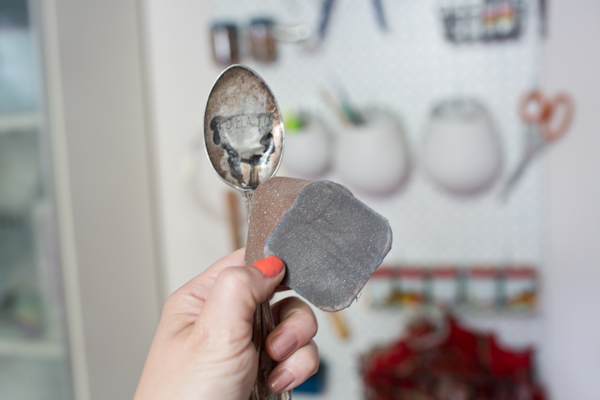
Step 5:
Next take some sandpaper or a sanding pad and wipe off the excess solution. I’ve also heard a Sharpie marker will work, use rubbing alcohol to wipe off excess marker.
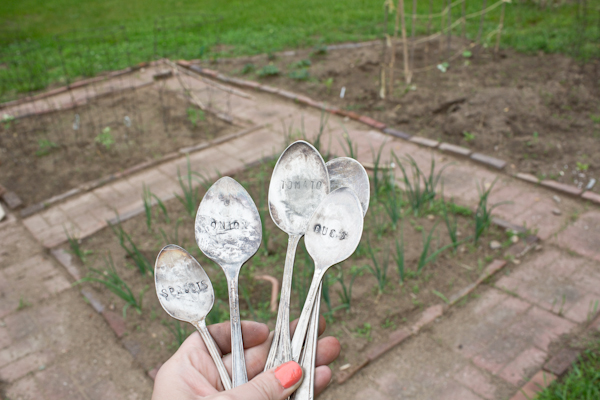
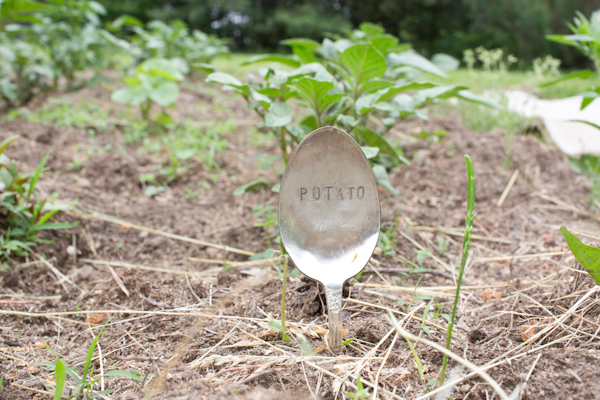
Stick it into your garden and you are good to go!
Special Savings on Popular Jewelry Classes

Learn from the best instructors. Get up to 33% off classes you can watch anytime, anywhere, forever.Enroll Now to Save »
Share tips, start a discussion or ask one of our experts or other students a question.
No Responses to “How to Make Vintage Silverware Garden Markers”