
Our exploration of dovetail joinery comes to a close, as we finally arrive at the reward stage of hand cutting dovetails where we get to see what all our efforts have wrought. But first, we’ll share some tips for fixing errors and finishing up.

Removing the excess
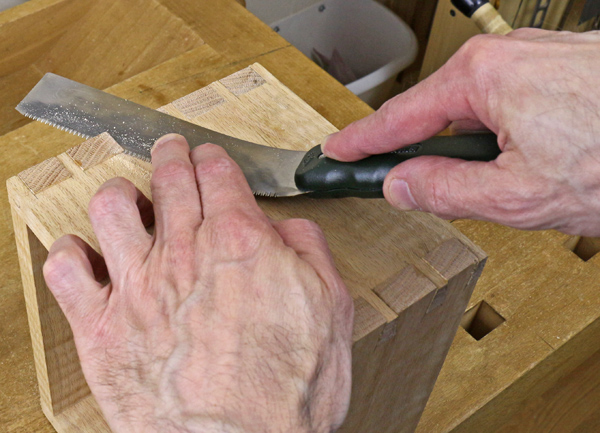
The protruding pins and tails can be removed most efficiently by sawing with a flush cut saw. The Japanese style is the thinnest and most effective for this work. Remove the last slivers as needed with a paring chisel or small plane, working toward the baseline to avoid chip out on the ends.
Fixing errors
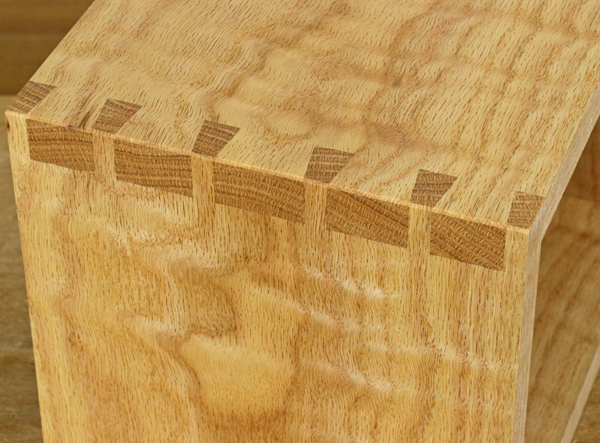
In an earlier post, I promised readers some mistakes, confident that I would deliver on that! Below, on the second to last tail, is nice big gap, probably the result of a loss of concentration — an error of the mind rather than of the hand. No problem. I sawed some thin wafers from scrap of the same species as the project, then test fit and sanded until a wafer fit snugly with the grain aligned to match. A larger or less regular gap could be intentionally enlarged and made uniform by sawing a kerf diagonally along the joint face of that tail.
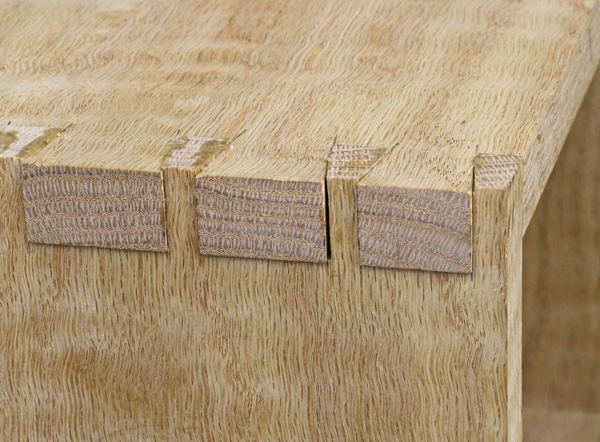
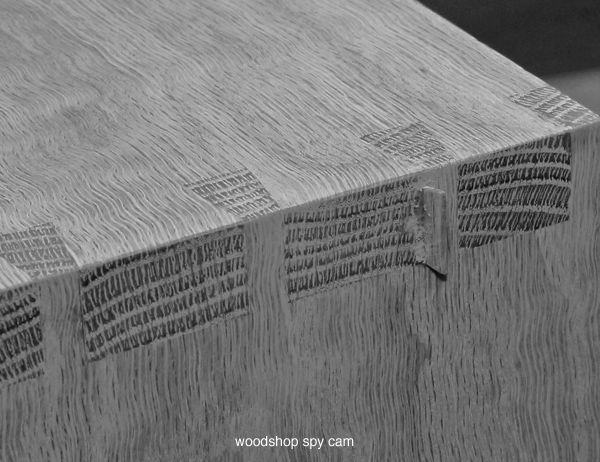
I glued the patch in and also sprinkled a bit of sanding dust at the joint line to hide any residual imperfection. Actually, the patch itself broke as I pushed it in and I ended up using a second truncated patch that you see in the photo. Of course, I did this when no one was looking to hide my embarrassment, though apparently the Woodshop Spy Cam caught me. Real craftsmen don’t do this sort of thing, right?
Wrong! Of course they do because they’re human and therefore make mistakes! The key point I want to make here is to that one should not be discouraged by occasional errors. If most of everything is going wrong, sure, you must step back and look at your procedures and practice more, but if you await perfection, I doubt you will ever finish making anything.
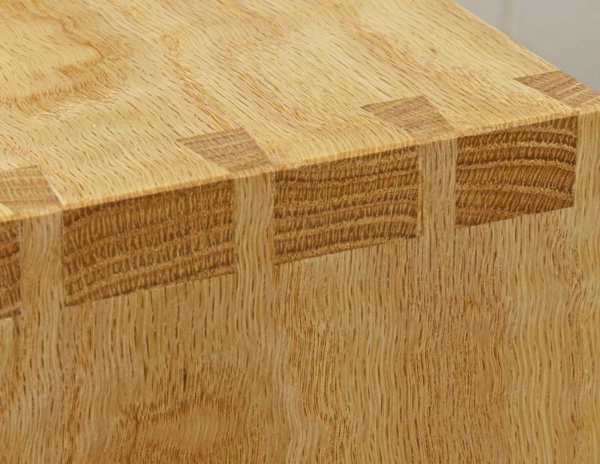
After paring and sanding, the gap is gone and the patch is barely noticeable, even in the photo enlargement:
Small gaps can be filled in with a mixture of sanding dust with glue or shellac. Some commercial products such as Timbermate also work well. This will depend on the species — these materials do not blend in as well with coarse-grained woods such as this red oak. Don’t bother trying to correct minutia. Remember, the object is to make an overall excellent woodworking project, not a perfect joint.
Surface finishing
There are some precautions to be taken when smoothing the surfaces of a project with through dovetails. If you are hand planing, or even scraping, the end grain areas can make the start of the cuts difficult. Use a very sharp blade, very thin shavings, skew the plane and use an excellent quality plane, properly tuned to eliminate blade chatter. At the far end of the cut, the end grain will chip out unless the corner is chamfered or a backing piece is used.
For sanding, use a cork or similar firm backing block to avoid the side grain surfaces from being worn away faster than the end grain, which would create noticeable hollows.
As for finishes, opinions vary, and each wood and project has its own requirements, but I feel that exposed joinery best supports the look of a piece when relatively thin finishes are used, such as wiping varnish, oil-varnish mixes and thin shellac. Here, I’ve used satin gel varnish.
Perspectives
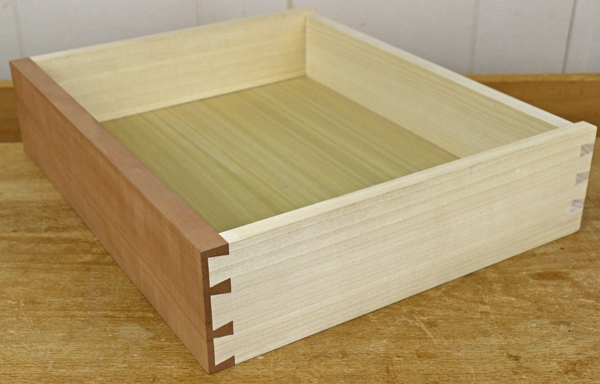
This series has described the steps in making through dovetails. The principles and skills, however, are applicable to all of the many variations of the joint, such as the half-blind dovetails, commonly used in drawer making, as shown below.
Furthermore, realize that what I have described here, though a tried and true, reliable hand tool method, is just one way to get the job done. One can use machinery for part or all of the process. Some woodworkers make the tail and pin cuts on the table saw or bandsaw, though this involves considerable set up that I consider rather tedious, especially for the one-of-a-kind projects that I make. There are also several excellent jigs that are used with a router to make dovetails, notably the Leigh, Keller, and Gifkins jigs.
Of course, the choice ultimately depends on how you like to work and the type of projects you do. I can tell you that the methods and skills described here, along with practice, quality tools and diligence will yield excellent results in a wide variety of work, from small boxes to full size carcase work.
In an earlier post, I posed the question, “Is this worth all the trouble?” For me, without a doubt, yes, it is. Craft gives us an opportunity for creativity and expression while producing useful, lasting objects. Endowed with the marvelous gifts of free mind and hands, we can imagine, work, and make.
Share tips, start a discussion or ask one of our experts or other students a question.
No Responses to “The Dovetail Joint: Fixing Errors & Finishing Up”