
Do you own any tiny little embroidery designs and are not sure what to do with them. In this week’s post, I will show you how easy it is to embellish text using embroidery software programs.
There are so many brands of embroidery software programs on the market, it’s hard to know which one to choose. If you want to create an embroidery design from artwork, then you might want to invest in a full digitizing program, such as PE-Design, Floriani Total Control, Bernina Artista or Husqvarna Viking 5D.
If you are only interested in combining existing embroidery designs that you already own with fonts and text, then you may not need the full digitizing program. Programs such as BES Lettering Software or MacBroidery Lettering Software (for all you Mac users) allow you to merge pre-digitized embroidery designs with text and fonts that are included in the software and some of the programs allow you to turn true type fonts found on your computer into stitches.
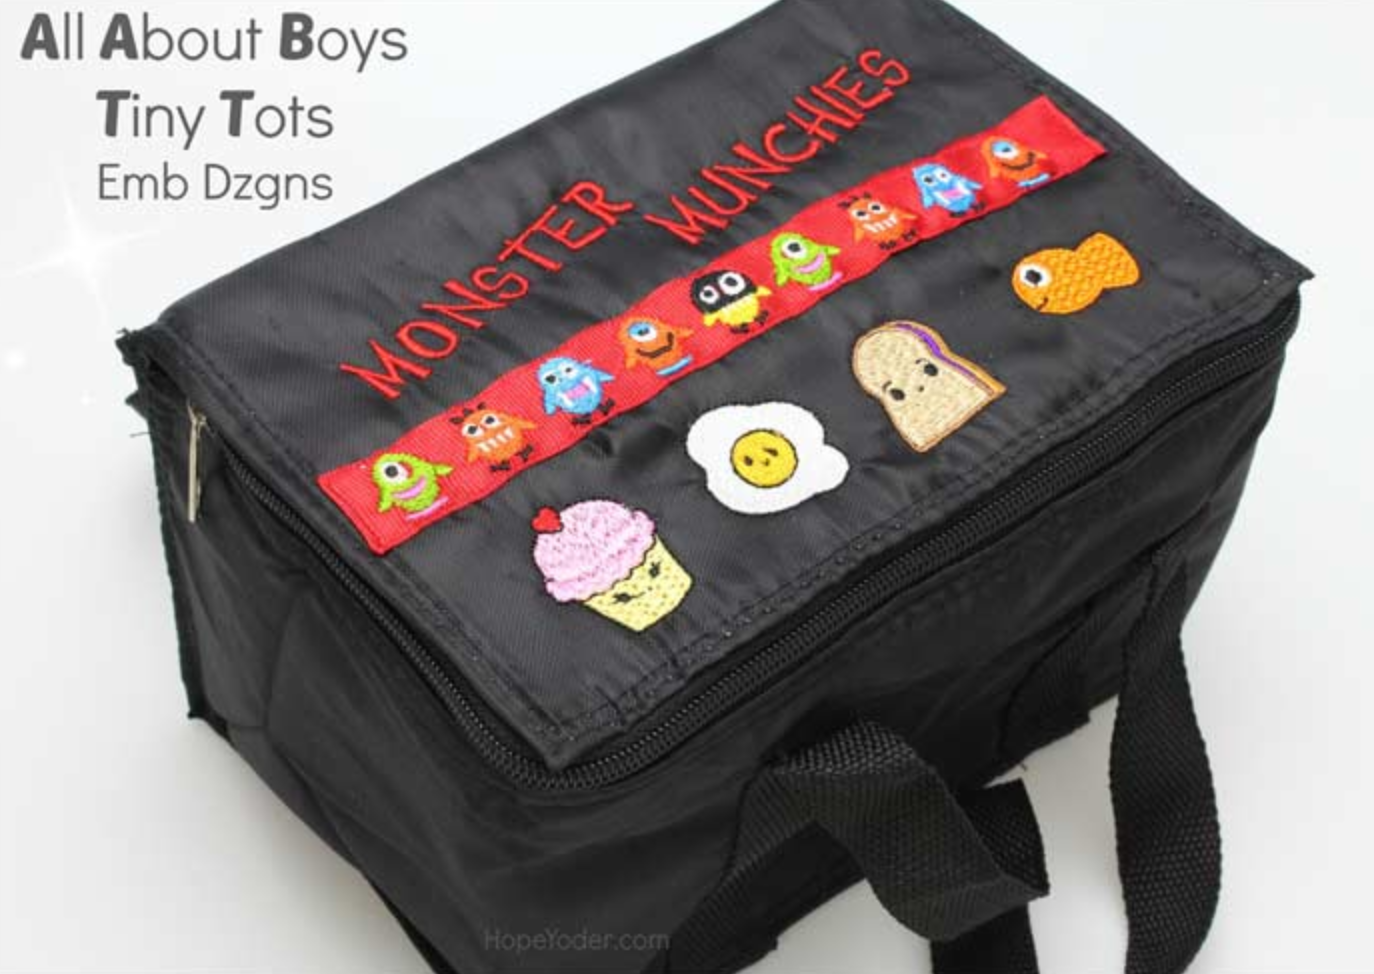
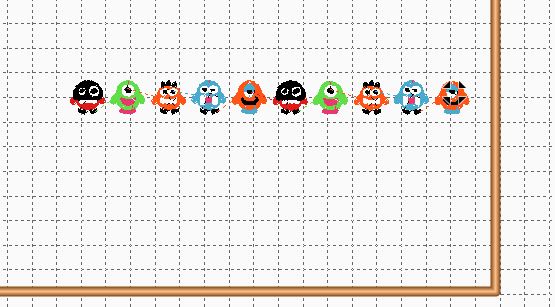
To create the cute little lunchbox seen above, we have used two small embroidery design collections: Tiny Tots and All About Boys DZGN Minis. Monster Munchies text was added using built-in “Comedy” fonts from the Floriani Total Control software program. Most embroidery software programs have a built-in kid fonts that would work great for this project.
Aligning tiny designs on screen
Step 1:
Open a new page in the program. Select File > Open and find the first design.

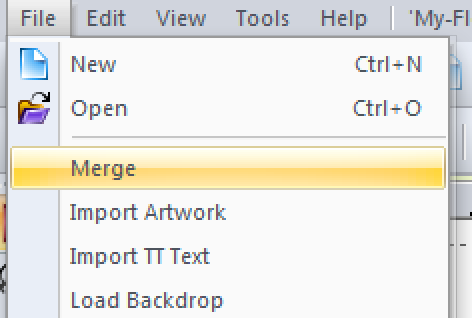
Step 2:
To add the other designs select File > Merge and bring in the next design.
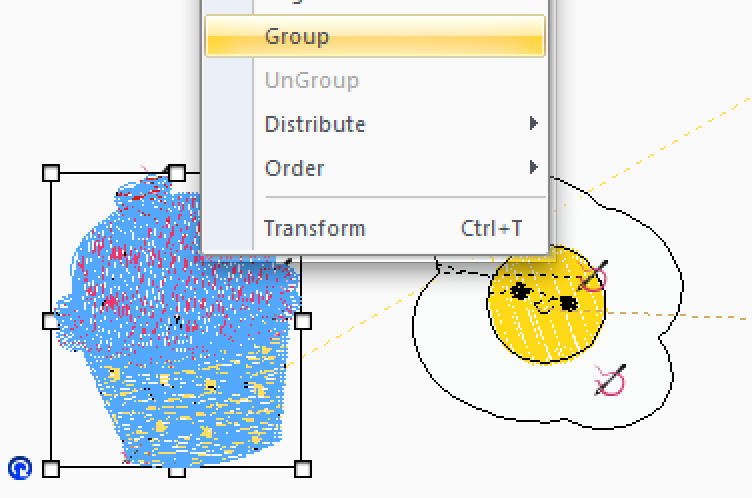
Step 3:
Continue with File > Merge until you have all the designs on your screen. Select each design by right-clicking on “Group.” This will group all the stitches within that design so you can drag the design around on the screen without remove or distorting the stitches.
Step 4:
To add lettering, select the Text tool and select “Comedy” and type in Monster/Apply. Then add another section of text and type in Munchies/Apply. Move the text where you want it, and group the text together as shown above.
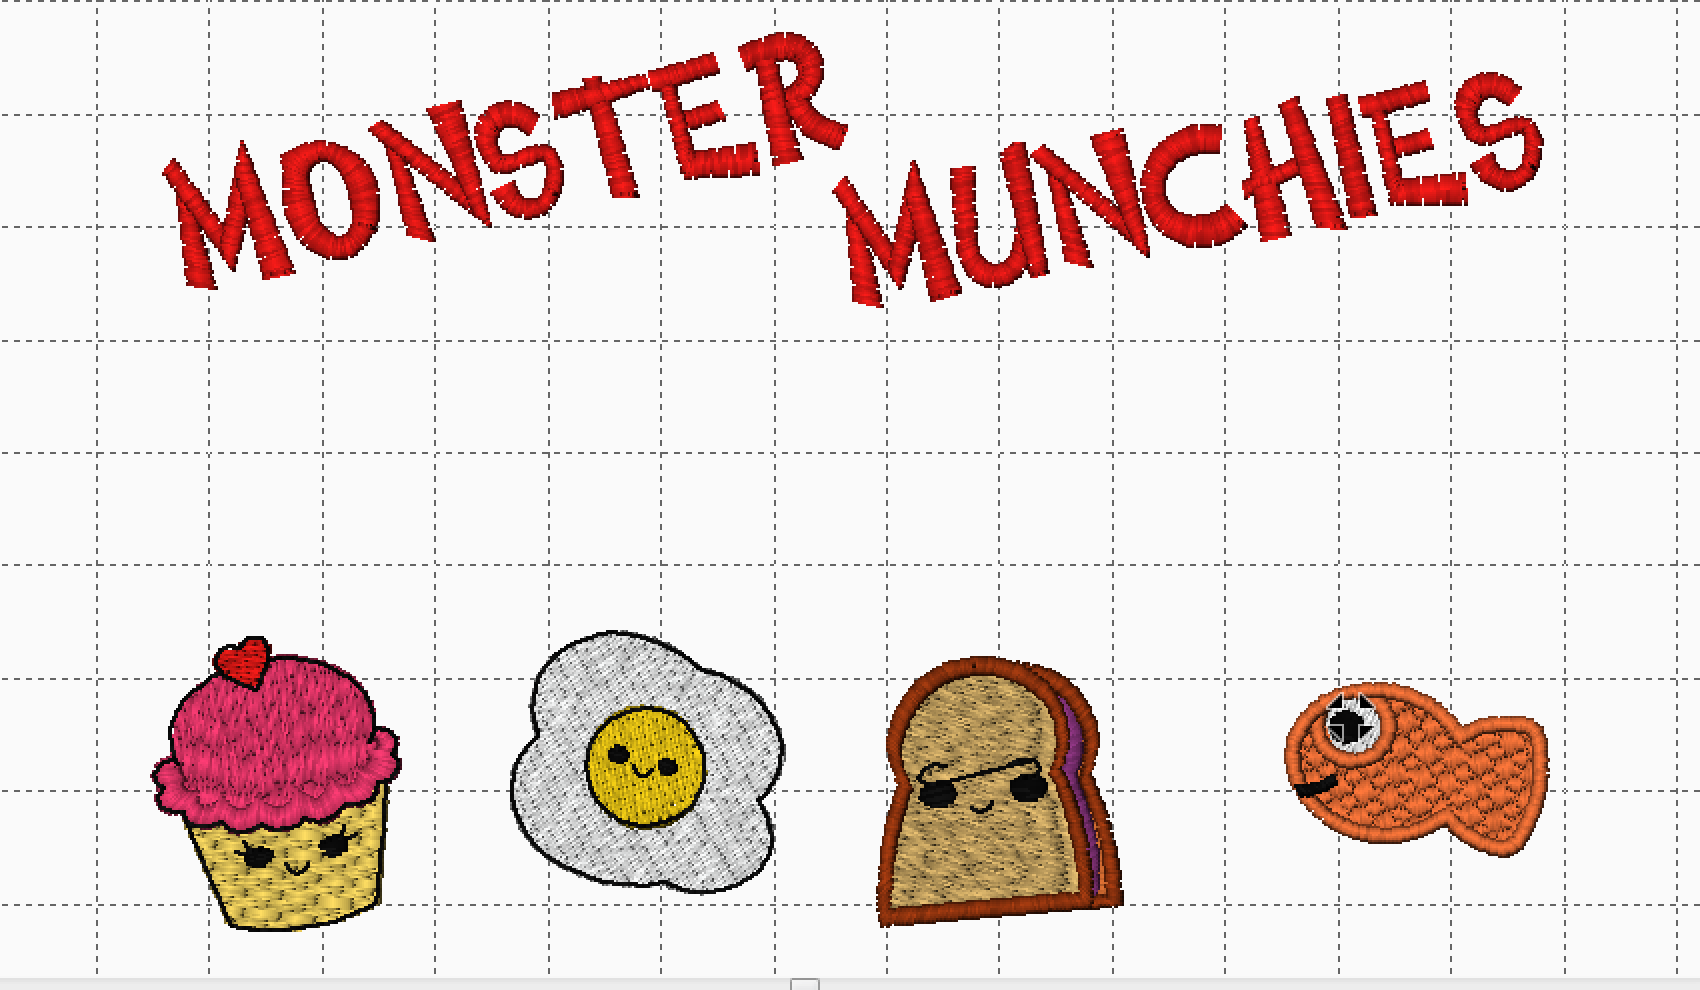
Step 5:
Arrange several monster designs in a row, spacing them as desired. Make sure they are all along the same horizontal line angle. Some software programs have a “horizontal alignment” tool that makes this job easy.
Embroidering on your machine
Step 1:
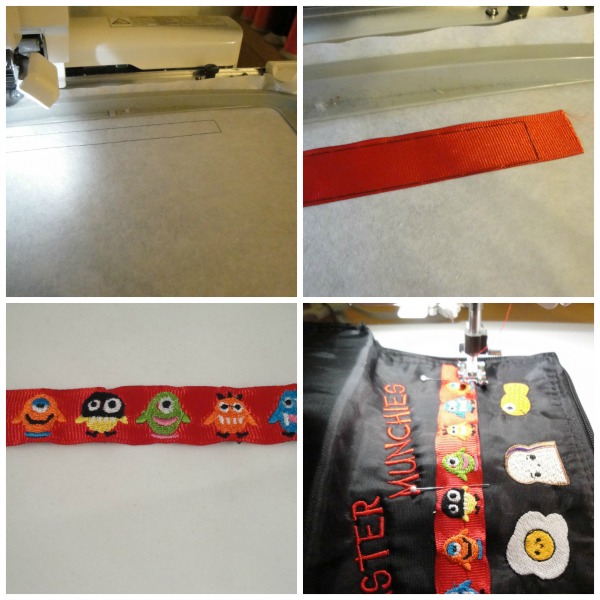
Cut a piece of 7/8”- 1” grosgrain ribbon several inches longer than your lunchbox width and iron a piece of fusible tear-away stabilizer to the wrong side — this prevents puckering. Hoop a lightweight tear-away stabilizer and “baste” the design in the hoop.
Tip: Basting in the hoop is a great feature that most of the new top-of-the-line embroidery machines have. This means you can select this feature on your machine and a rectangle will be placed around your design as color 1. It’s a great feature that you can not only use to baste the ribbon to your stabilizer, but it can also be used as a placement line so you know exactly where to lay the ribbon so the design is centered.
Step 2:
Engage an automatic basting of the 10 monster designs and embroider the rectangle using contrasting thread. (You are embroidering on stabilizer only.)
Step 3:
Center the ribbon (prepared with fusible tear-away on the wrong side) over the basting line.
Step 4:
Embroider the monster and remove the ribbon from the hoop, leaving the fusible tear-away in place.
Step 5:
Topstitch the ribbon to the lunchbox using matching thread. Or, you could topstitch the ribbon after the monster munchies embroidery is complete, as shown below.
Step 6:
Print a paper template using the software and audition it where you plan to embroider it on the lunch flap.
Step 7:
Embroider the design on the lunchbox and enjoy.
Want to find out more about machine embroidery? Why not sign up for the Bluprint class Machine Embroidery With Terrycloth and More.
Check out my other blog topics by clicking here. Please feel free to post comments or ask me a question!
Share tips, start a discussion or ask one of our experts or other students a question.
No Responses to “Little Embroidery Designs Plus Text Tutorial”