
Hooping can be a handful. On top of that, there is the issue of design placement. Where should napkin monograms be located? How far from the bottom should a towel design be placed? If you are not able to see the alignment marks in the hoop, how do you know your embroidery will line up right? Fortunately, there are a variety of helpful items available.
Two challenges face stitchers when embroidering on garments. The first task is determining where to place the embroidery. The second is how to center it where you want it to stitch.
Design placement
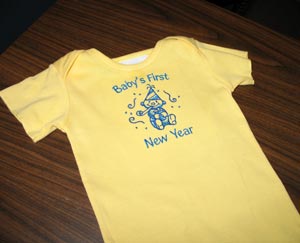
Photo via EmbroideryLibrary.com
EmbroideryLibrary.com provides two embroidery placement guides. One includes measurements for placement of embroidery on more than a dozen different adult garments in addition to locations for embroidered toweling and linens.
An additional chart provides measurements for embroidery locations on blankets and clothing for infants, toddlers, and children.
Get Baby’s First New Year design here.
Get the Embroidery Placement Guide here.
Get the Embroidery Placement Guide for Infants, Toddlers, and Children here.
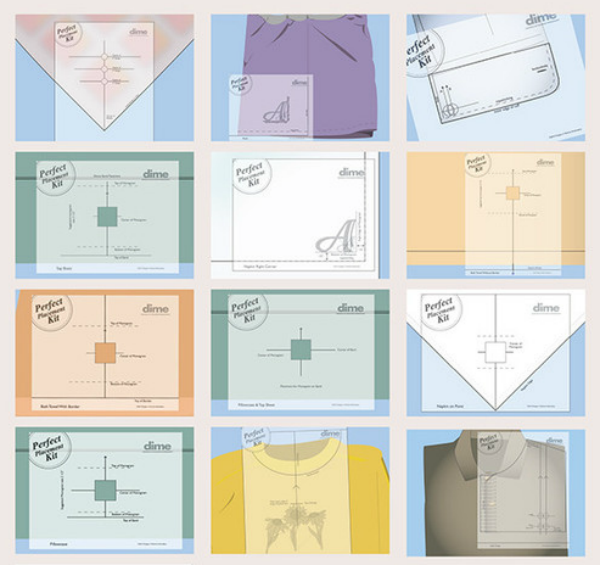
Photo via Designs In Machine Embroidery
If the thought of calculating measurements makes your head spin, Designs In Machine Embroidery offers several products for easy design placement. The Perfect Placement Kit provides more than a dozen templates for placing embroidery on linens and wearables.
All of the measuring is done for you and a convenient window allows for easy placement of target stitckers, removable crosshairs that insure that embroidery is exactly where it should be. These templates are especially useful if you are creating multiple stitch outs of the same embroidered piece, such as with monogrammed towels, napkins, or polo shirts, and you want them all to match.
Get the Perfect Placement Kit here.
Now you can perfect monogram placement and stitching with Bluprint’s Embroidering Monograms by Machine class with Terri Johnson.
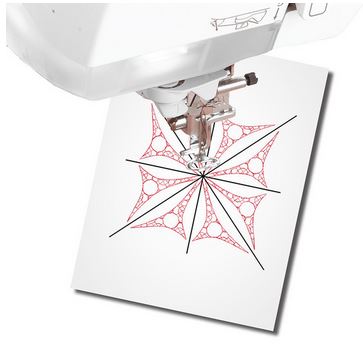
Photo via Designs In Machine Embroidery
What if you could print a template of your embroidery design that was semi-transparent and had a sticky back? Print and Stick Target Paper does just that. It adheres to the embroidery surface and can be repositioned easily, sticking in place.
You can see the fabric and stitching through the translucent paper making it easy to align crosshairs and stitch sequences.
Get the Print and Stick Target Paper here.
In Bluprint’s online Continuous Line Embroidery class, instructor Bobbi Bullard shows you how to determine placement, mark and align your designs, and create reusable templates.
Centering designs
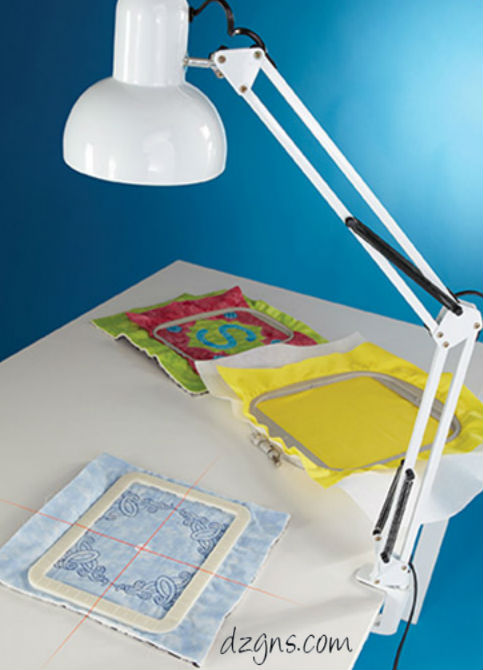
Photo via Designs In Machine Embroidery
The Perfect Alignment Laser 2 (PAL2) produces a laser crosshair that can be projected over your hoop or work surface to help with finding and marking the center of your embroidery. It also helps with lining up text, sewing a straight seam, squaring up quilt blocks, and sewing perfectly aligned continuous embroidery designs.
Get the Perfect Alignment Laser here.
Share tips, start a discussion or ask one of our experts or other students a question.
No Responses to “6 Alignment Tools and Resources for Embroiderers”