
After learning how to embroider on paper, the sky is the limit with what you can do with this fun paper craft technique. Use it for scrapbooking, creating unique artwork, or, my personal favorite, card making. I especially love using embroidery to make one-of-a-kind party invitations.
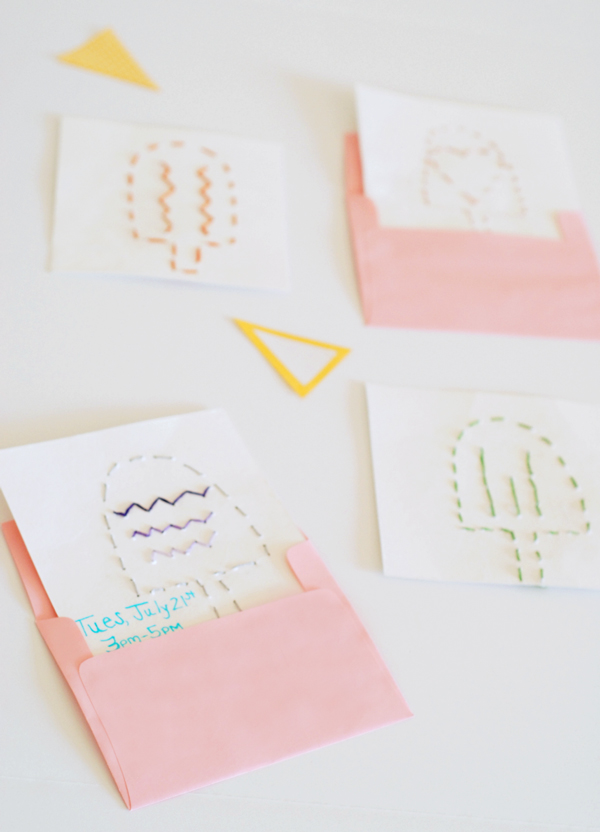
If you are looking for a simple way to invite friends over for summer festivities, these embroidered ice pop invitations might be exactly what you are looking for. All you need to do is print out our template and get stitching for fun and whimsical invitations!
One of my favorite things about hand embroidery is the freedom it gives any crafter to create a gorgeous product. You can add details to cards and make anything more beautiful with bright thread, stitches and a little bit of time.
Discover the relaxation and joy of hand embroidery in the Craftsy class Design It, Stitch It: Hand Embroidery. Learn all the tips and techniques you need to design and stitch unique embroidered treasures!
How to make an embroidered card
Materials needed:
- Heavy card stock*
- Bright embroidery thread
- Our printable template
- Embroidery needle
- Scissors
- Glue
*Note: I like using letterpress paper for hand embroidering, as it takes the needle well and doesn’t bend under the thread’s pressure. Any type of heavy card stock will work though.
Step 1:
Once you have printed out the free template, cut around the ice pop shape and trace onto the backside of your paper.
I included the dot positioning for the thread length we used. When tracing the template, you can trace around the template with the dots so that your needle will have a clear guide as to where to land. If you’d like your thread lengths to be longer or shorter, simply trace the basic shape and add in your own dot spaces.
Step 2:
Add in texture and design to your card. We drew simple hearts, stripes and Chevron patterns to decorate each of the ice pops. Draw in the design you like with pencil on the backside and add in dot marks ever 1/4″ to stitch through.
Step 3:
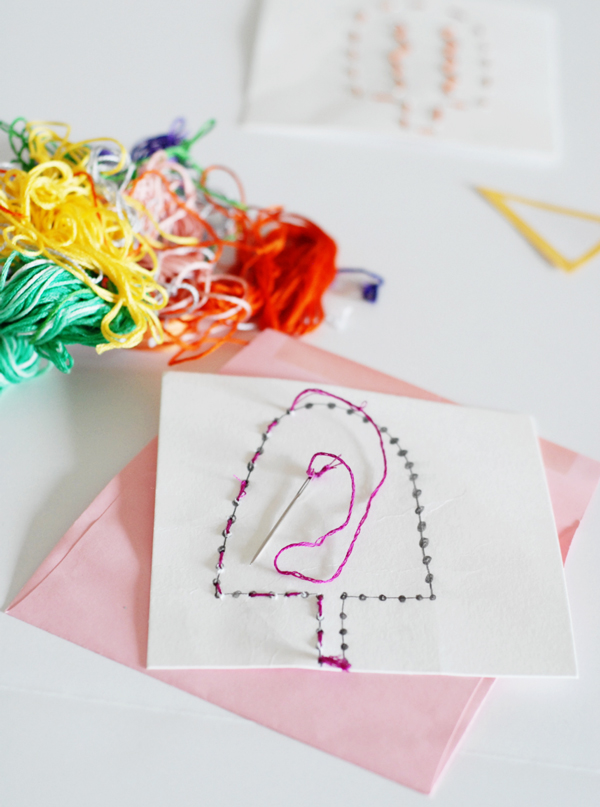
Thread the needle with the embroidery thread.
I find basic embroidery needles to be the best to use for embroidering into heavy card stock paper.
Step 4:
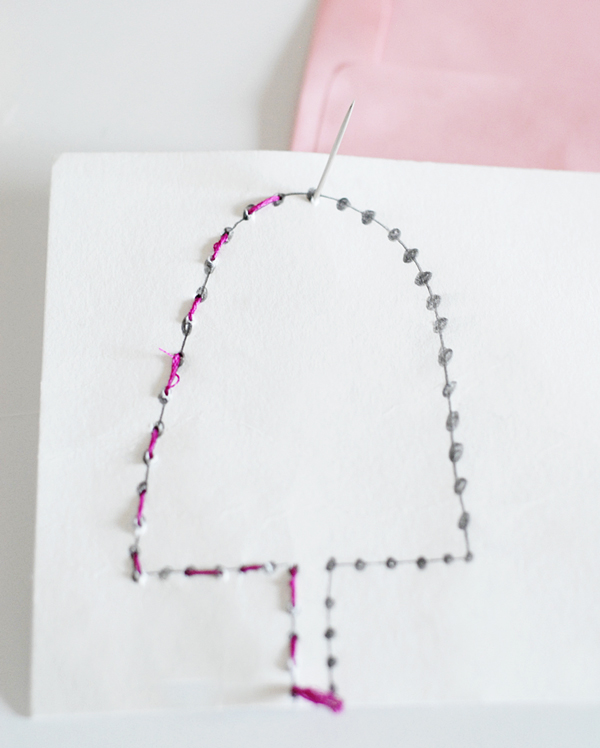
Beginning on the backside of the paper, thread the needle through and tie off the end — be sure to leave enough thread to stitch around the card. Stitch your first stitch and keep going under and over until the card is finished off.
Step 5:
To change colors, tie off one thread and begin another. The backside will be messy and that’s OK! Once the card if finished off, tighten any areas as needed and tie off the thread on the backside. Secure the tie offs with a small piece of transparent tape.
Step 6:
For a card that looks finished from all sides, use a second sheet of identical paper and glue to secure it to the backside — this will hide all your stitch marks.
Step 7:
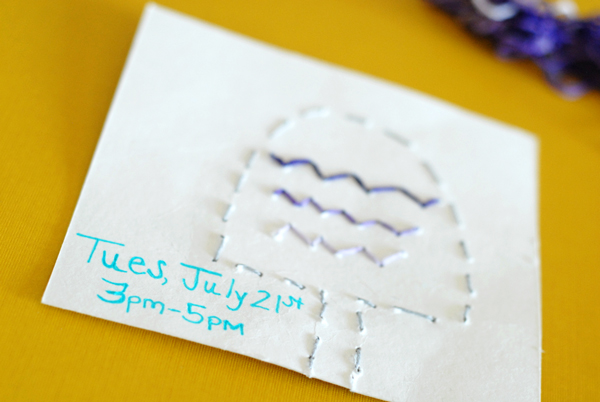
Once dry, flip the card over and write in the details.
I love the great dose of individual design these cards bring to a party. Make a stash to send for your next bash! Or, craft a couple up to send to friends, just to say “hello”! They will know how much you care with the stitches received.
Looking for another fun embroidered card pattern to try? Check out the Thank Ewe Sow Much Embroidered Card Pattern by Craftsy member The Bored Zombie!
Share tips, start a discussion or ask one of our experts or other students a question.
No Responses to “Looking for a Fun DIY Invitation Idea? Make an Embroidered Card!”