
My diaper bag just died. I was opening the zipper, and the zipper pull came right off. I was so sad, but that meant I could make a new one with every feature that I want!
Photos via Feathers Flights
Counting this one, I have made a total of three diaper bags. Each time I add something that I want and learn more about how to create a good bag. My first bag was a shoulder bag with lots of pockets. My second bag was a leather and fabric backpack that can be changed into a shoulder bag.
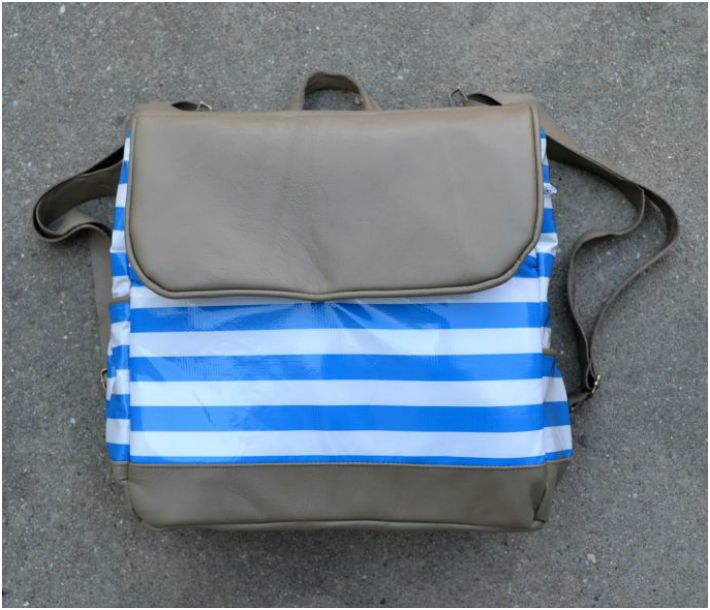
This time, I wanted another backpack/shoulder bag with a lot of structure and a lot of pockets. I used leather and oilcloth, and I used the Classic For Moms pattern found right here on Craftsy. Follow along to see how I stitched it up!
How to sew a diaper bag
Step 1:
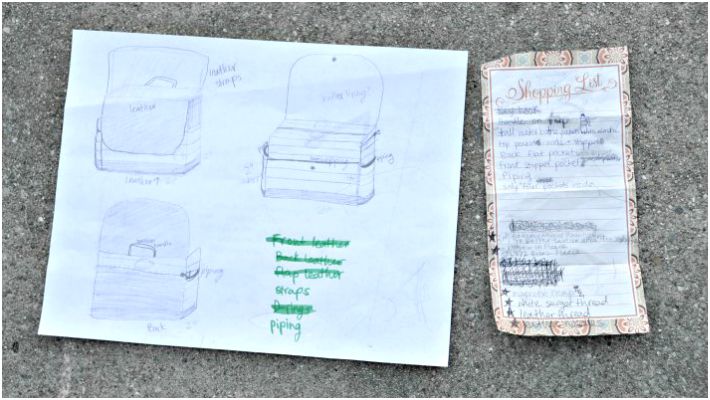
First, sit down and write out everything you want in your bag. I wrote out a list of the pockets and details that I wanted. Then I wrote out the supply list I would need for the changes I would make to the original pattern. I also drew a picture of the bag from multiple sides to make sure the I liked the look and placement of the stripes. I’m glad I did because I changed some things as I was drawing it out.
Step 2:
Use the fabric and interfacing amounts recommended by the pattern. Since I was sewing with oilcloth and leather, I could not use iron-on interfacing, so I used a stiff sew-in interfacing and sew-in batting. Get your notions and supples plus any additional supplies for the added details, like piping, extra zippers, etc.
Note: I would not recommend sewing this pattern with leather unless you’ve made it previously with woven fabrics.
Here are the changes I ultimately decided to make to customize the original pattern:
- Changed the front zipper changing pad to a flat pocket
- Changed the flat back to a zipper pocket for tablets, notebooks, etc.
- Lengthened one side pocket for a tall water bottle
- Added a small zipper pocket above the other side pocket
- Added a handle for the top
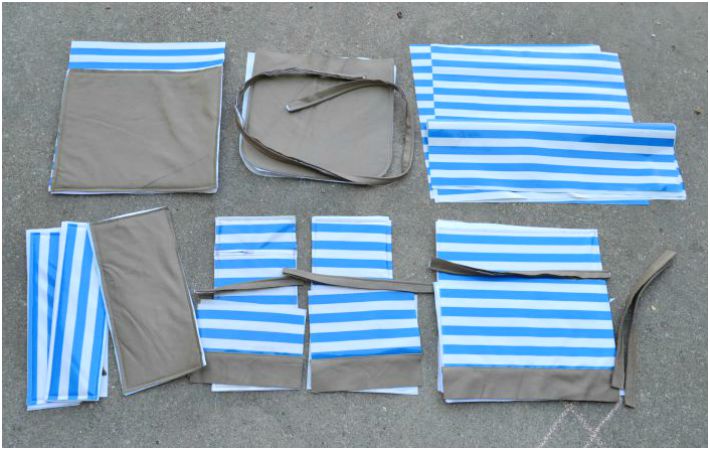
These are all my pieces laid out with the stiff interfacing.
Step 3:
Iron or sew in each separate piece with the interfacing. It took a long time to prepare each piece, but that was the bulk of the work.
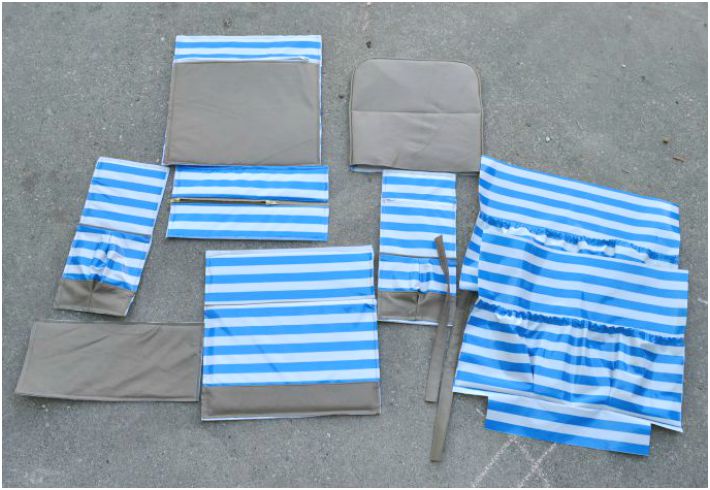
I used really stiff interfacing, so it made all my pieces thick. It gives my bag a lot of structure which I really wanted. I just kind of hated it while I was sewing it, but I love it now after it’s all done.

Alteration details
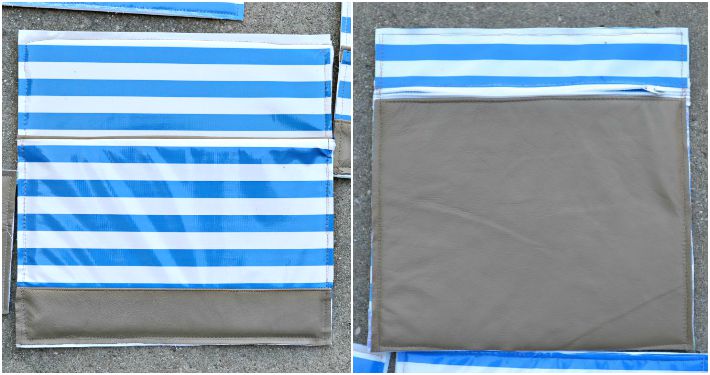
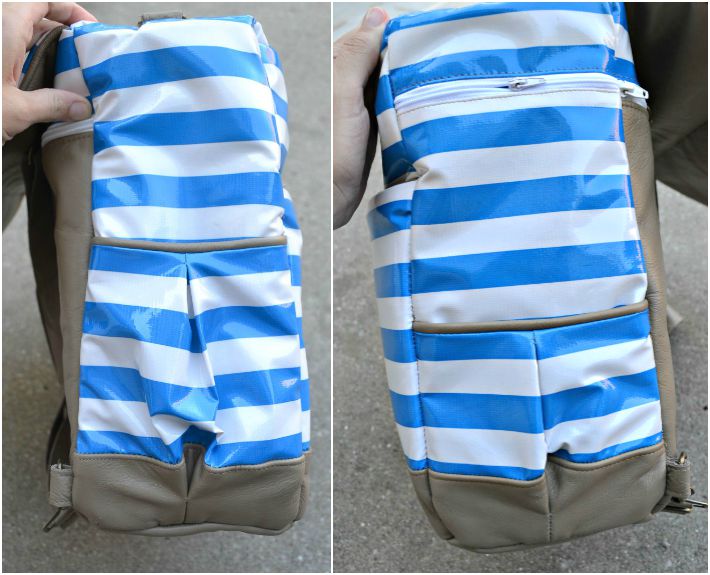
The left photo below is the front of the bag and has one flat pocket with leather piping at the top. The main piece and the pocket are interfaced. I added a small leather panel at the bottom to match the leather bottom. The right one is the back and has a zippered pocket. The main piece and the leather section are interfaced. I was planning on using this back pocket for tablets or a small laptop, so I wanted good padding.
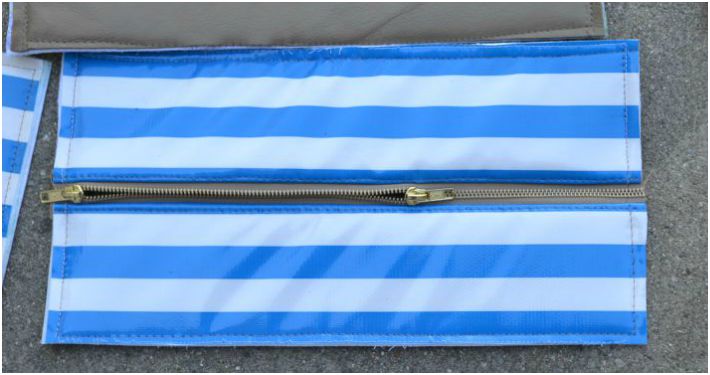
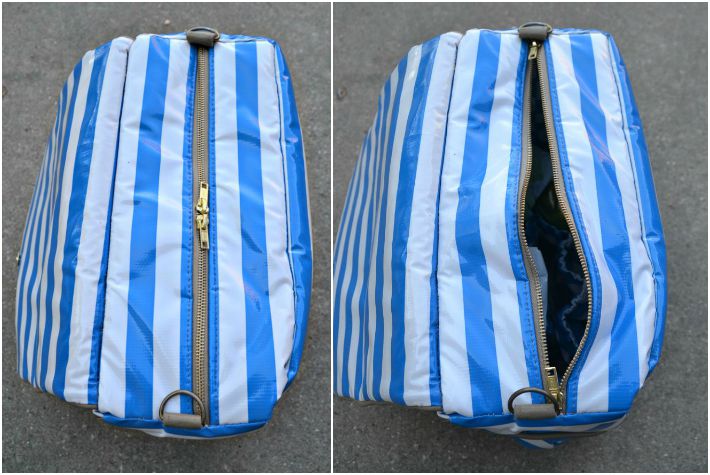
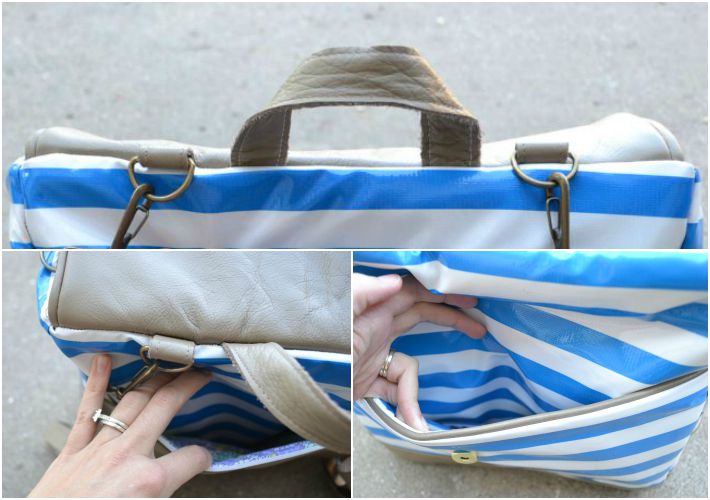
I changed the top slightly. I removed the top side panels that lowered the zipper. I used a coverall zipper with two pulls instead of a nylon zipper with one pull. I cut the ends off of the coverall zipper, took one pull off, and flipped it around and put it back on. I love having a double zipper.
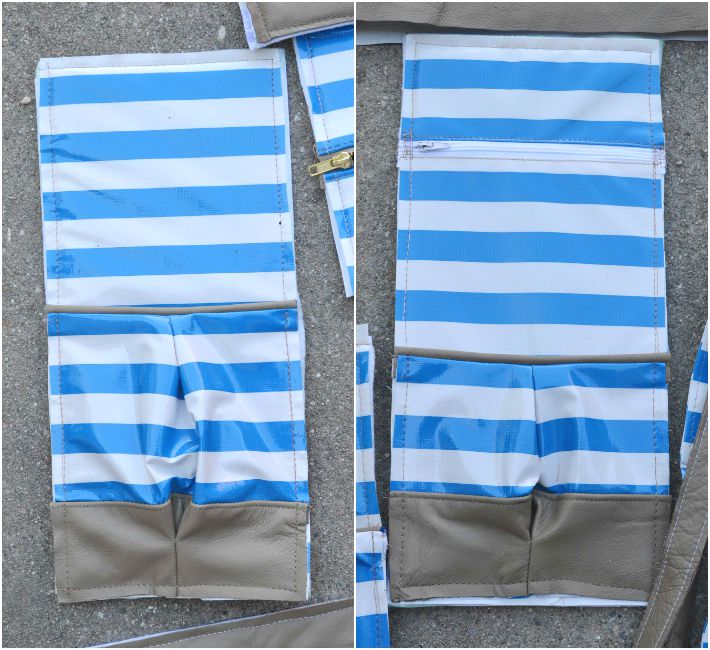
Here are the two side pockets. My husband often complained about the pockets being too short and tall water bottles would fall out. So I added height to one and left the other the same. I also switched the elastic at the top to piping and pleats. I added a small leather panel at the bottom to match the leather bottom.
Step 4:
Assemble the lining and inside pockets as instructed in the pattern. I did not alter the inside of the bag.
Step 5:
Attach tabs with D-rings where instructed by the pattern.
Step 6:
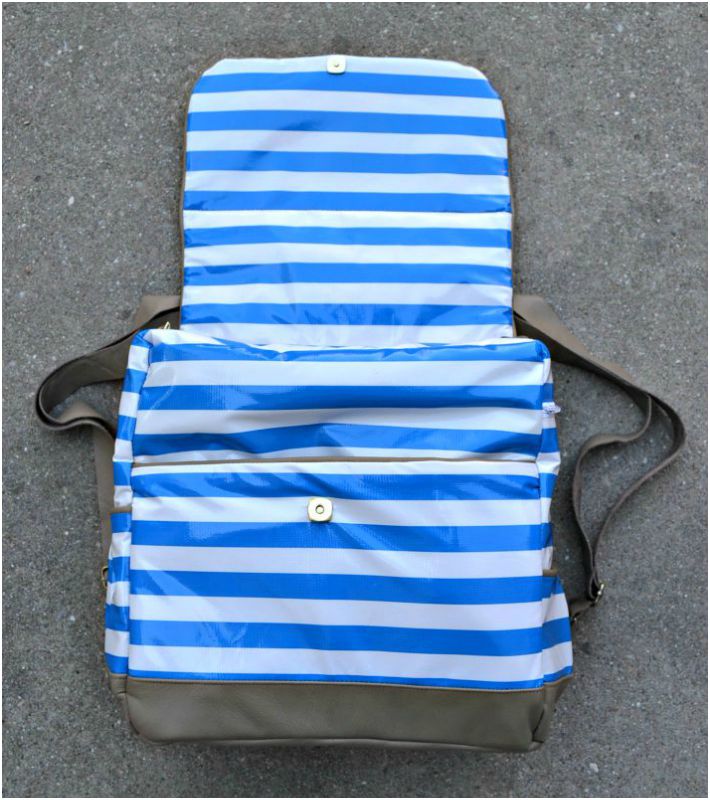
Assemble the outside of the bag by sewing all four sides together. Sew on the bottom. Sew on the flap to the top of the back piece. Insert the bag into the lining with right sides together and sew on the top. Flip inside out and you’re all done.
Notes on this project
One part that I did not think through before cutting and assembling was the very top. I left out the top side panels which is needed to separate the zipper ends from being next to the tabs and D-rings. Functionality is not affected, but sewing over a zipper and leather tabs was a nightmare. I had to sew some of it by hand because it was too many layers for my machine. I like the look now, but it would need to be changed to make it easier to sew.
The side pockets turned out great. I love the look of the piping along the top of the pockets. The piping makes the pockets a little tight, so I’m hoping it’ll stretch after a bit of use. My favorite is the small zipper pocket at the top. It’s on the right side so I can open it with my right hand. It’s going to be the pocket for my keys. I love having a secure place for my keys, so I know they can’t fall out and I don’t have to dig around in my bag for them.
I added a handle to the top for quick grabbing. When the straps are attached for backpack mode, it’s awkward to grab a strap when I’m running out the door. It’s too long for grabbing before putting it on my back. It makes it look more like a backpack which I don’t love, but I love having a handle.
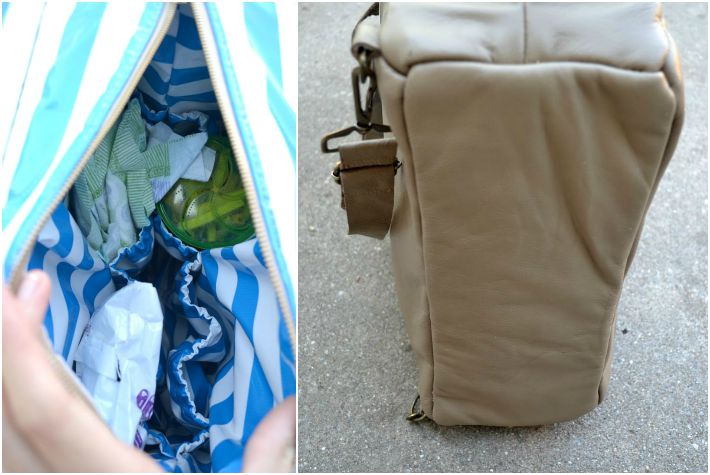
The bottom is just leather and blends into the leather on the sides and back. I’m hoping it hides dirt and scuffs and makes it easy to clean. There are four big pockets inside which is great along with the fantastic double pull zipper. I was worried the opening at the top would be too small for easy access, but I haven’t had a problem since I’ve started using it.
I am really happy with my new leather diaper bag. The structure will make it last a long time, the versatility is great, and I must say the bag looks fantastic. It definitely feels like me, and I’m very proud to use it and wear it everywhere I go.
Share tips, start a discussion or ask one of our experts or other students a question.
No Responses to “Learn How to Take a Pattern & Make It Your Own With This FREE Diaper Bag Tutorial”