
Do you shy away from sewing curved quilt blocks? A good way to practice quilting curves is with improvisational or wonky curved quilt blocks. These blocks are not only quick and fun to sew, but they are very forgiving and they’ll let you practice joining fabric along a curve without the need to be perfect.
Here’s a quick tutorial that will teach you how to make improv curved quilt blocks!
Block Size:
Approximately 8 1/2″ x 16 1/2″
Materials:
- Four fabric pieces 12″ x 18″
- 1/4″ quilting foot (optional)
- Rotary cutter and cutting mat
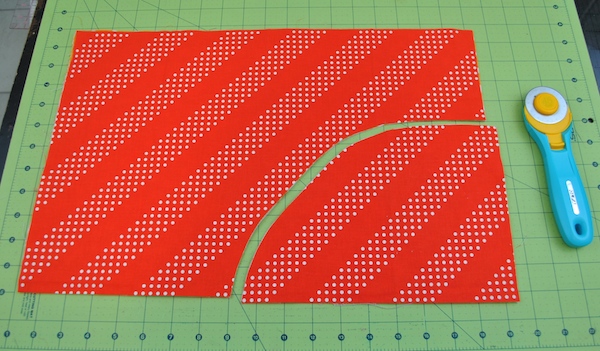
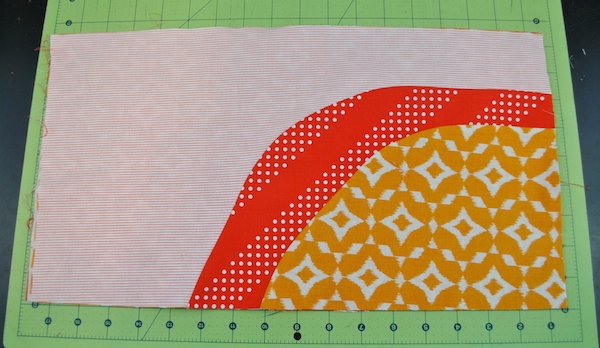
1. Stack your four fabrics right side up on top of each other. Use a rotary cutter to cut a curve from the center of the right edge to the center of the bottom edge. It’s preferable if your curve is not perfect.

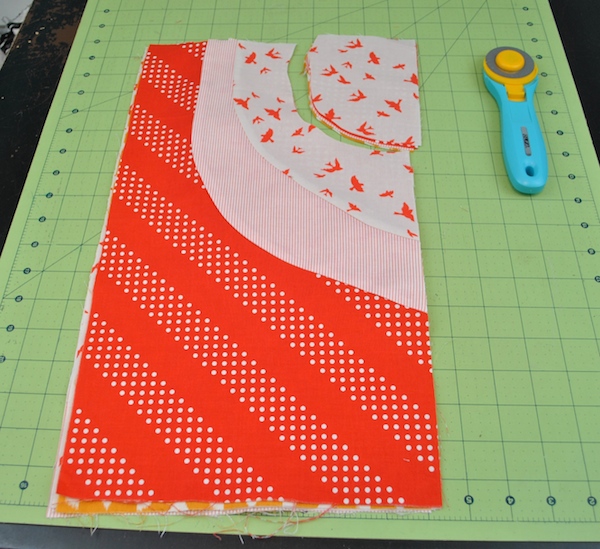
2. Choose one upper and one lower piece that you will sew together.
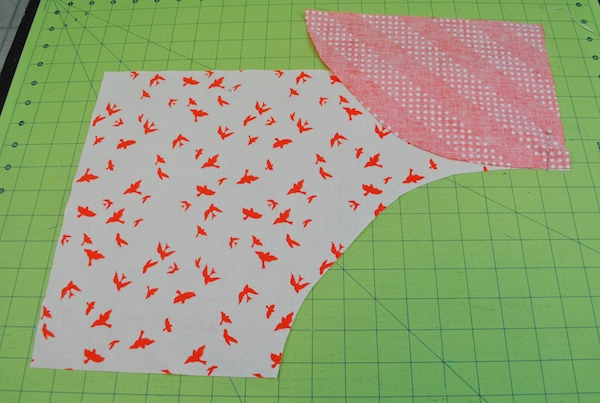
3. Flip up the lower (red dot) fabric so it is face down on top of upper (white bird) fabric. If you’d like, you can place one pin to hold the fabrics in place.
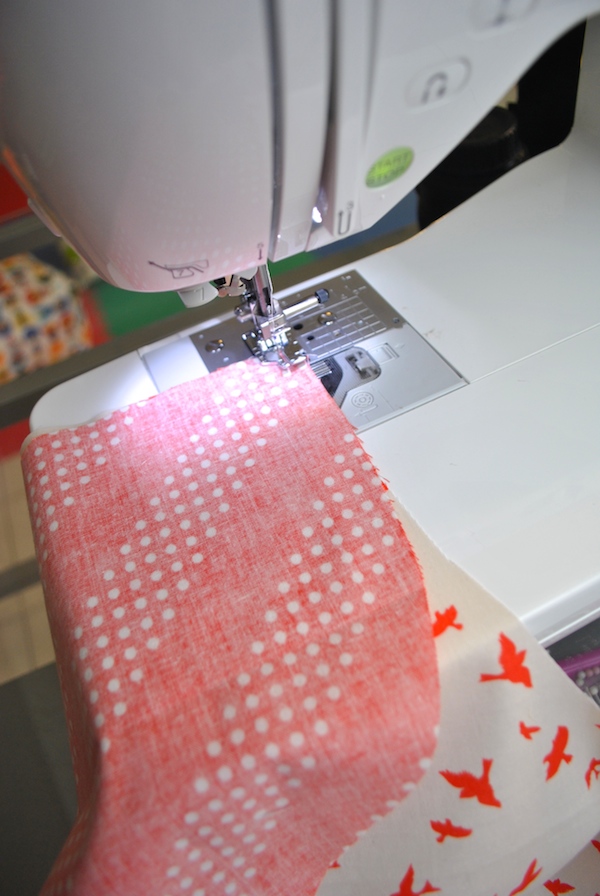
4. Head to the sewing machine and sew the pieces together using a 1/4″ seam allowance. I prefer to sew with the bulging curve (convex/red dots fabric) on top and the inner curve (concave/white birds fabric) on the bottom.
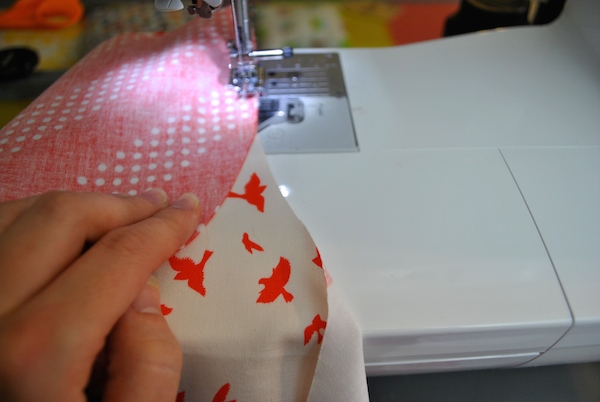
5. The pieces will naturally line up at first, but you’ll have to use your hands to guide the fabrics together as you continue. Stitch along the whole curve. At the end, you’ll have some extra fabric that doesn’t line up, and that’s OK. Just ease the fabric along and don’t try to stretch it too hard to fit the curve.
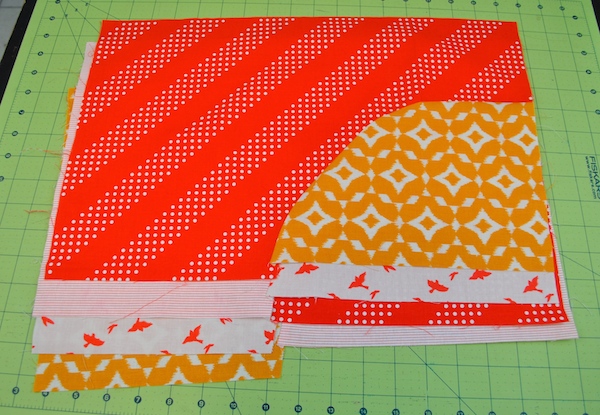
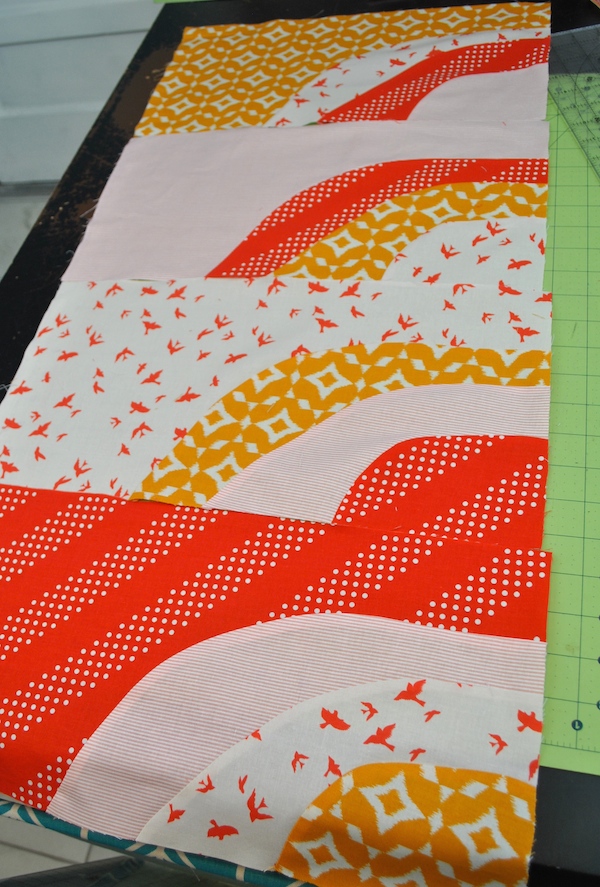
6. After you’ve finished sewing one block, mix and match the other curved pieces, joining the blocks. This stack-and-slash method will allow you take make four blocks at one time.
7. Stack the blocks so that they are aligned along the straight edge (left side of this photo). Trim the uneven edge.
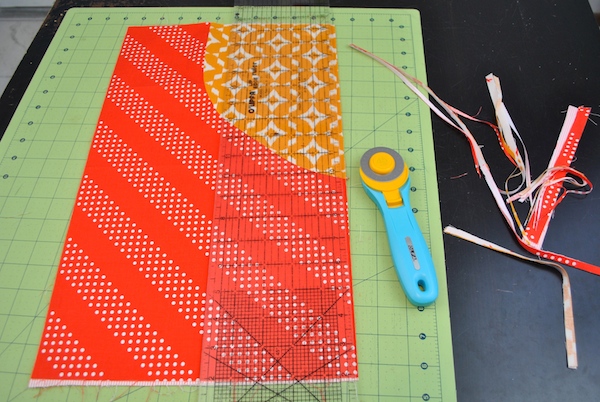
8. Make another cut through all four blocks, this time above the previous curve. Mix and match the block sections and repeat steps three through five. Trim the uneven edge.
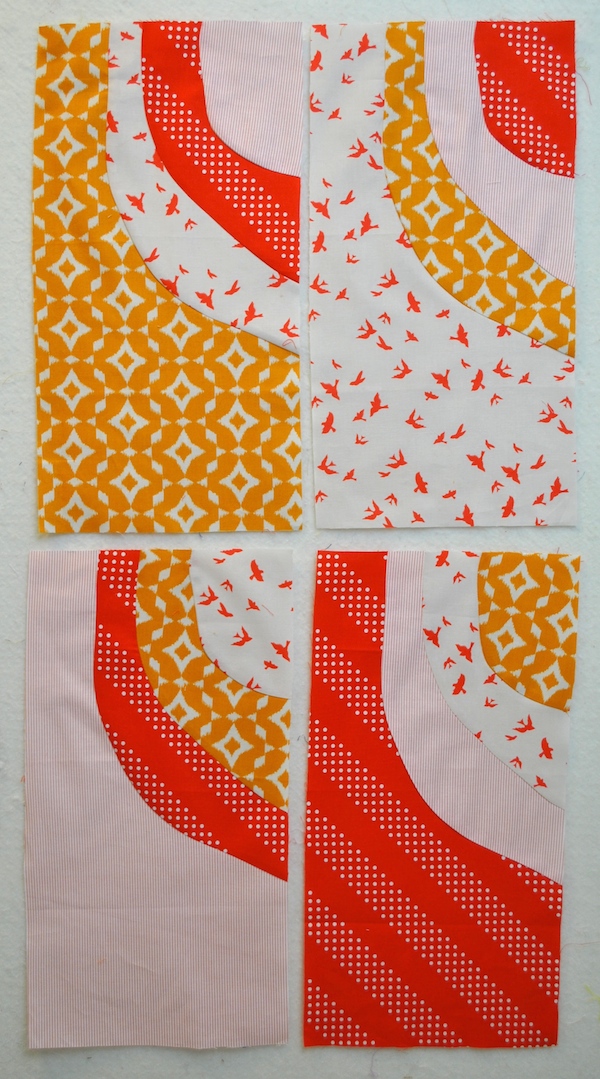
9. Here’s the new stack of blocks. Are you ready to try it again?
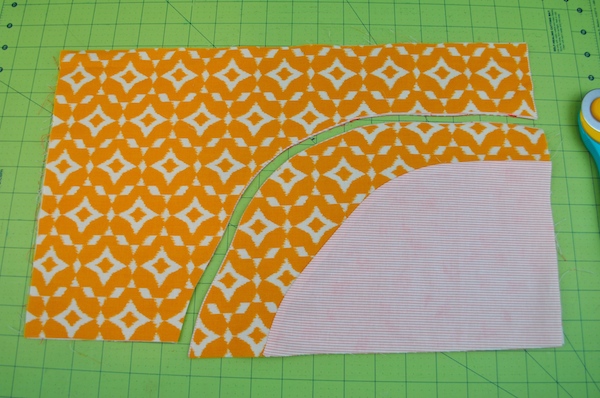
10. Make another freehand curve cut through the stack of blocks, this time through the contrasting corner. Mix and match the block sections and repeat steps three through five. Trim the uneven edge.

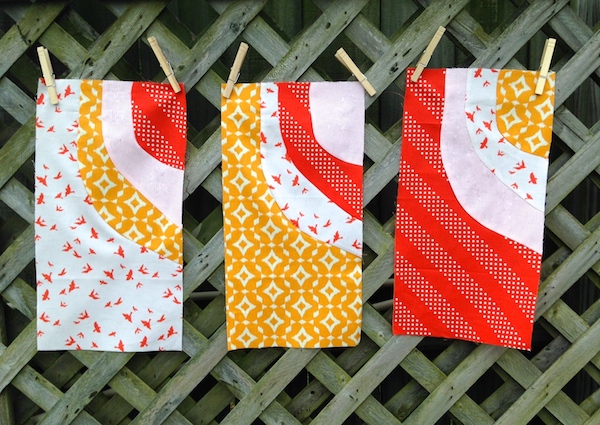
11. Here is the new block. Trimmed even with the other block, it measures about 16 1/2″ long x 8 1/2″ tall. Don’t worry if your block is a bit off from this size. As long as you keep your blocks the same size, you’ll be able to combine them easily for a quilt, table runner or other patchwork project!
12. If you’d like to keep making blocks for a quilt, choose a new stack of four fabrics and repeat this process. To make curves that face in the opposite direction, start cutting your first curve from the center of the left side instead of the right.
13. Arrange the blocks so the curves face in the same direction, or twist the blocks if preferred.
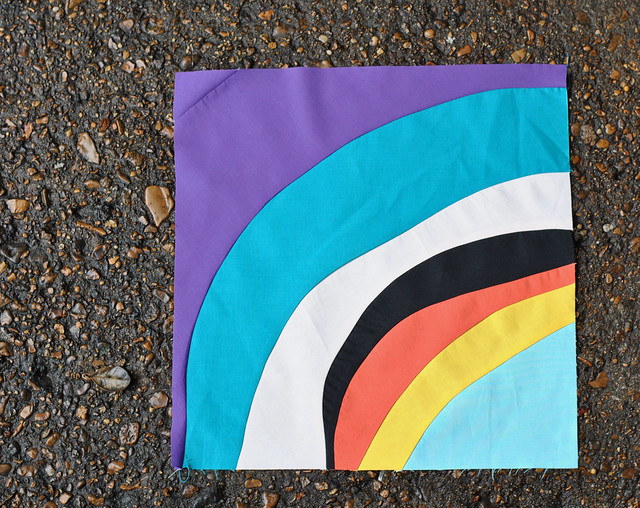 Photo via Lindsay Sews
This improv curved block works great in solid fabrics as well! If you’d like to make just one block instead of four at a time, I recommend following this tutorial by Val at Pink Please, which will allow you to use fabric scraps for your block.

Share tips, start a discussion or ask one of our experts or other students a question.
No Responses to “How to Sew Improv Curved Quilt Blocks”