
Editor’s Note: We’re excited to welcome our friends from Posh Coloring Studio to our blog today with an exclusive step-by-step tutorial for making use of your coloring pages. Enjoy!
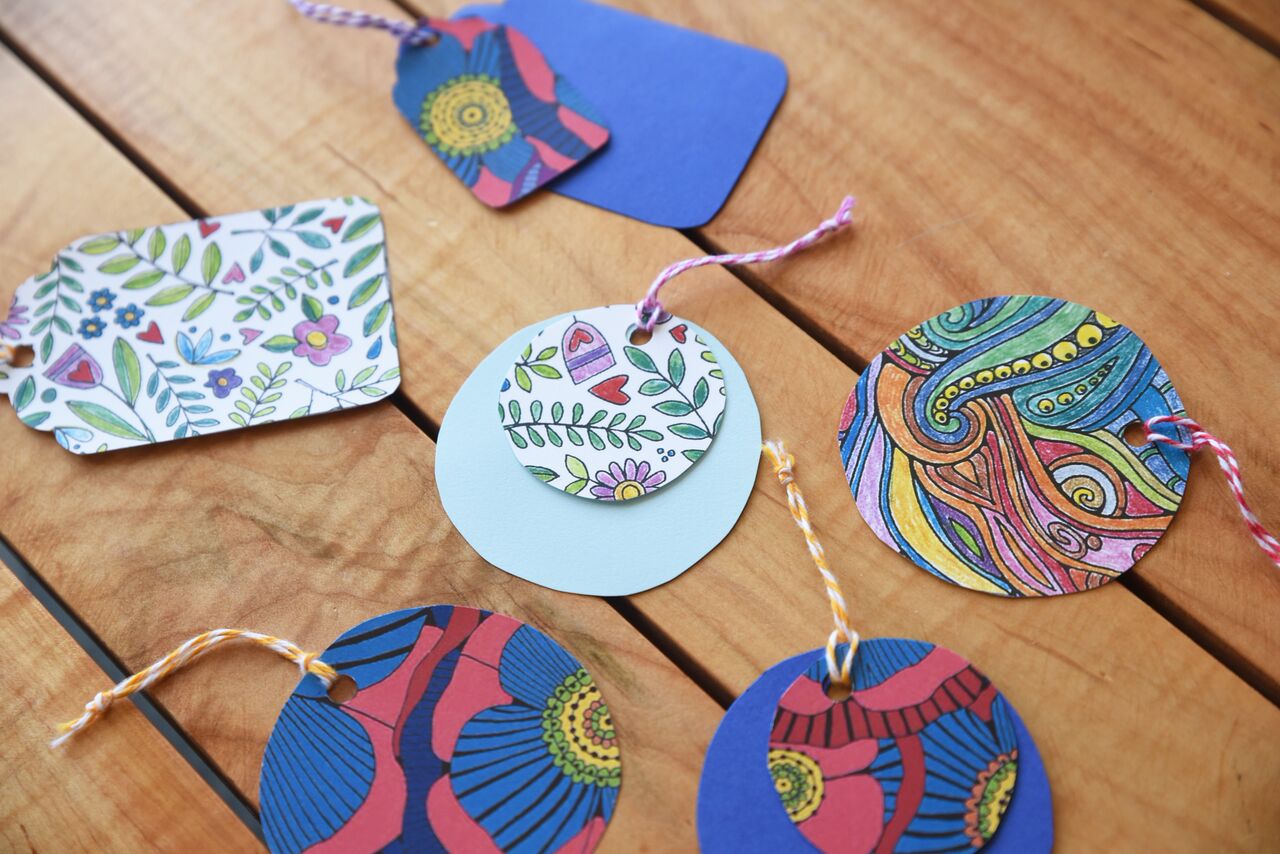
How many times have you found yourself having to stop at the store for a gift card while running late to a party, gift in hand? (Everyone’s been there, right?) With this super easy craft up your sleeve, it’ll never happen again! One of the easiest ways to use completed coloring pages is to turn them in to DIY gift tags.
All photos via Posh Coloring Studio
So what kind of coloring pages should you use to make gift tags? We’ve found that pattern-based designs and very detailed pages work best, but you could really use whatever you like! Mandala coloring patterns would be beautiful (you’d just get fewer tags from each page), and so would many nature coloring pages. Not sure where to start? Check out our favorite !
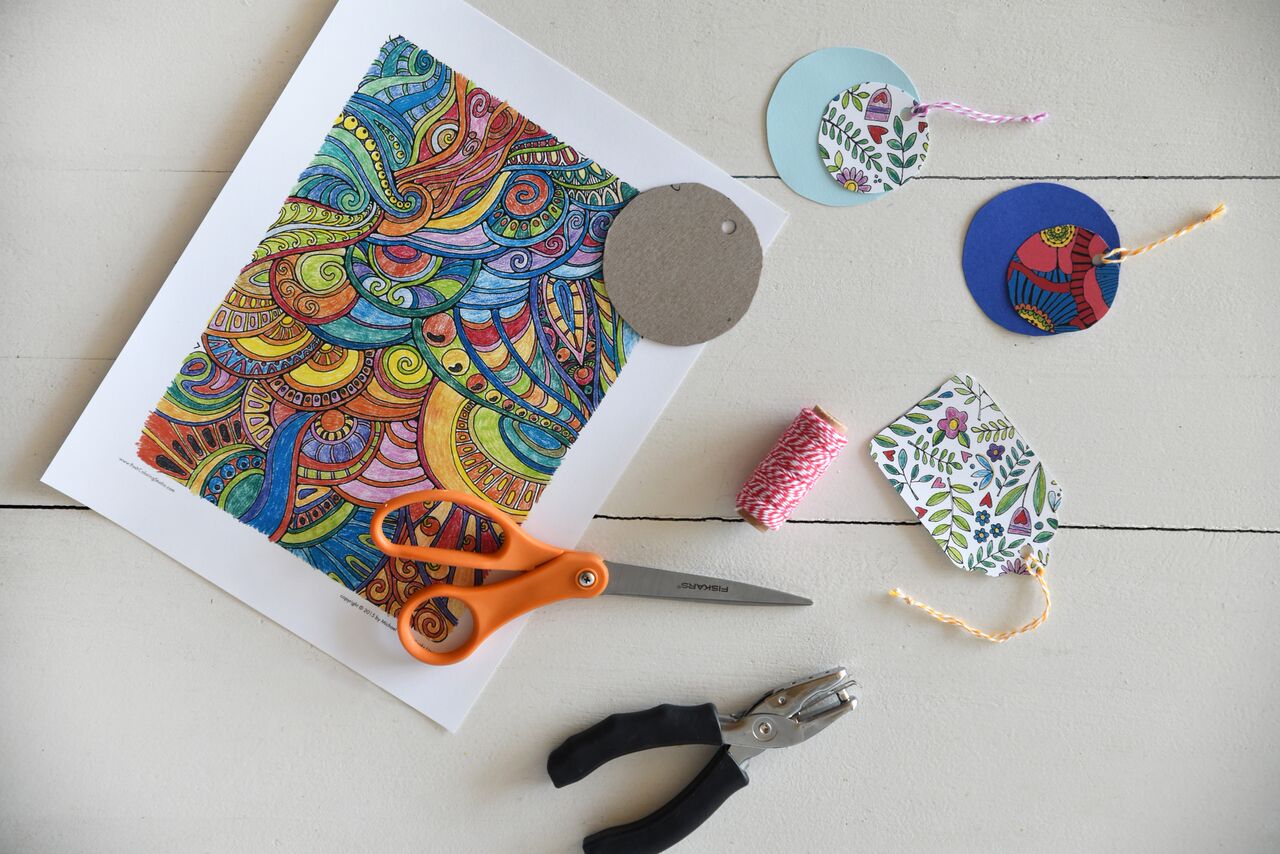
What you’ll need:
- Completed coloring pages, preferably printed on card stock and colored with your choice of utensils
- A hole punch (a single works best, but a three-hole punch will work)
- Something to tie your gift tags with (ribbon, twine, string, etc.)
- Scissors
- A piece of thin cardboard (optional)
- Spray adhesive (optional)
- Extra card stock (white or colored) or decorative paper (optional)
- Additional embellishments (stickers, ribbon, etc.)
Step 1:
Gather your coloring pages. For this project, it’s best to print designs on card stock before coloring. However, if you want to use a design printed on regular printer paper, we suggest mounting it to a piece of card stock using spray adhesive before continuing on to step two.
Step 2:
This step — making a template for your gift tags — is totally optional. You can free-hand a shape if that’s more your speed, but if you want to be more exact, grab a piece of smooth cardboard (like from a cereal box), scissors and a pen or pencil and make yourself a template. Download our free template guide here.
For this project, you can keep it simple and make one-layer gift tags, or you can go a step further and make two-layer gift tags. If you want to make two-layer gift tags, make templates for both the large and small sizes included as part of the template guide.
Step 3:
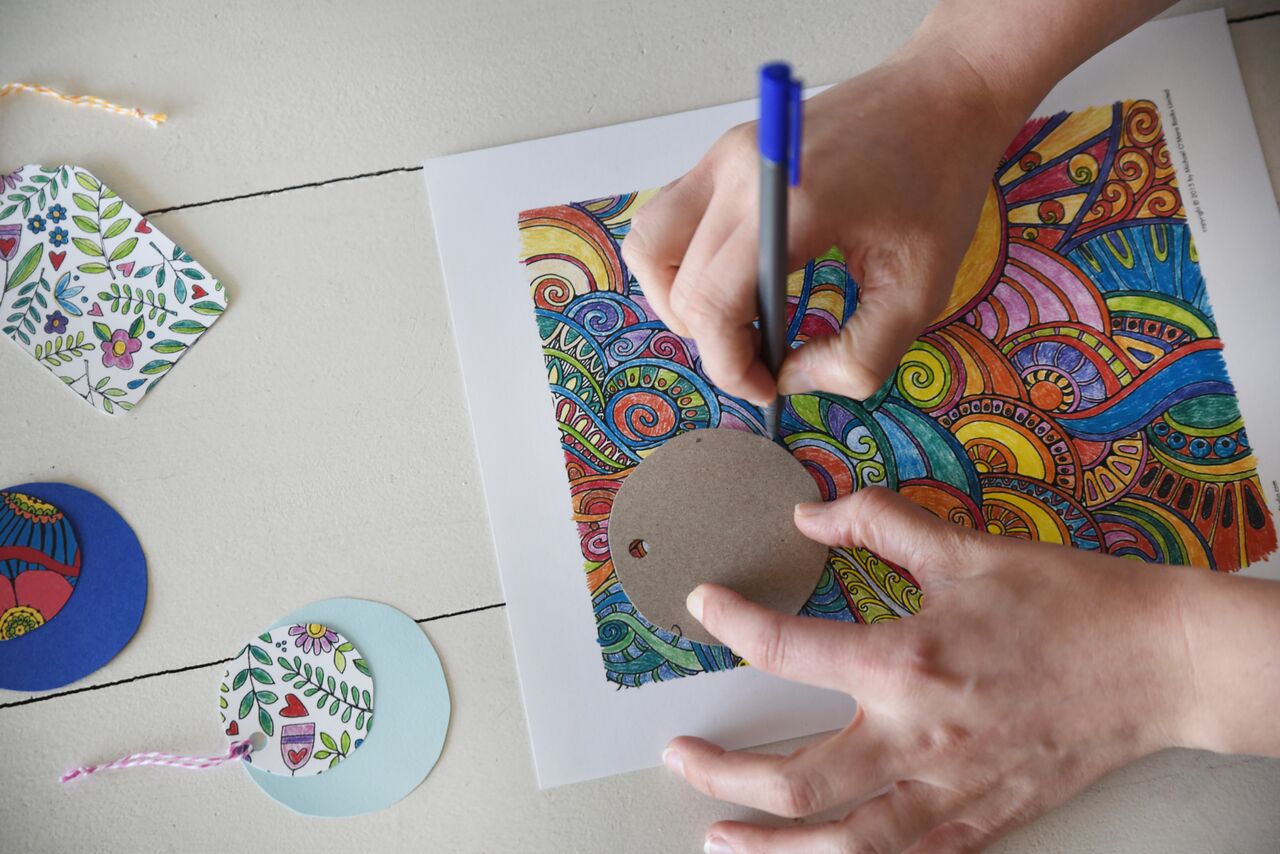
Once you have your template made, it’s time to trace your tags. With the circle template guide linked above, one 8.5″ by 11″ coloring page should yield about six large tags, or four large tags and four small tags. Trace the template onto the page as many times as it will fit. If you’re not using a template, grab a pencil and start free-handing a shape on your coloring page.
(If you want a two-layer tag, we recommend using a coloring page for one of the layers and a plain sheet of paper — colored or white — for the other. This way, you’ll have a nice place to write your note!)
Step 4:
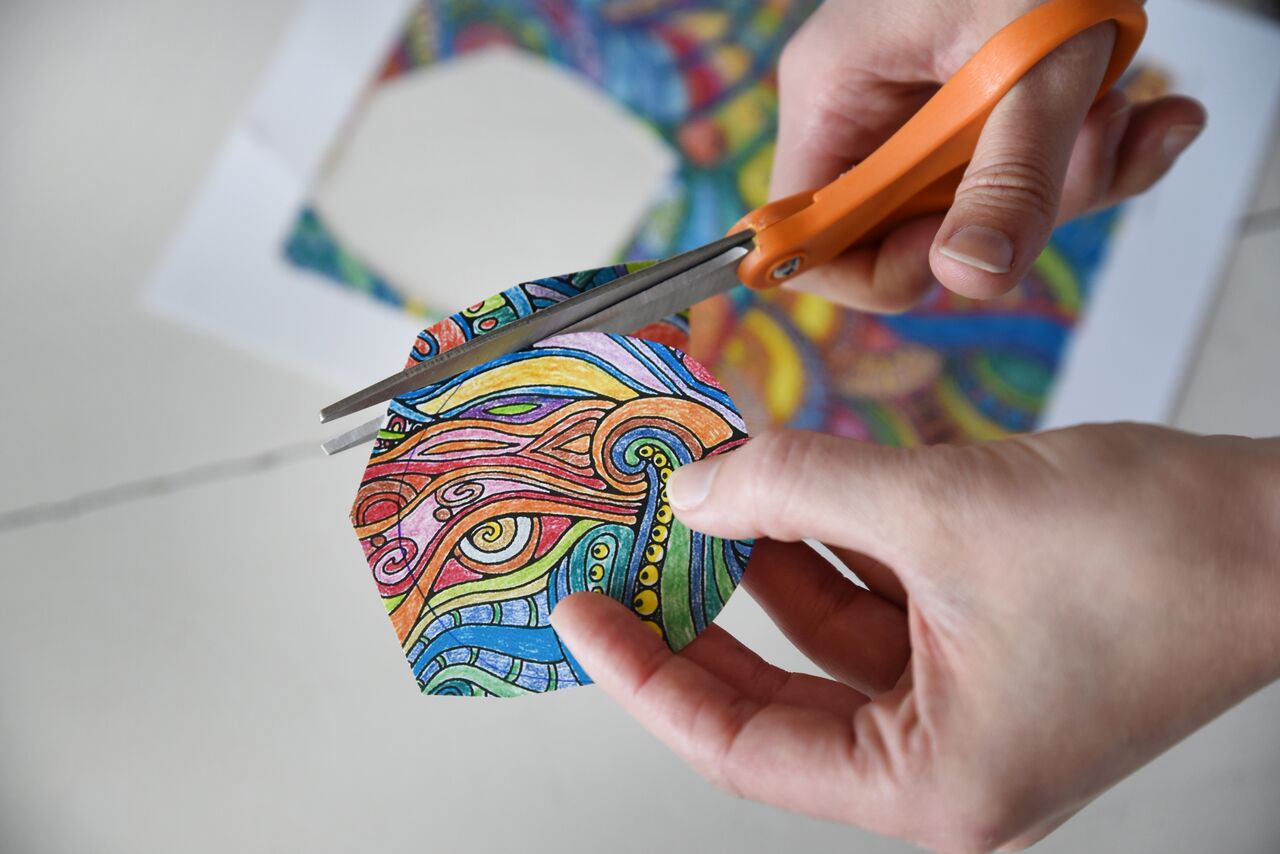
Next, cut out the tags you traced. For circle tags, scissors work best. If you’re using more of an angular design that has lots of straight lines, try using an X-Acto knife for better control.
Step 5:
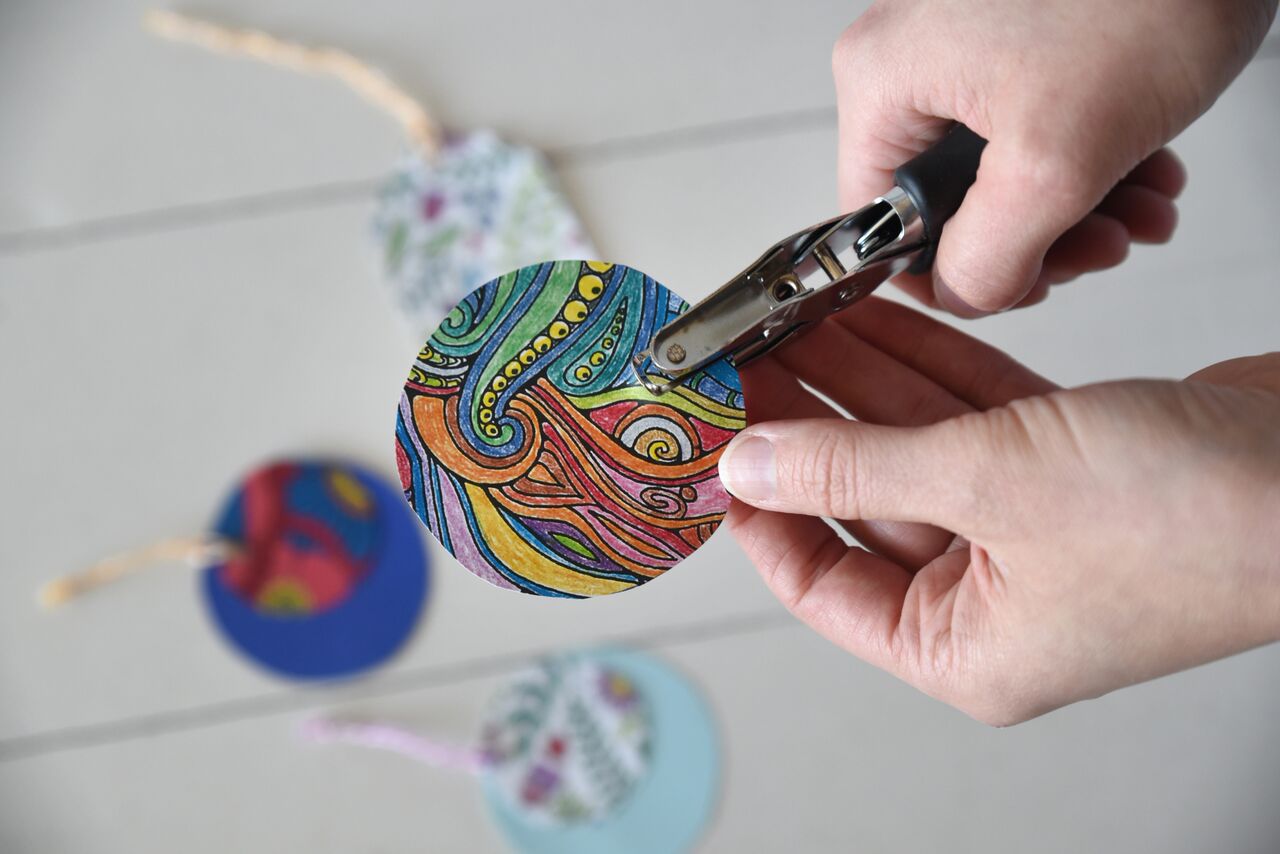
Once all of the shapes are trimmed, punch a hole at the top of the each tag, about ¼” to ½” from the edge.
Step 6:
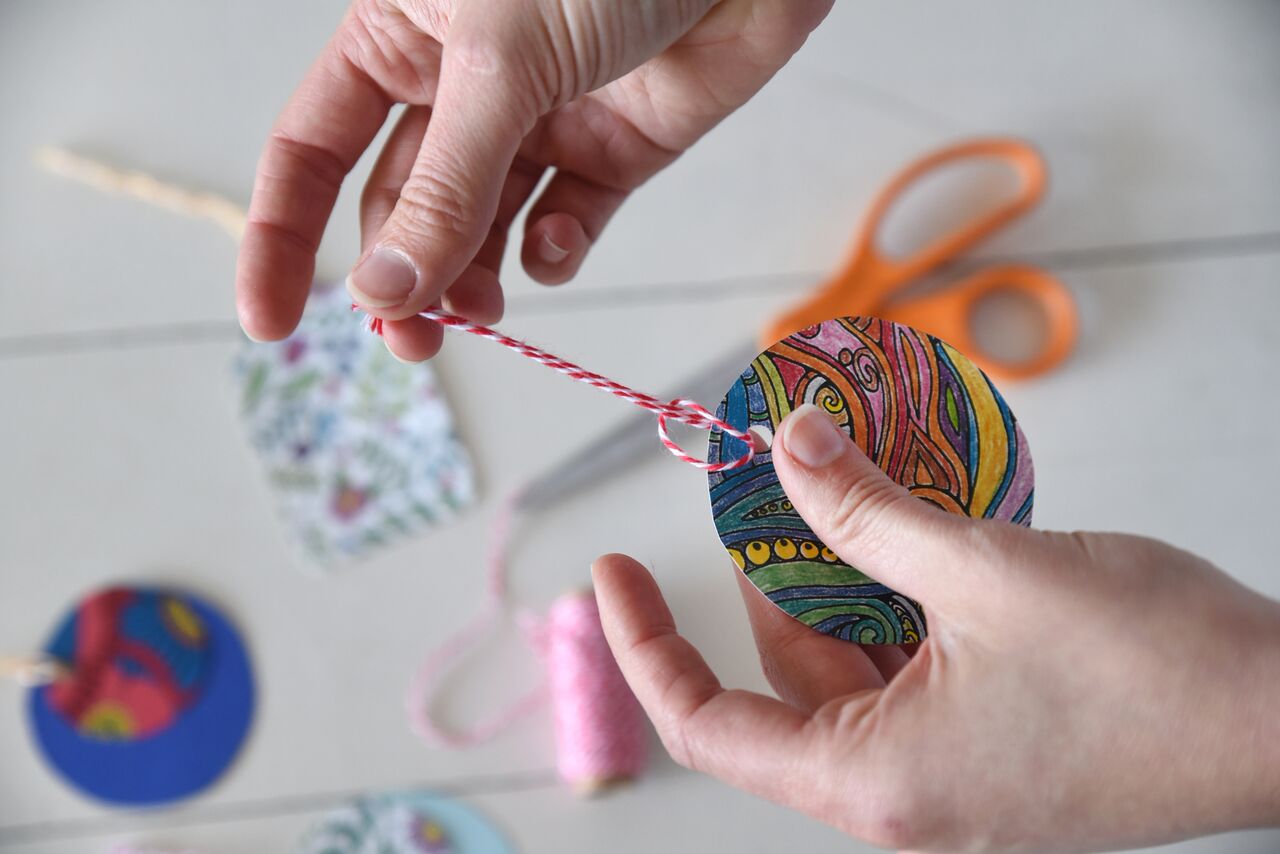
Now it’s time to add the tie! (If you’re making a two-layer tag, start by stacking your small shape on top of the larger one.) Take a piece of ribbon, thin twine, or string — roughly 4″ to 6″ long — and tie the ends together in a knot. Take the folded end and push it through the punched hole. Then, insert the knotted end through the loop formed by the folded end, and pull.
Step 7:
These tags are perfectly usable as is! Write your note on the back of the patterned card, or if you opted for a two-layer tag with one plain piece of paper and one coloring page, write your note on the plain part of the tag. If you want to take your crafting a step further, add embellishments to the back or edges of your tags using stickers, ribbon, glitter, or whatever else your heart desires.
About Posh Coloring Studio
Posh Coloring Studio is a place for you to gather inspiration, nurture your own personal style, and meet others who are all about doing the same. The beauty of coloring is that anyone (even those of us with zero artistic skill) can do it! No matter the medium, we’re all about inspiring you to express yourself creatively. See what we have to offer and browse our 1,200+ coloring pages here!
Share tips, start a discussion or ask one of our experts or other students a question.
No Responses to “Turn Your Coloring Pages Into DIY Gift Tags!”