
Have Your Cake and Decorate It, Too!
Though cake decorating can be traced back to Europe in the 17th century, it wasn’t until the mid-1800s when the art truly took form. Baking was facilitated by the introduction of the temperature-controlled oven, further promoting dessert presentations, and therefore, popularizing their ornamentation. Decorated cakes became prominent at important banquets and celebrations, a tradition that continues to hold true today. Yet the vast number of tools and techniques that have since developed have grown tremendously to define our current notion of cake decorating.
With the abundance of cake decorating shows on television, such as Cake Boss and Ace of Cakes, along with the plethora of easily accessible books and online content on the subject, the industry has experienced continued growth in popularity. No longer limited to professional bakers, these various venues allow for the introduction, education and expansion to a much wider audience of hobby and amateur cake decorators. More and more, DIY (Do-It-Yourself) and baking enthusiasts now have the opportunity to have their cake and decorate it, too!
The tools required for successful cake decorating have also become more readily available to the public. Brands, such as one of the industry’s leading cake supply companies, Wilton, have multiplied their product offerings over the recent years and distributed them to not only cake specialty stores, but local and nationwide craft stores. And when all else fails, any cake decorating materials can always be found online and shipped across the world.
From the very beginning stage of designing a cake to the implementation of decorating techniques in achieving the final product, a cake decorator must begin with the knowledge of the equipment and methods available. Learn about the tools, how each functions, and their ultimate purpose to assist in creating and executing the cake you envision.
Cake Design and Planning
The entire procedure of planning and decorating a cake is dependent on the occasion. The celebration can be comprised of a large, elaborate wedding or, on the contrary, a small get-together. The event can be in honor of a birthday or a milestone or a holiday. Whether the commemoration is big or small, traditional or unique, the manner in which you commence planning your cake is based on its function, the overall theme and the number of guests it is intended to accommodate.
Once the motif and portions have been determined, the choice of cake and filling must be made in order to bake and prepare it for decorating. After settling on one or more of the countless flavor combinations, the main question lies with what type and size of cake you are visualizing. The sheet cake is a classic one, baked in a rectangular pan that can be easily utilized with fillings to compose a layer cake. Similarly, geometric cake pans, such as circles and squares, can not only be utilized for single-layered cakes, but also be the perfect choice for stacked creations. With gradient sizes, stacked cakes provide greater portions, as well as an impactful and commanding display. To maintain its construction, the vital part of a stacked cake is centered around the use of support devices, such as plastic or wooden dowel rods, to avoid the layers from sinking into each other. By inserting the dowel rods in each layer, they provide assistance in propping up the remainder of the cake so that it does not cave in the center. Some cake decorators also choose to add an additional cake board for supplemental reinforcement. In addition to these conventional stacked cakes, a trend in the industry is a twist on the traditional with what is referred to as a topsy-turvy cake. With carved, angled layers and the use of additional support, such as polystyrene, the topsy-turvy cake adds a whimsical effect and often gives the mere illusion that the layers are unstable.
Aside from the common cake pans, various companies offer novelty pans to cater to different shapes, themes and licensed characters. With the batter poured directly into the shaped pans, the cake bakes to the contoured silhouette, simplifying the decorating process. They can also aid in constructing three-dimensional cakes, such as balls, giant cupcakes and more, but when such pans cannot be found as needed, the cake artist’s option is to carve it in the desired shape. To do so, sheet cakes are stacked with the predetermined filling, and with the use of a large knife, the model is sculpted out of the layered piece until it takes shape. As with the stacked cakes, the sculpted cake might also require the use of support dowels or an even stronger support base.
Unless you are utilizing a novelty pan with the directions spelled out for you, the next step is to visually plan out your cake when you have decided on the type of design. This can range from a drawing you sketch out on paper to a digital draft designed via a computer program. The main goal is to make an illustration of your vision that you can utilize as a road map to plan out your work and use as a reference, especially when ensuring all the elements of your cake are proportionate.
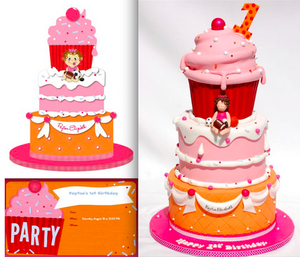
Photo via Royal Bakery
Covering a Cake
Once the cake is baked and constructed, the first step in the decorating process is to decide how it will be covered. Buttercream icing is an extremely common and classic choice for decorators to cover their cakes. Made primarily from butter and confectioners’ sugar, the icing is often utilized both as fillings in between the layers and over the entirety of the cake. With the use of a straight or angled cake spatula, the first coat, referred to as the crumb coat, is spread across both the top and the sides of the cake, providing a layer that will contain any cake crumbs and a nice, smooth surface ready to be covered by the layer that will be visible.
Now, the second layer can be applied in a variety of techniques. Utilizing the spatula, the buttercream icing can be spread evenly over the cake in a very smooth and precise finish or with deliberate or random markings. Many cake decorators place their cakes on turntables that allow for a more effortless manner in which to rotate the cake as they ice it, depending on the size and shape of the cake. Patterns can also be made with the icing with the use of the spatula, such as petal cakes, which can be achieved when the icing is piped on with a pastry bag and a large round tip, and then a portion is pressed down and dragged to one side with the spatula, creating the petal effect.
Another icing utilized to cover cakes is ganache, made from chocolate and cream. Ganache can be made into a glaze that is poured over the cake and allowed to cascade down the sides while drying, or it can be made a bit thicker to serve a similar purpose as the buttercream icing as a crumb coat, utilizing the same method. Other glazes, such as fruit or sugary mixtures, are also applied on cakes by pouring them over its entirety or in patterns with the mere use of large spoon.
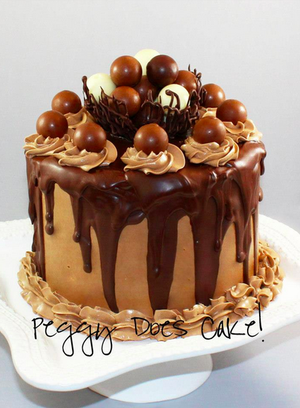
Photo via Peggy Does Cake
For a clean and polished look, rolled fondant was traditionally prominent in wedding cakes, but has experienced a large surge in other areas as well nowadays. The sugary dough, comprised mostly of sugar, water and corn syrup, is rolled out on a clean work surface with a fondant rolling pin, then placed over the cake (already prepped with an icing crumb coating) and then smoothed out in place with the use of the decorator’s hands and a plastic fondant smoother. The use of shortening might be necessary to ensure the elasticity and malleability of the fondant. The excess is cut off with a knife or a rolling pastry cutter. Sometimes, you may encounter bubbles when covering the cake, which can easily be popped with a pin and smoothed out. Other icing confections, such as modeling chocolate or marzipan, can be utilized in the same manner as the rolled fondant. Modeling chocolate, made of chocolate and corn syrup, is also very pliable and can provide a more pleasant taste than that of fondant. Marzipan can also be utilized to cover a cake, but because its recipe is inclusive of almonds, an awareness of nut allergies is required prior to its usage.
Lastly, a current trend in the baking industry is what is referred to as a naked cake for the mere fact that while it contains filling within its layers, its top and side surfaces are exposed and not covered by any type of icing, giving it a more rustic and simple feel.
Cake Decorating Techniques
Now comes the fun part! The cake has been baked, built and iced and is now ready for its adornments and embellishments that will turn the confection into a work of art! With creativity and imagination, the possibilities in cake decorating are endless, regardless of your skill level. To make the most of all the tools available, learn their functions and the methods in which to use them to bring your vision to fruition, adding your own personal style to it.
Sprinkles are a fun and simple way to add color and interest to a cake. From non-pareils (tiny, round sugary balls) to jimmies (the more cylindrical miniature candies) to sanding sugars (crystalized), you can vary the amount used on an iced cake for different effects. Drizzle sprinkles lightly over the top or cover the entire surface of the cake for a dramatic display. Some of the most useful and frequently used tools cake artists rely on to embellish their cakes are pastry bags, decorating tips and couplers to pipe designs. Buttercream icing, royal icing and chocolate are most commonly utilized in piping. The buttercream icing will pipe on smoothly directly onto a cake or a cake that is iced or covered (i.e. with fondant), but ensure the mixture is adequately stiff to maintain the composition of the shape. Royal icing is a mixture of confectioners’ sugar and egg whites that will dry considerably hard. In general, it should be used to pipe decorations onto fondant-covered cakes, but not those iced with buttercream, as it will begin to absorb the grease and break down. Chocolate can also be utilized in piping, but as opposed to buttercream and royal icing, it must be heated and melted and will harden a lot quicker.
Regardless of the medium you use, piping adornments onto a cake can be done beautifully with the vastly different shapes and sizes available in decorating tips, in conjunction with pastry bags and couplers. Though both reusable and disposable pastry bags are available, determine what works best for you, keeping in mind that any residual that is difficult to wash out might affect your icing the next time you use it. For example, any lingering grease from buttercream will alter and eventually ruin the consistency of royal icing, so using separate bags for each medium is desirable. Once you’ve decided upon the type of icing and bag, insert the base of the coupler inside the bag, then fold its sides outward to facilitate the process of scooping the icing inside, avoiding as many air bubbles as possible. Add the desired decorating tip to the narrow end of the bag and twist on the ring until it is attached to the base. The beauty of the coupler is that you can easily switch out any decorating tips while still using the same bag of icing. By twisting the wide end of the pastry bag, the icing is pushed toward the tip and you can begin piping by gently squeezing the bag so the optimum amount of icing comes out as you decorate. From lines and ruffles to flowers and leaves to grass and basketweave patterns, all these motifs can be achieved with the appropriate tips, a varied amount of pressure applied to the pastry bag, and the perfect angle. Practicing on a flat board, as well as a vertical surface, mimicking that of a cake, will assist in perfecting your piping skills.
Stencils can also be used on the surface of a cake to transfer patterns. You can use a powder, such as sugar or chocolate, to achieve the markings or it can also be done with buttercream or royal icing. With the stencil directly flattened to the surface of your cake, you can apply the icing over the top and smooth it out with a spatula until the stencil is covered, making sure it does not move at any point. Then, carefully remove the stencil and repeat as necessary until the cake is covered.
Fresh fruits and flowers can be an exquisite garnish to cakes as well. While the use of flowers can enhance a presentation, it is essential that your choice includes edible blossoms and especially ones that have not been sprayed with any poisons or pesticides. Cake decorators must always familiarize themselves with all food safety regulations, inclusive of what flowers can be used on a cake and even those that must be removed prior to serving.
Shaped and sculpted decorations are very popular and prominent on a cake, especially in this modern age when embellished and extravagant cakes are not only dedicated for weddings or massive celebrations, but are widespread for parties and events of all kinds. Figures of people and animals can be sculpted and used as adornments, as well as an abundance of flowers and shapes. Similar to the mediums used to cover a cake, these decorations can be molded out of fondant, modeling chocolate, marzipan or gum paste. Because fondant is so soft and pliable, it is sometimes difficult to shape and requires a bit more stiffness, which can be achieved with the addition of Tylose powder or with the use of gum paste. Gum paste dries harder than fondant and besides figures, is often used to create sugar flowers because it can be rolled out thinly and holds its shape well.
There are many tools that can be used when forming figures and shapes. One of the simplest ways to create silhouettes is with the use of metal and plastic cutters that can be used to punch out the shape from the medium of choice. The cutters can vary from basic geometric shapes, such as circles and squares, to those of leaves and petals, as well as more intricate designs. Another extremely useful tool is a mold made from food-grade silicone. If you are using a material like fondant, you would fill the mold with it, remove the excess from the back, and use your hands and fingers to remove it inversely. If it does not come out easily, a short time in the freezer can aid in its removal. Without a cutter or mold, the next phase would be to mold the desired shape by hand or cut it out with a precision knife.
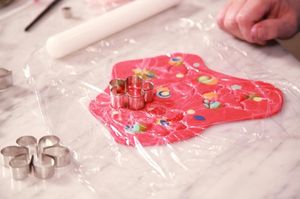
Photo via Colette Peters
Fondant and gum paste tools are also essential to adding features, details and depth. From knife, veining and ball tools to modeling sticks and cutting wheels, these gadgets are perfect to accentuate features and add dimension. Additional useful components, especially when creating sugar flowers, are foams to shape petals, stems and drying racks. To imprint a pattern directly onto fondant, embossing mats are also great for adding texture to the design.
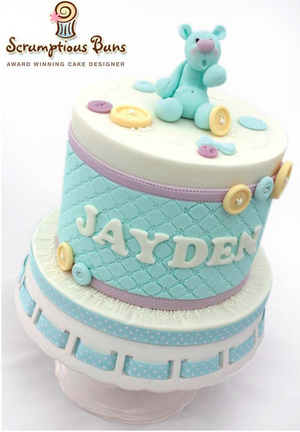
Photo via Scrumptious Buns
Another cake decorating medium is that of isomalt, which is a sugar substitute that, when heated to a high temperature, can be molded to resemble glass and stones. Cake decorators experienced in sugar can pull and mold it into various shapes, such as flowers and ribbons, and even blow sugar spheres to be used for cake decor, creating gorgeous works of art.
Adding Color
Whether utilizing icing, fondant or other mediums when implementing the various cake decorating techniques, one of the main necessities is color. The most prominent manner in which to color icing and cake decor is with the use of soft gel pastes, as the amount of liquid contained in regular food coloring will negatively affect the consistency of icing, fondant, etc. Colored fondant and gum paste are also sold ready-made and can aid in saving time, especially with hard-to-tint hues, such as black and red. It is also important to understand how the coloration can change when accents have dried. For example, tinted fondant can begin to fade when exposed to light, so adequately storing it will ensure the color preservation.
Shimmer dusts in a powder form can provide an extra sparkle to cake decorations, while luster sprays and foils can add a metallic sheen.
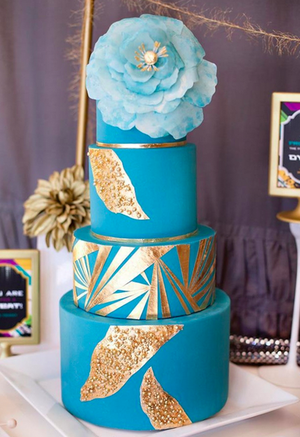
Image via Hey There, Cupcake!
Gel colors are also often used to add hand-painted details to fondant cakes. Because of their thickness, the gel paste can be combined with water or a clear, alcohol-based liquid, such as vodka to create a paint to be utilized with food-safe brushes. The alcohol in the vodka evaporates, but allows for a smooth mixture that can be applied to the fondant with ease. There are also edible markers with which you can write or draw directly onto fondant or hardened icings.
In addition to hand-painting cakes, many experienced decorators also utilize airbrush machines. An airbrush systems allows you to paint on icing and fondant, adding many different layers, accents and dimensions of color that would be difficult to hand paint, with variations in pressure, speed and angles.
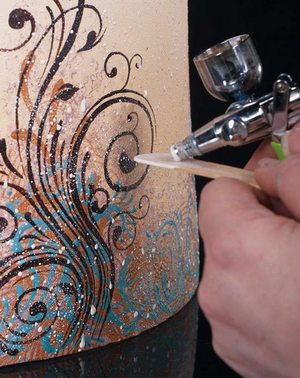
Photo via Lisa Berczel
Another technological practice present in cake decorating is the use of edible images. With edible printer icing sheets, ink and a compatible printer, you can replicate any image to apply directly on your iced cakes. Additionally, the use of rice paper (a more fragile wafer sheet) continues to rise in popularity in creating embellishments, such as flowers and feathers.
Much like a cake, successful decorating requires a sturdy foundation. Learning the extensive varieties of cake decorating tools and techniques will allow you to hone your skills and further experiment, eventually developing your own style. There are many resources available from which to attain further information and instruction, such as books, local classes or online videos. From the classic, traditional stacked wedding display to a fun and whimsical, carved figure, there’s no limit to your creations. With all the fun you will have in the process, the praise you will receive from customers, guests and admirers will merely be the icing on the cake!
Share tips, start a discussion or ask one of our experts or other students a question.
No Responses to “Cake Decorating: History, Overview and Techniques”