
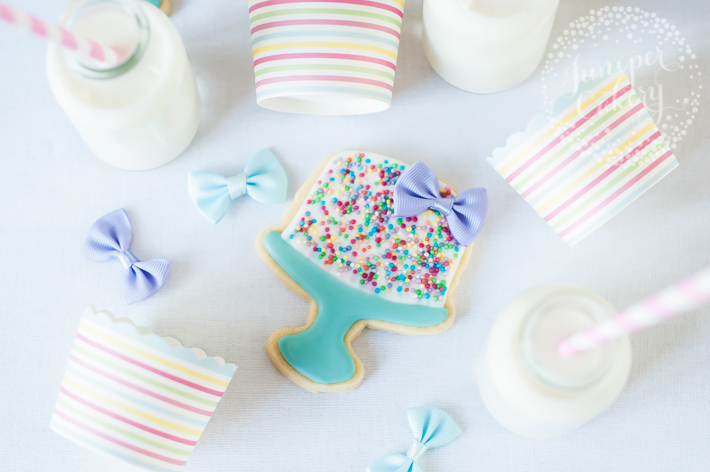
Dessert tables are still all the rage in the cake and party world and why wouldn’t they be? A table full of gorgeously decorated themed cakes, candies and treats? Yes, please! So if you’re planning a birthday party for either a kid’s party or a vibrant event for a fun-loving big kid (err… adult), these rainbow sprinkled birthday cake cookies will be a sure hit! Plus they’re pretty easy to decorate too.
Follow our simple tutorial below to whip up a batch of adorable mini birthday cakes in cookie form!
Birthday cake cookies tutorial
Materials needed:
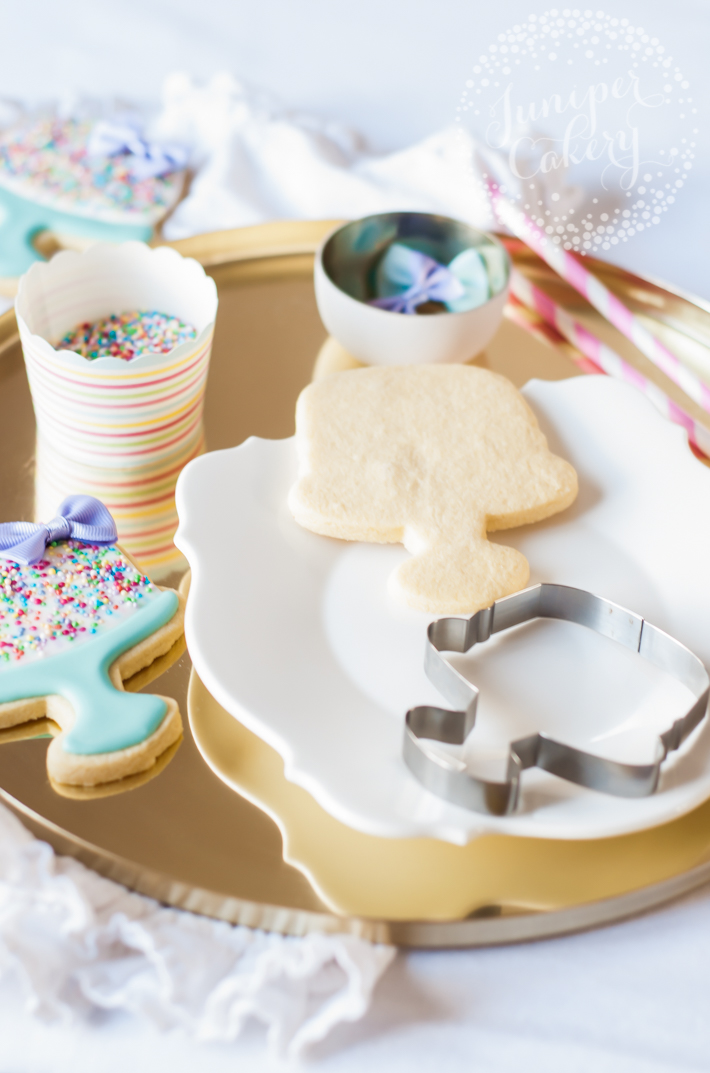
- Cake shaped cookie cutter (if you don’t have one, bake circle cookies and use an edible marker to draw cake silhouettes onto the surface for you to ice)
- Your go-to sugar cookie recipe
- Royal icing in piping consistency (like toothpaste) in your chosen colors
- Royal icing in flooding consistency (like runny honey) in your chosen colors
- Rainbow sprinkles
- Small craft or haberdashery bows (instead you can always create tiny fondant flowers)
- Small round piping tip (we always use a 2.5 PME supatube to pipe our outlines)
- Cocktail sticks

Step 1:
Using your go-to sugar cookie recipe and a cake shaped cutter cut and bake your cookies according to your recipe. Remember that if you can’t get your hands on a cake shaped cookie cutter you can always cut circle or square cookies to sketch a cake and stand silhouette onto to pipe over!
Step 2:
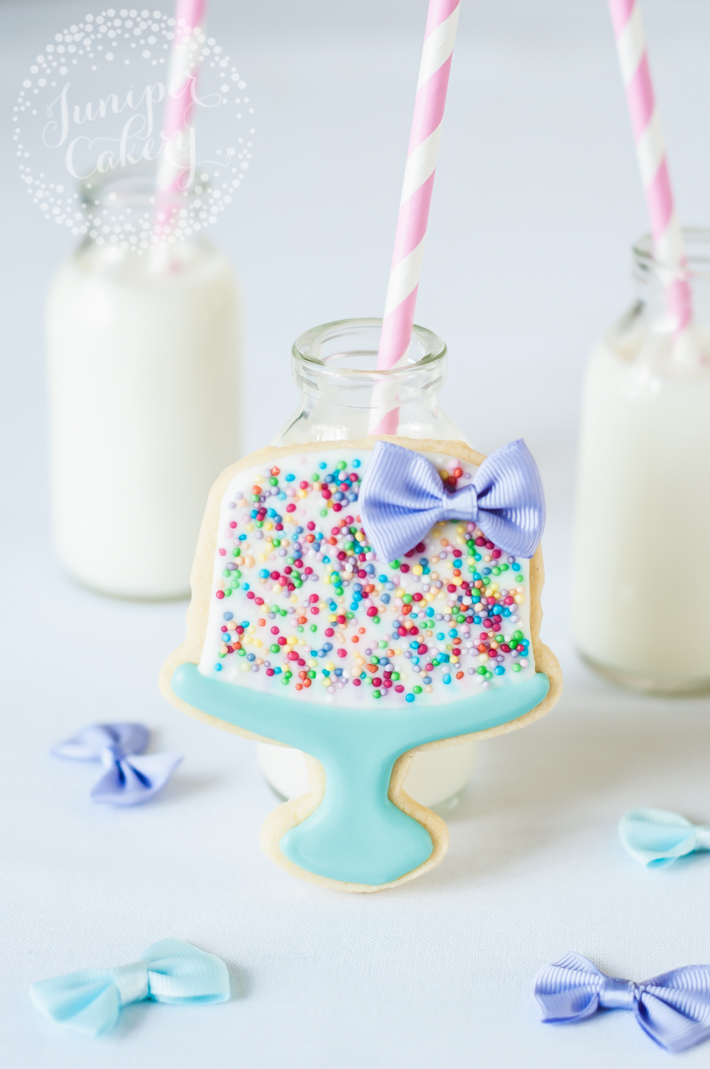
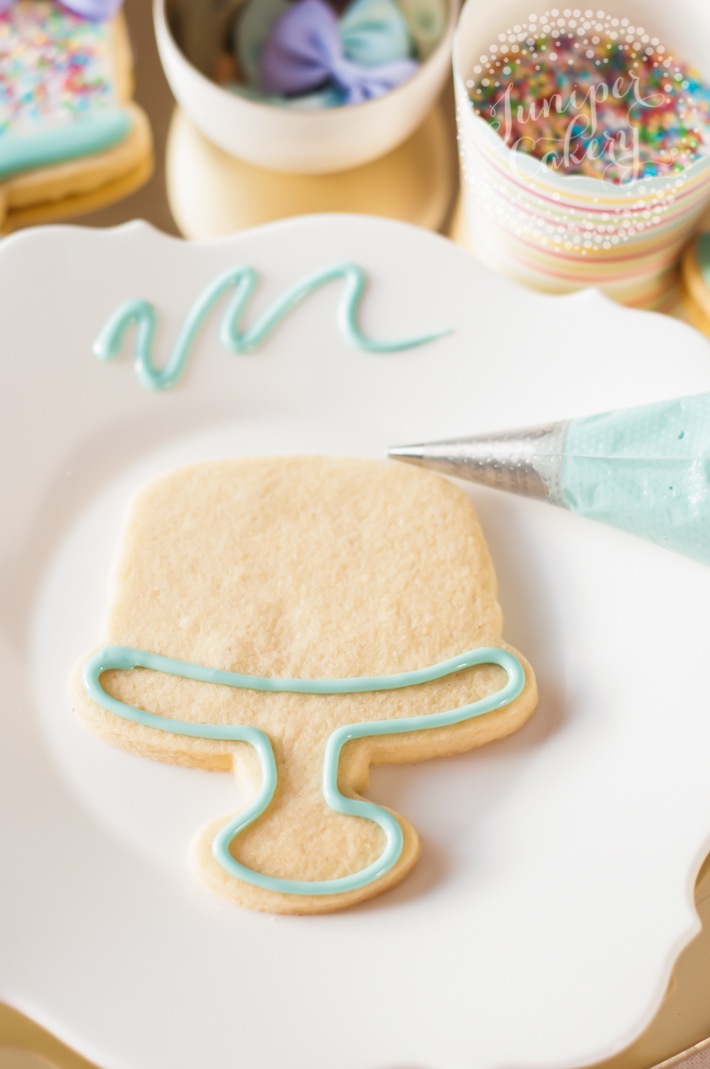
Begin decorating your adorable birthday cake cookie by outlining the stand. We chose to ice ours with a soft jade green color to mimic those gorgeous vintage-inspired milk glass stands that are oh-so popular.
Step 3:
Using this free tutorial on how to flood sugar cookies, fill in the cake stand section of your cookie. Flood your outlined sections as soon as you finish piping the outlines to help the icing look consistent and prevent the outline from being seen. The longer you leave your outline to set before flooding, the more it will be noticeable. Some decorators like this, however.
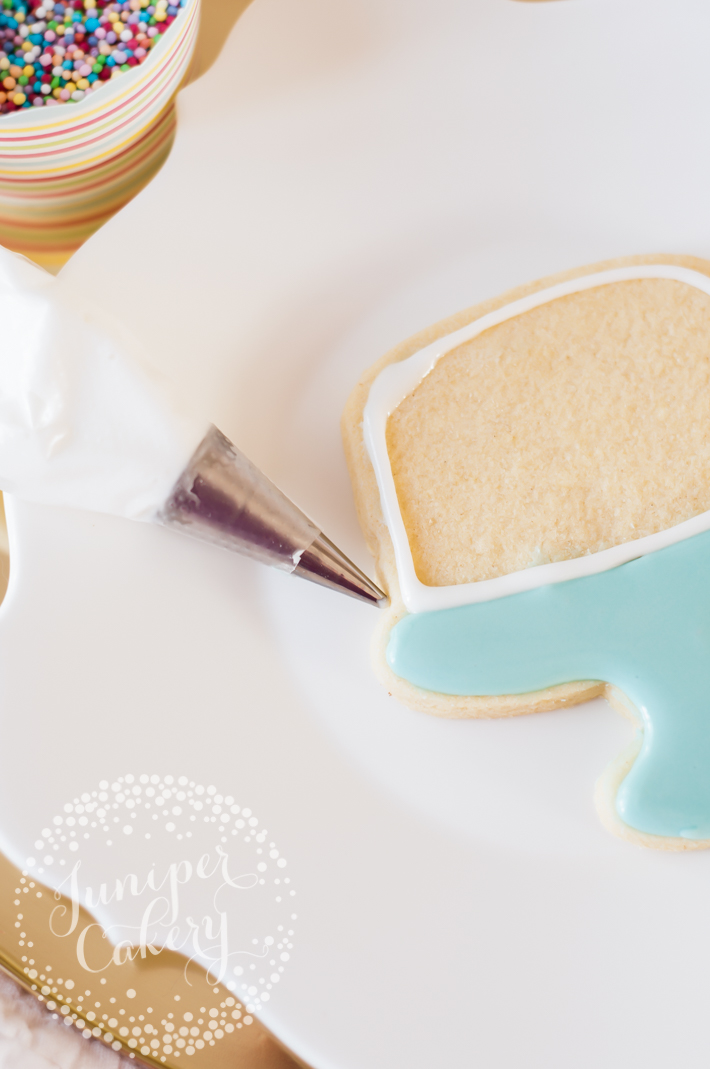
Step 4:
For the cake section of your cookie outline, use your chosen color of royal icing. We chose white and kept the icing colors for this cookie pretty simple as we wanted the bulk of color to come from the lovely and bright rainbow sprinkles we’ll be adding later on!
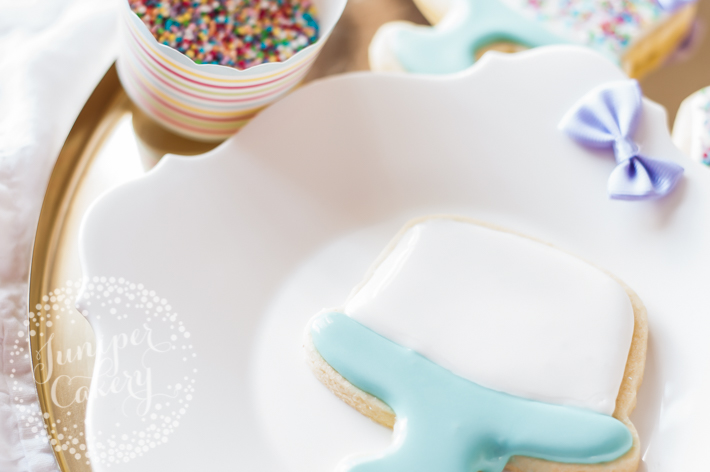
Step 5:
Flood the cake section of your cookie with runny royal icing and a cocktail stick. Use the stick in circular motions to move the icing out to the outline you piped in step 4 and to burst any pesky air bubbles!
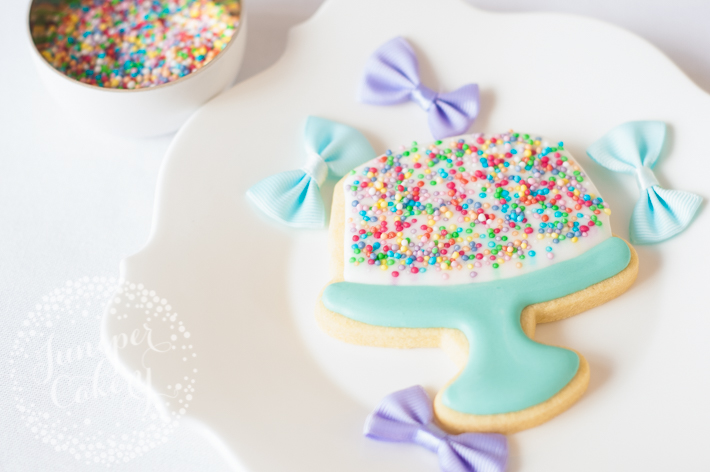
Step 6:
While the royal icing on your cake section is still wet, add your chosen sprinkles on top. We kept ours simple with bright rainbow nonpareils. Some great ideas involve using popping candy sprinkles, shaped sugar confetti or even using edible sugar pearls to create pretty Swiss dots!
Step 6:
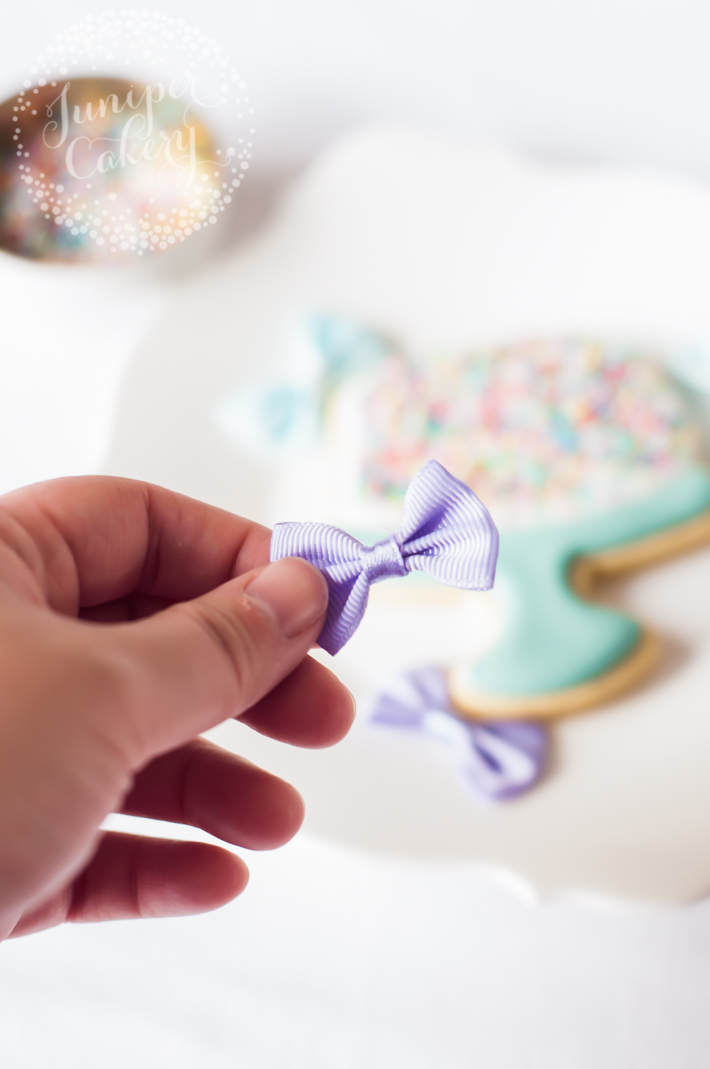
Finish your fun birthday cake cookies with a pretty ribbon bow on top or even with small fondant or royal icing blossoms. You can even add small cut-out numbers to each cake for a super special birthday!
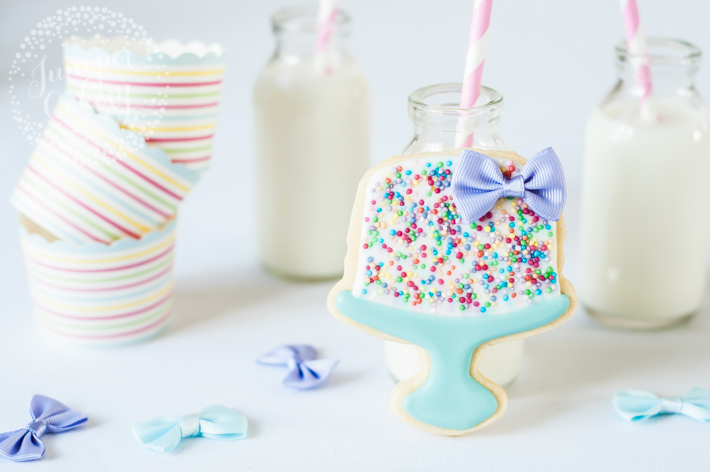
Voila! You should now be left with some utterly gorgeous and fun birthday cake cookies perfect for any special party! These are fantastic to customize — in fact, we had so many cute designs in mind it was hard to choose. You can easily adjust colors add different sprinkles and royal icing details to make your birthday cake cookies match the actual party cake itself.
Need sweet ideas for wedding favors that bound to start conversations? Why not create a cake shaped cookie for each guest that fit the theme and color palette. Add each guest’s name carefully piped onto each cookie to really impress!
Share tips, start a discussion or ask one of our experts or other students a question.
No Responses to “Make Fun & Festive Birthday Cake Cookies: FREE Tutorial”