
Today, I’ll be teaching you how to make baby shower cake pops that’s sure to make this occasion an even more joyous one! These darling cake pops can be made in any color, and with simple customizing, can be made to welcoming a baby girl or a baby boy.
This would also be a great for a gender-reveal party by tinting the cake pop dough either pink or blue and your guests will surely be ecstatic when they take that first bite into these cake pops.
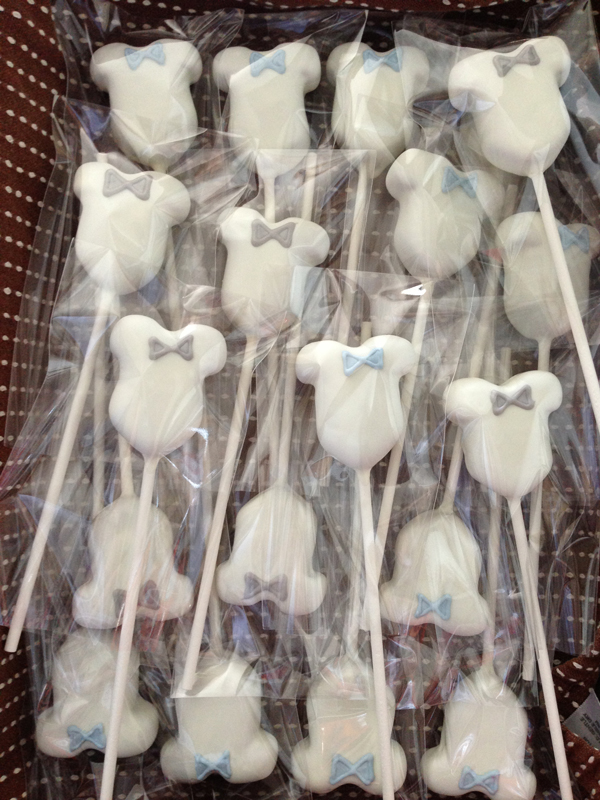
Shower expecting parents with onesie cake pops for a sweet gift.
You’ll need:
- Cake pop dough
- White candy wafers (or color of your choice)
- Candy wafers in the color of your choice for accenting; about 10 pieces
- Ziplock bag for piping
- Lollipop sticks
- Wax paper
- Styrofoam block or cake pop stand
Line your work surface with wax paper.
Shaping the onesie cake pops
Shaping the dough is the most important part of cake pop making. Do this properly and every step after will be easy as pie! Please refer to this dough-making and shaping tutorial to review this process before jumping right in.
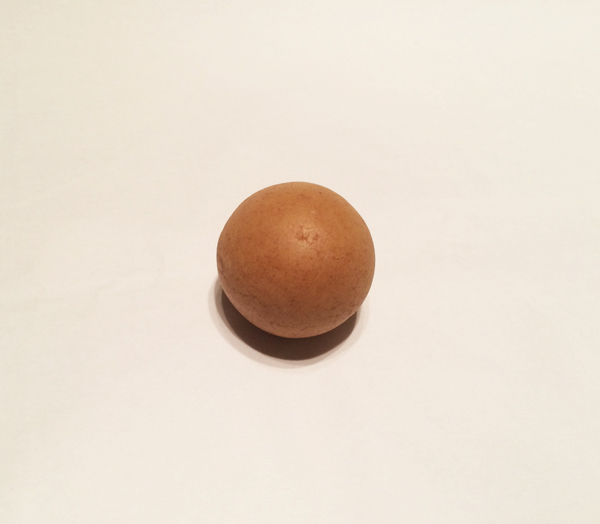
1. Scoop a portion of cake pop dough using a cookie scoop then roll each portion into a ball.
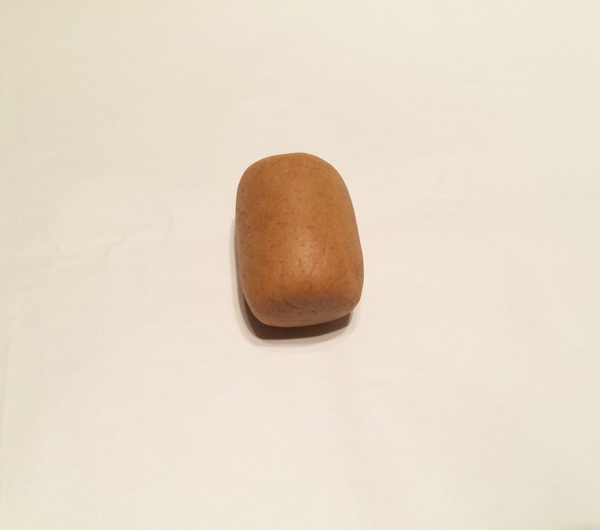
2. Roll it into a log.
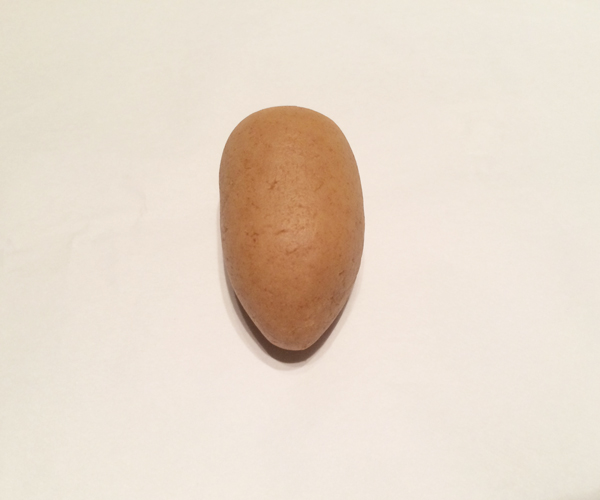
3. Using your fingertips or your flat work surface, form a point on the end of the log.
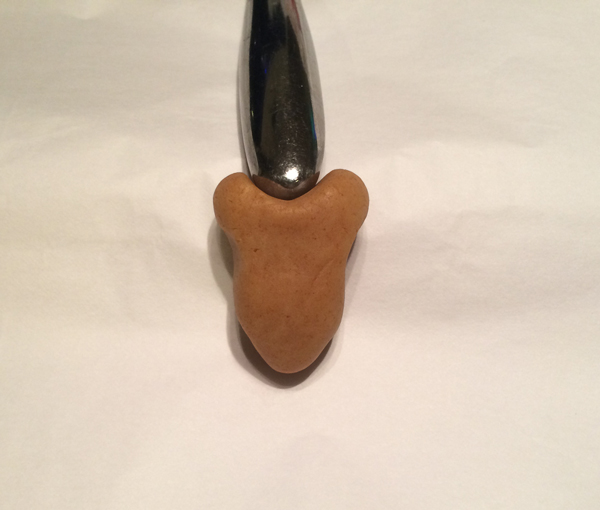
4. On the other end of the log, use a round cylindrical tool, like this butterknife handle pictured above, to create the neckline of the onesie. You’ll notice that as you hold it and push the knife down, the pressure from your fingers will create the sleeves as well.
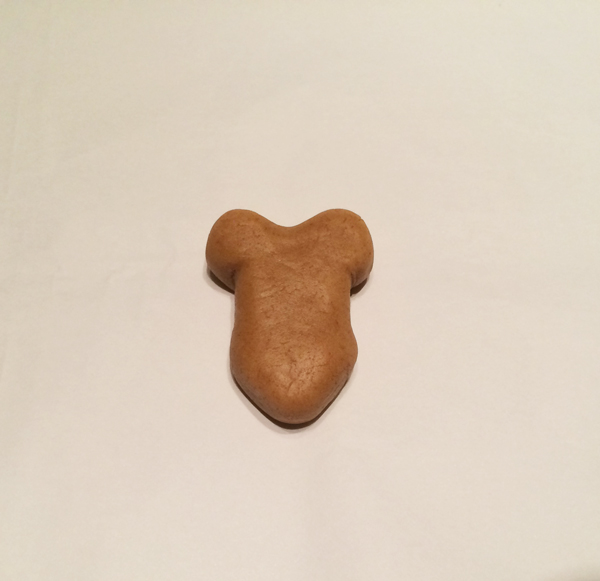
5. Use your fingers to carefully finish sculpting the sleeves and torso area.
6. Repeat for all pieces and refrigerate for at least 10 minutes.
Coating the cake pops
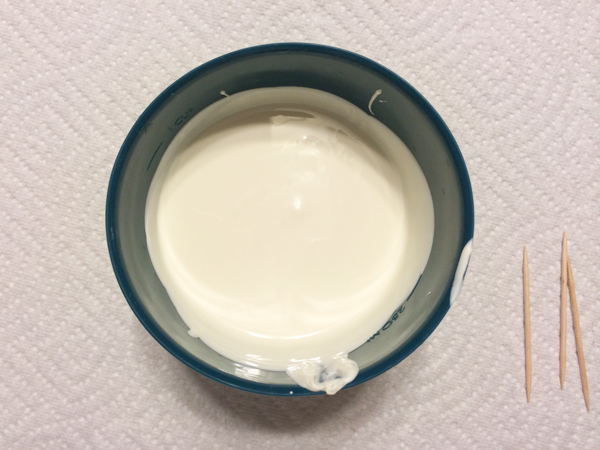
1. While the pieces are chilling in the fridge, melt white (or any color of choice) candy coating in a microwave-safe bowl. Do this by microwaving the wafers for 1 minute at 50% power. Stir. Then microwave at 30-second (50% power) intervals, stirring after every interval, until melted.
Set aside and let rest for a few minutes. Use Paramount Crystals to thin out the candy coating if needed. Refer to this tutorial for tips on handling candy coating and dipping.
Remove the uncoated onesies from the fridge. Let rest in room temperature for a few minutes. In the meantime, gather your sticks and make sure your cake pop stand or styrofoam block is nearby.

2. Dip ⅓ inch of a cake pop stick into candy coating and push into the bottom of the onesie until it’s about halfway through. Do this for the remaining pieces.
3. Dip each piece into the candy coating by submerging it completely until the coating meets the stick and pulling it out in one motion. While still upside down, gently shake the cake pop side to side to allow the excess to drip off.
If you notice any air bubbles, gently pierce them using a toothpick. Place on cake pop stand and let dry completely. Repeat for all cake pops.
Decorating the onesies
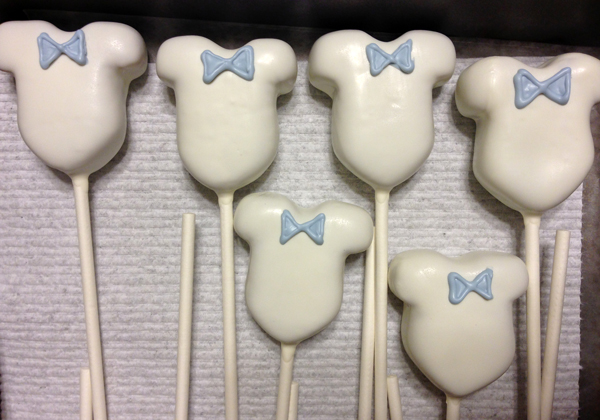
1. Melt the candy wafers you chose for your accent color (in this case I’m using blue and gray) and pour into a ziplock bag. You’ll be using this to pipe by snipping the tip of the corner of the bag.
If at anytime you find that the candy coating is hardening, microwave the bag for 10 seconds at 50% power to soften again. Do this as needed.
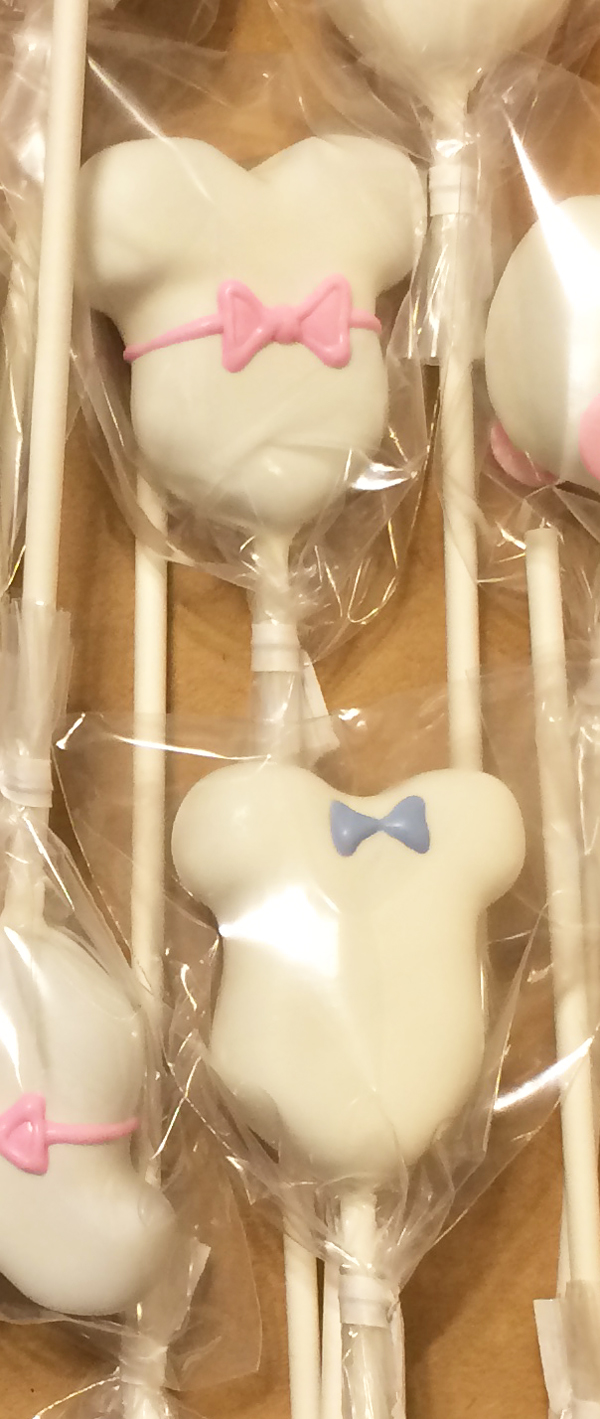
2. I like to pipe bow ties for the boys and bows at the waist for girls. The options for decorating and accessorizing these onesies are endless! Place on cake pop stand and let dry completely.
Share tips, start a discussion or ask one of our experts or other students a question.
No Responses to “Bundles of Sweet Joy: How to Make Baby Shower Cake Pops”