
Decorating cookies with unique designs is something that I think we all enjoy. However, crafting complicated designs with multiple colors of royal icing can be tedious. One simple solution is to use an airbrush system, which can add a lot of detail with very little work.
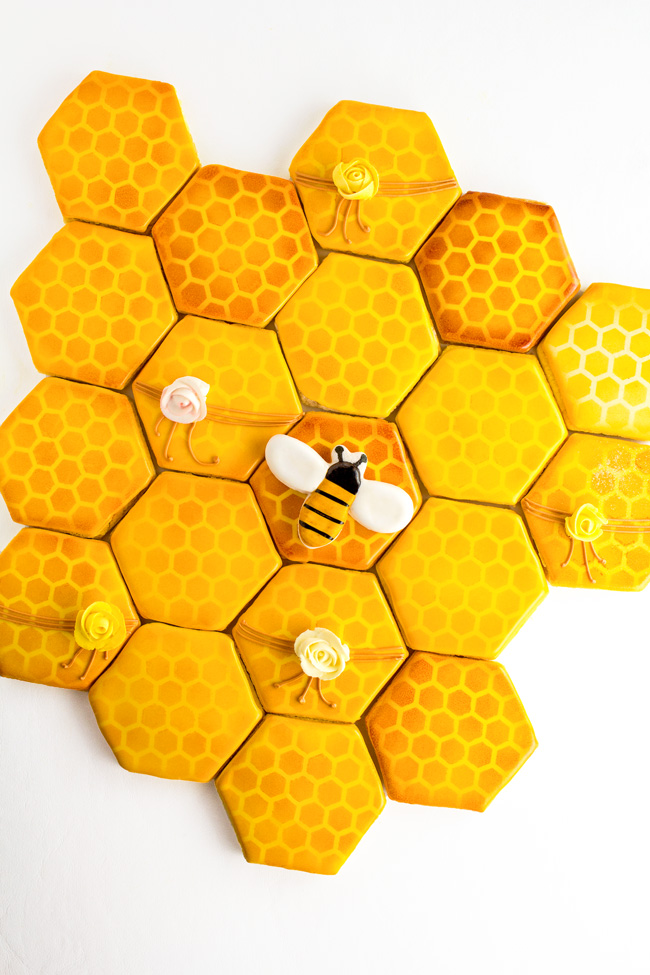
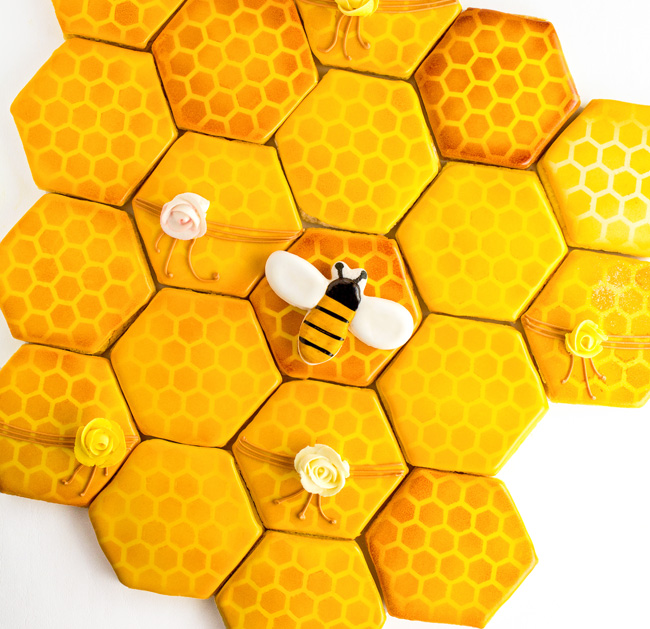
Take a look a the honeycomb cookies in the picture above. They all look a little different, but I used one hexagon cookie cutter, one honeycomb stencil, and an airbrush gun to make them. Some of them have a darker look and some have a lighter look. This is just one example of how you can make unique designs with an airbrush gun.
What you need:
For the honeycombs:
- Freshly baked sugar cookies
- Hexagon cookie cutter
- Yellow royal icing
- Tipless disposable decorating bags
- Honeycomb stencil
- Stencil Genie or magnets to hold the stencils in place
- Yellow and brown airbrush colors
For the bees:
- White piping- and flooding-consistency royal icing
- Brown piping consistency royal icing
- Bee cookie cutter
- Lemon yellow soft food gel color mixed with water
- Black airbrush color
- Small paintbrush
- Royal icing roses
Step 1:

Bake your hexagon sugar cookies. Outline and flood them with yellow royal icing, and allow them to dry completely.
Step 2:

Now it’s time for the really fun part. First, make sure that the stencil you’re using is food-safe.
Once you have your stencil, you need a way to hold it in place so the air from the airbrush gun doesn’t move it around when you spray on the design.
One easy option is to place your cookie on a baking sheet; then, center the stencil over the cookie and lay it down. Place simple craft magnets on each corner of the stencil. Move the magnets a little closer to the cookie to hold the stencil flat for more control.
Another option is to use a Stencil Genie, a plastic square with a magnet built into each corner. It’s like a picture frame that holds the stencil still, even as the air from the airbrush gun sprays the color.
Whichever option you choose, make sure the stencil is touching the cookie so the airbrush color doesn’t spread.
Step 3:

Let’s airbrush! Before you start spraying, keep these tips in mind.
The angle of the airbrush gun is important.
If you hold the gun at a 45-degree angle, the air will move the stencil and you won’t get a clean look. If you hold the gun at a 90-degree angle, you will get a clean look with sharp edges from your stencil. Be careful not to spill the airbrush color out of the gun. I’ve done this before and it isn’t fun.
You can achieve different coverage by holding the gun close or far from the surface.
If you hold the tip of the gun close to the cookie, you will get a fine line almost like you’re writing on the cookie with a pen. If you hold the gun farther away from the cookie, you will spray a wider surface.
Practice makes perfect.
If you want to practice with your airbrush system before starting on your cookies, buy a coloring book and try to spray the pictures. It works! This will help you know how close to hold the gun to the cookie, how hard to pull the trigger.
The surface of the cookie needs to be dry before you airbrush with a stencil.
If it isn’t dry, you can damage the icing with fingerprints or dents.
Make the icing as flat as possible.
If the surface is bumpy, the airbrush color can get under the stencil and make the design look messy.
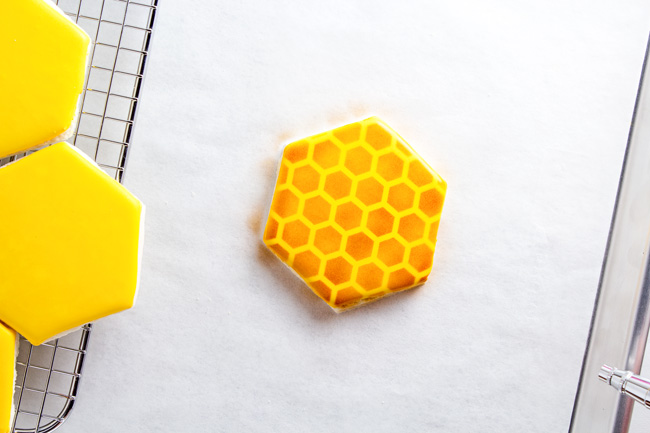
Once you’re comfortable with the airbrush gun, it’s time to move on to your cookies. As you spray the color, move the airbrush gun so the color won’t build up in one spot and look like a spill on your cookie.
Once you spray the pattern, lift the stencil straight off the cookie. Lift up so it doesn’t drag and smear the design. Some patterns look better if you spray around the edge of the cookies, making the design look more natural.
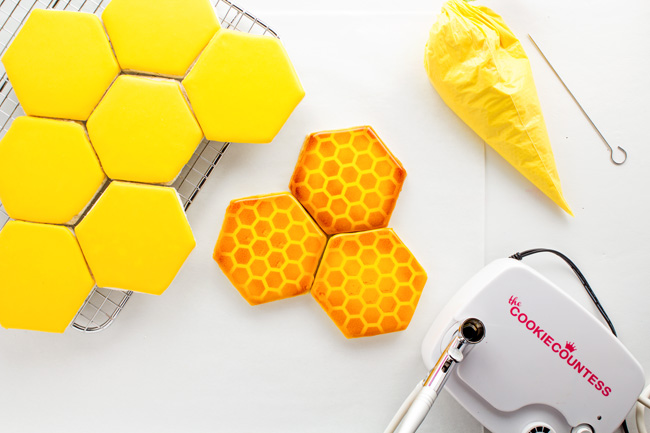
If you’re designing a whole cookie platter, spray some of the designs on the cookies a little darker. It will add character to your cookies and keep things interesting.
Note: You need to clean the stencil after you spray two or three of the cookies because the airbrush color can get on the back of the stencil and smear a spot on the cookies. Rinse your stencil every few sprays.
Step 4:
If you like, you can create cute little bees to top off your design.
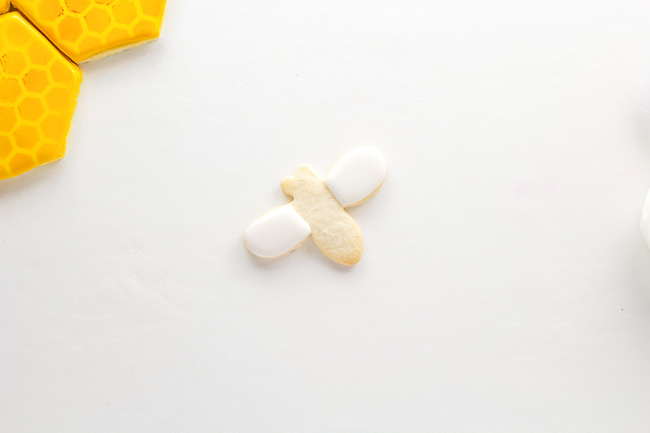
First, outline and flood the wings of the bee with the white royal icing. Let the icing dry for about an hour.

Then, outline and flood the body with white royal icing and let the icing dry completely.
Mix the yellow food gel color with a little bit of water, and paint the body of the bee. Before you paint, blot the paintbrush on a paper towel to remove the excess water. Too much water can damage the royal icing. Let the color dry.
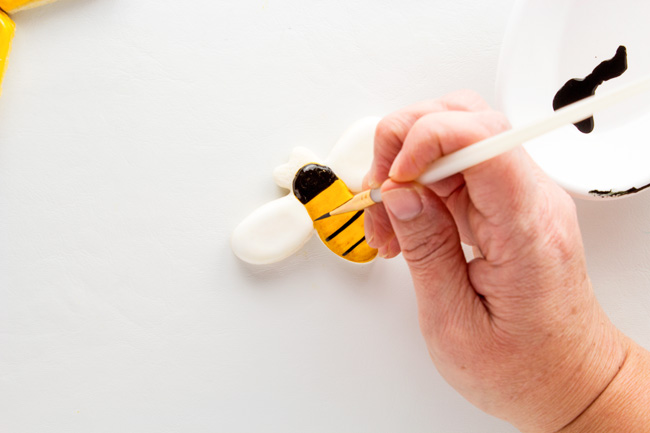
Finally, use the small paintbrush to paint the head, stripes and antenna with the black soft food gel color mixed with a little water.

Let the cookie dry completely.
Step 5:
For even more cute detail, pipe a few lines across some of the cookies and add a royal icing rose. This step is completely optional, but it adds a little character and makes the cookie design a little more professional without a lot of work.
Share tips, start a discussion or ask one of our experts or other students a question.
No Responses to “Adorable Airbrushed Honeycomb Cookies”